


Review: Honeywell Wi-Fi Color Touchscreen Programmable Thermostat
Posted by: Timothy Tibbetts on 04/21/2015 08:25 AM
[
 Comments
]
Comments
]
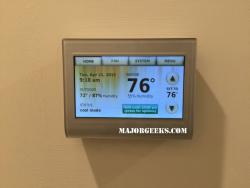
In need of a new thermostat I did something I never thought I would do. Spend $200 on one. Normally I am content to just set the temperature as needed but a touchscreen? This I had to try. You might have seen my tweet recently that said “for $200 this smart thermostat had better be pretty smart”. Was it? Let’s take a look at my experience.
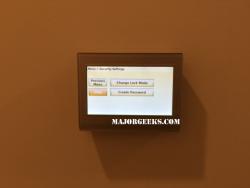
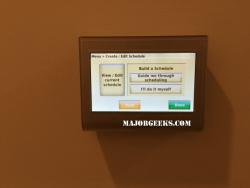
Now comes the best part, at least for me. Setup was ridiculously easy; something I hoped the touchscreen would accomplish. While directions are included, it’s as simple as using an app. I easily connected my Wi-Fi, changed the screen color and setup a schedule all within minutes. I also clicked around a little just to see other options. I would guesstimate total time to set it up and look around was about 5 minutes. Whoever put together the touchscreen operating system certainly spent some time perfecting it for ease of use. You might want to come back later and look into security settings and other advanced settings.
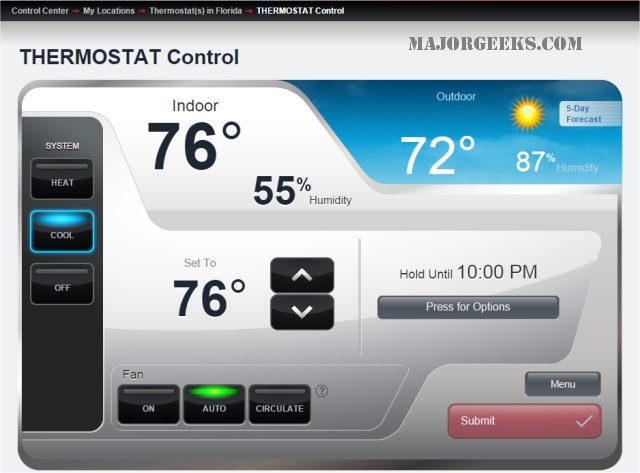
I have registered for an account for remote access with my smartphone, PC, etc. and it took 30 minutes before I got my confirmation email so if you want my advice; register your thermostat online and then install it. This way you should be ready to use the remote access by the time you’re done. A resend finally got it done. Here is the screen from my desktop once registered.
The bottom line? I love this thing. It was so easy to install, easy to use and so cool to look at it. The hardest part about this was deciding to plunk down the $200. Because I work from home, it might take longer to get my money back but someone who leaves every day for work could easily save a ton of money over time by making a schedule. Some rough math tells me most people will get their money back in 4-5 years if your energy costs are at least $100 a month and you dial it down during the day when you're not home. I compare it to two other “newer” technologies in my home. One is the LED light bulb. You get awesome light that lasts for many, many years, cool to the touch and saves you money. But you have to pay up front and wait for those savings to trickle in. The other is my 4K TV. How many times have I told people “check out my sweet, expensive 4K TV that has nothing really to watch in 4K yet”. But, this is nothing new to us geeks. We’ve bought technology and overpaid for it most of our lives because we have to have it so now that I think about it; I’m ok with it.
If you wanted the model number used for this review, it was RTH9580 Wi-Fi.
If you’re considering buying one, you can pick one up at Amazon for $178.49 saving you 20 bucks or more. This is the same model you are reading about here. Odds are the price will continue to drop as new models come out at a higher price. The above link is a referral (affiliate) link so if you do please consider following that link to purchase one.
Couple things I noticed during installation:
The jumper wire is easy to dislodge when wiring so watch out for that.
My RC wire went to R. As you know, or will find out; they are next to each other.
Make sure all your settings are correct. It took me a couple of tries.
Now comes the best part, at least for me. Setup was ridiculously easy; something I hoped the touchscreen would accomplish. While directions are included, it’s as simple as using an app. I easily connected my Wi-Fi, changed the screen color and setup a schedule all within minutes. I also clicked around a little just to see other options. I would guesstimate total time to set it up and look around was about 5 minutes. Whoever put together the touchscreen operating system certainly spent some time perfecting it for ease of use. You might want to come back later and look into security settings and other advanced settings.
I have registered for an account for remote access with my smartphone, PC, etc. and it took 30 minutes before I got my confirmation email so if you want my advice; register your thermostat online and then install it. This way you should be ready to use the remote access by the time you’re done. A resend finally got it done. Here is the screen from my desktop once registered.
The bottom line? I love this thing. It was so easy to install, easy to use and so cool to look at it. The hardest part about this was deciding to plunk down the $200. Because I work from home, it might take longer to get my money back but someone who leaves every day for work could easily save a ton of money over time by making a schedule. Some rough math tells me most people will get their money back in 4-5 years if your energy costs are at least $100 a month and you dial it down during the day when you're not home. I compare it to two other “newer” technologies in my home. One is the LED light bulb. You get awesome light that lasts for many, many years, cool to the touch and saves you money. But you have to pay up front and wait for those savings to trickle in. The other is my 4K TV. How many times have I told people “check out my sweet, expensive 4K TV that has nothing really to watch in 4K yet”. But, this is nothing new to us geeks. We’ve bought technology and overpaid for it most of our lives because we have to have it so now that I think about it; I’m ok with it.
If you wanted the model number used for this review, it was RTH9580 Wi-Fi.
If you’re considering buying one, you can pick one up at Amazon for $178.49 saving you 20 bucks or more. This is the same model you are reading about here. Odds are the price will continue to drop as new models come out at a higher price. The above link is a referral (affiliate) link so if you do please consider following that link to purchase one.
Couple things I noticed during installation:
The jumper wire is easy to dislodge when wiring so watch out for that.
My RC wire went to R. As you know, or will find out; they are next to each other.
Make sure all your settings are correct. It took me a couple of tries.
Comments
