


How to Enable or Disable Disk Write Caching
By Timothy Tibbettson 06/15/2023 |
Disk Write Caching uses your system memory to cache write commands sent to your storage devices. Write caching allows the program to run faster by not waiting for the slower drive. By default, removable disks have write caching on, and internal disks have write caching disabled.
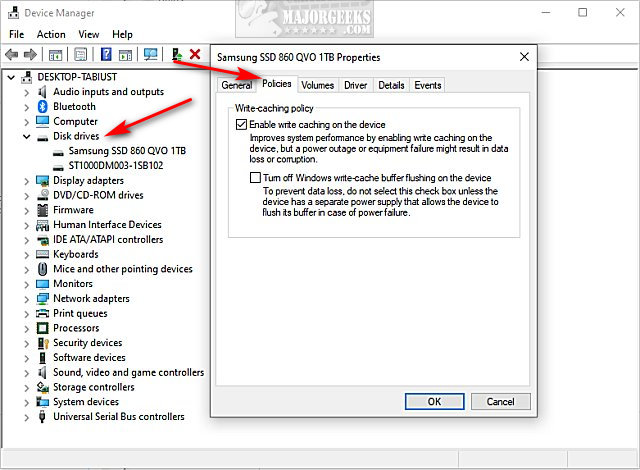
Open Device Manager by pressing the Windows Key + R and type in devmgmt.msc and press Enter.
Find your hard drive (under Disk drives), right-click, and select Properties or double-click. Click on the Policies tab.
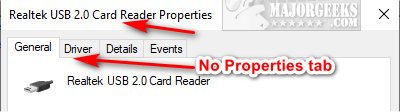
Note: Some people mention they don't have the policies tab. If you don't have a policies tab, be sure you're not clicking on a DVD drive or Card reader. Write caching on those drives is disabled so you can safely unplug a device without using Safely Remove Hardware.
Hard Drives
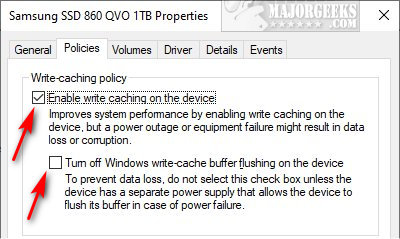
By default, Write-caching is disabled for internal hard drives, and you should leave it alone, or you could lose data in the event of a power loss. If you have a good reason to turn off write-caching, you should have a battery backup in place.
Making changes is as easy as clicking on Enable write caching on the device or Turn off Windows write-cache buffer flushing on the device.
USB Drives
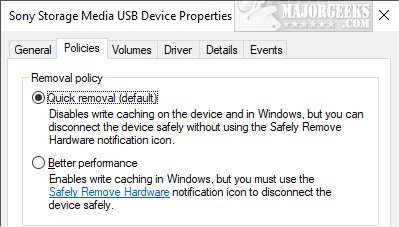
USB drives also have two choices, but they are worded differently. USB drives should have write caching enabled by default.
Enabled, or Quick removal, is on by default allowing you to connect and disconnect your USB devices without using Safely Remove Hardware.
Better Performance, or disabled, requires you to right-click on your drive (system tray) and click Safely Remove Hardware before unplugging or you risk losing data.
Making changes is as easy as clicking on Quick removal (write caching on) or Better performance (write caching off).
comments powered by Disqus
Open Device Manager by pressing the Windows Key + R and type in devmgmt.msc and press Enter.
Find your hard drive (under Disk drives), right-click, and select Properties or double-click. Click on the Policies tab.
Note: Some people mention they don't have the policies tab. If you don't have a policies tab, be sure you're not clicking on a DVD drive or Card reader. Write caching on those drives is disabled so you can safely unplug a device without using Safely Remove Hardware.
Hard Drives
By default, Write-caching is disabled for internal hard drives, and you should leave it alone, or you could lose data in the event of a power loss. If you have a good reason to turn off write-caching, you should have a battery backup in place.
Making changes is as easy as clicking on Enable write caching on the device or Turn off Windows write-cache buffer flushing on the device.
USB Drives
USB drives also have two choices, but they are worded differently. USB drives should have write caching enabled by default.
Enabled, or Quick removal, is on by default allowing you to connect and disconnect your USB devices without using Safely Remove Hardware.
Better Performance, or disabled, requires you to right-click on your drive (system tray) and click Safely Remove Hardware before unplugging or you risk losing data.
Making changes is as easy as clicking on Quick removal (write caching on) or Better performance (write caching off).
comments powered by Disqus
