


How to Change the Default Account Picture in Windows 10
By Timothy Tibbettson 07/21/2023 |
Windows 10 uses a simple default picture or avatar on the Windows 10 login screen. There is no built-in way to remove that picture, but we have a workaround for you to remove or replace the Default Account Picture in this guide.
There are two steps to making this work.
1: Replace the Default PNG
Download a new default User-192.png from MajorGeeks.
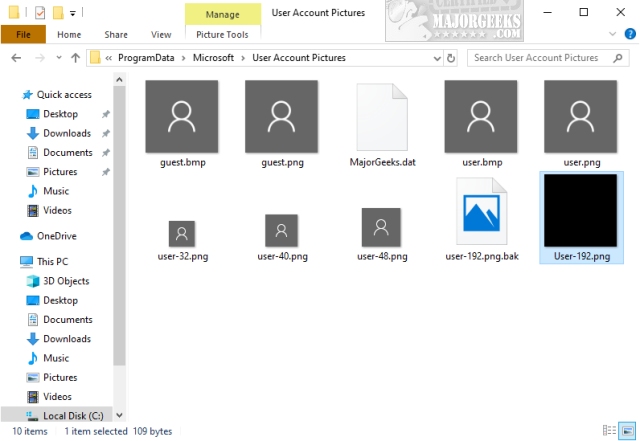
Open File Explorer and go to C:\ProgramData\Microsoft\User Account Pictures.
Note that the ProgramData folder is a hidden . You will also need to check the box next to File name extensions to see the file extension and add .bak.
Rename user-192.png to user-192.png.bak and copy the User-192.png you downloaded to this folder.
2: Edit the Registry or Group Policy Editor
Now we need to make a simple registry modification. You can also use Group Policy Editor on Windows 10 Pro, but the registry edit is simple and works for everybody.
Open the registry editor and navigate to HKEY_LOCAL_MACHINE\SOFTWARE\Microsoft\Windows\CurrentVersion\Policies\Explorer.
Right-click in the right pane and select New > DWORD (32-bit) Value. Name it UseDefaultTile. Next, double-click on UseDefaultTile and change the Value Data to 1.
Sign out or reboot.
Advanced users who want to use Group Policy Editor can navigate to Computer Configuration\Administrative Templates\Control Panel\User accounts and enable Apply the default account picture to all users.
Your Default Account Picture should now be gone:

comments powered by Disqus
There are two steps to making this work.
1: Replace the Default PNG
Download a new default User-192.png from MajorGeeks.
Open File Explorer and go to C:\ProgramData\Microsoft\User Account Pictures.
Note that the ProgramData folder is a hidden . You will also need to check the box next to File name extensions to see the file extension and add .bak.
Rename user-192.png to user-192.png.bak and copy the User-192.png you downloaded to this folder.
2: Edit the Registry or Group Policy Editor
Now we need to make a simple registry modification. You can also use Group Policy Editor on Windows 10 Pro, but the registry edit is simple and works for everybody.
Open the registry editor and navigate to HKEY_LOCAL_MACHINE\SOFTWARE\Microsoft\Windows\CurrentVersion\Policies\Explorer.
Right-click in the right pane and select New > DWORD (32-bit) Value. Name it UseDefaultTile. Next, double-click on UseDefaultTile and change the Value Data to 1.
Sign out or reboot.
Advanced users who want to use Group Policy Editor can navigate to Computer Configuration\Administrative Templates\Control Panel\User accounts and enable Apply the default account picture to all users.
Your Default Account Picture should now be gone:
comments powered by Disqus
