


How to Fix When Windows 10 Turns Itself on
By Timothy Tibbettson 06/15/2023 |
If you've ever found your Windows 10 computer turns itself on, you're not alone. There's an easy way to find out what the culprit is and stop this from happening any more. This guide may also be helpful in Windows 7, 8, and Vista as well.
Find the Problem
Start by launching the Command Prompt as admin (PowerShell won't work here).
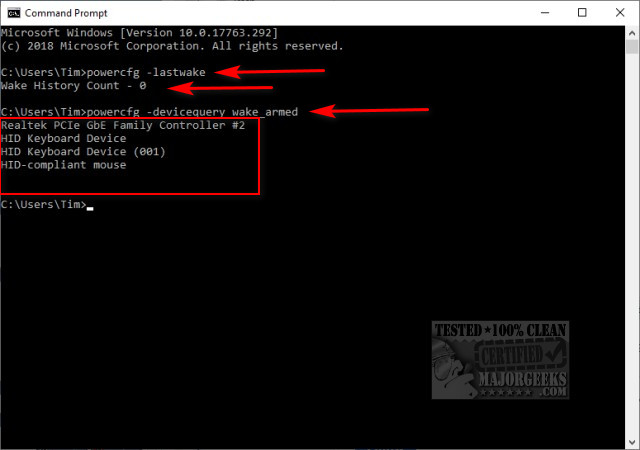
To find out what last woke your computer up, type in:
powercfg –lastwake
Also helpful, is a command to see all devices with permission to wake your computer:
powercfg –devicequery wake_armed
Now that we know the culprit, we need to disable that from waking Windows. Advanced users can figure out from here. There's a lot of possible hardware and software that can be waking your PC, but we'll go over some possibilities next.
Disable Hardware That Can Wake Your Computer
If you see hardware listed, we can disable them one at a time. Keep in mind that you should typically leave your keyboard and mouse alone so you can wake your computer as you probably are used to. You can, however, disable one or the other if your situation calls for it.
Go to your Device Manager by pressing the Windows Key + S and typing in device manager.
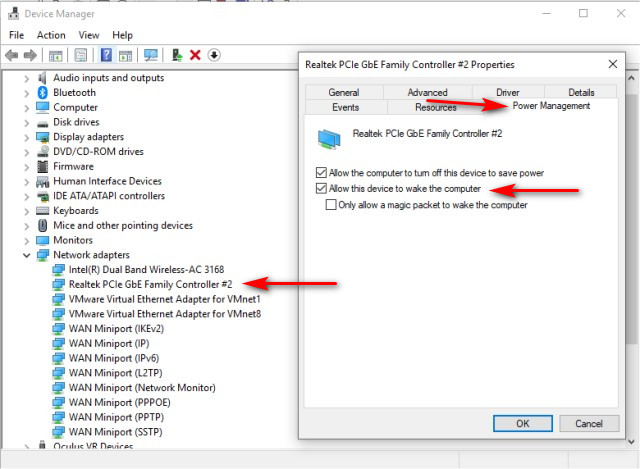
Scroll down and find the device causing you a problem. In our example, we've chosen the Realtek PCIe GbE Family Controller #2
Double-click on the device and click the Power Management tab. Uncheck Allow this device to wake the computer and reboot.
These steps can be repeated for any hardware you want to disable from waking your computer.
Disable Wake Timers
One of the easiest ways to stop everything from waking your computer is to disable Wake Timers.
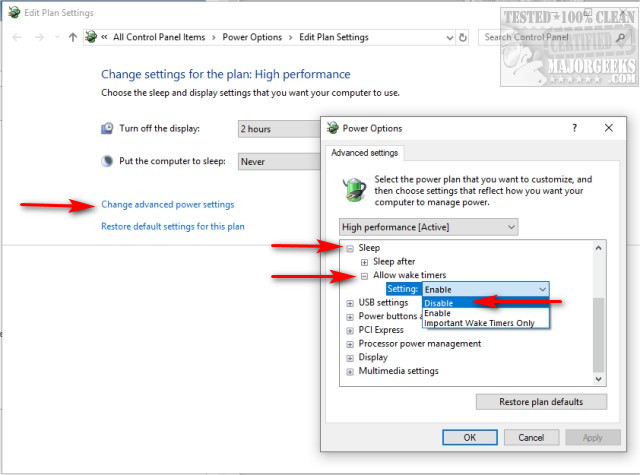
Press the Windows Key + S and type in edit power and click on Edit Power plan. Click Change advanced power settings.
Scroll down to Sleep and expand that tree. Expand Allow wake timers and click on Enable to expand the dropdown box and click on Disable/ Click Apply, OK, and reboot for the changes to apply.
Change Automatic Maintenance Times
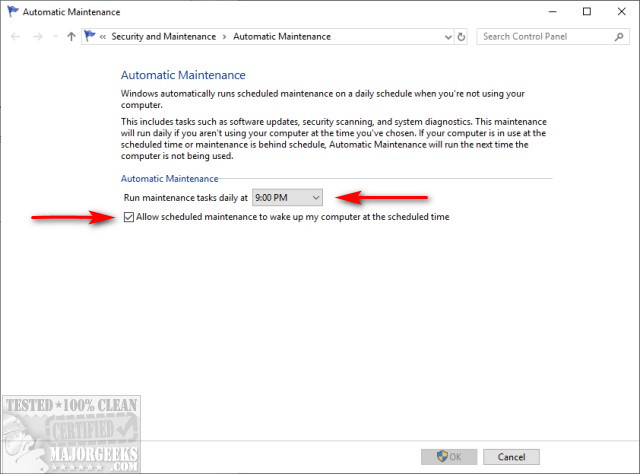
Press the Windows Key + S and type in automatic maintenance and click on Change Automatic Maintenance settings.
Here we can uncheck Allowed scheduled maintenance if you see that it's running at a time your computer is waking up at. Or, we can change the time to something more suitable, for example, an hour before you turn your computer on.
As always, if you have any other ideas or suggestions, leave a comment below.
comments powered by Disqus
Find the Problem
Start by launching the Command Prompt as admin (PowerShell won't work here).
To find out what last woke your computer up, type in:
powercfg –lastwake
Also helpful, is a command to see all devices with permission to wake your computer:
powercfg –devicequery wake_armed
Now that we know the culprit, we need to disable that from waking Windows. Advanced users can figure out from here. There's a lot of possible hardware and software that can be waking your PC, but we'll go over some possibilities next.
Disable Hardware That Can Wake Your Computer
If you see hardware listed, we can disable them one at a time. Keep in mind that you should typically leave your keyboard and mouse alone so you can wake your computer as you probably are used to. You can, however, disable one or the other if your situation calls for it.
Go to your Device Manager by pressing the Windows Key + S and typing in device manager.
Scroll down and find the device causing you a problem. In our example, we've chosen the Realtek PCIe GbE Family Controller #2
Double-click on the device and click the Power Management tab. Uncheck Allow this device to wake the computer and reboot.
These steps can be repeated for any hardware you want to disable from waking your computer.
Disable Wake Timers
One of the easiest ways to stop everything from waking your computer is to disable Wake Timers.
Press the Windows Key + S and type in edit power and click on Edit Power plan. Click Change advanced power settings.
Scroll down to Sleep and expand that tree. Expand Allow wake timers and click on Enable to expand the dropdown box and click on Disable/ Click Apply, OK, and reboot for the changes to apply.
Change Automatic Maintenance Times
Press the Windows Key + S and type in automatic maintenance and click on Change Automatic Maintenance settings.
Here we can uncheck Allowed scheduled maintenance if you see that it's running at a time your computer is waking up at. Or, we can change the time to something more suitable, for example, an hour before you turn your computer on.
As always, if you have any other ideas or suggestions, leave a comment below.
comments powered by Disqus
