


Windows Could Not Update the Computer’s Boot Configuration
By Timothy Tibbettson 06/30/2023 |
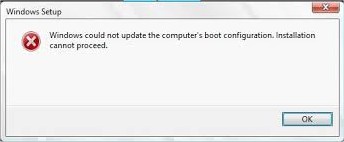
While updating Windows, some people have experienced an error that says, "Windows Could Not Update the Computer’s Boot Configuration. Installation Cannot Proceed." This error is most common when upgrading Windows 7-10.
Here are the possible fixes starting with your best bet.
1: Repair MBR (Master Boot Record)
A lot of people have had good luck repairing their MBR so let's start here. While there are a few apps to do this, it's easier to do it with PowerShell and Windows. First off, be sure to boot into safe mode. Open the Command Prompt or PowerShell and type in the following in order, followed by entering:
bootrec /RebuildBcd
bootrec /fixMbr
bootrec /fixboot
If you get an "Access is denied" message when trying bootrec /fixboot command, try bootsect /nt60 sys. (Thanks, donglacville)
2: Disable UEFI in Boot Options
Every BIOS is different, so you'll want to check or download your owner's manual to find this setting. If you're going to poke around, look under the Boot Order menu or try and find Disable UEFI or EFI. First, let's see if you have a UEFI BIOS. Press the Windows Key + R and type in msinfo32 followed by enter. This opens system Information. You should see BIOS Mode on the right side of the screen. If it says UEFI, then this step could work for you.

If tinkering with your BIOS isn't your thing, and we don't blame you, try using EasyUEFI, a useful tool to manage your EFI/UEFI boot options.
Update Your Motherboard Drivers
There used to be a known issue, particularly with Windows 7, where Windows didn't recognize the Intel SATA RAID controller. While this issue is a bit dated, if nothing else has worked, consider updating your drivers so Windows identifies the controller correctly. We prefer a driver updater to accomplish this, and our pick is Driver Booster.
Of course, you can always head to the Intel website and find the driver you need.
-=- Advertisement -=-
If Windows is behaving oddly, be sure to boot into safe mode first.
If you're working on a Surface, try to recover your device using the recovery image (or Reset This PC) from Microsoft first and then retry.
comments powered by Disqus
Here are the possible fixes starting with your best bet.
1: Repair MBR (Master Boot Record)
A lot of people have had good luck repairing their MBR so let's start here. While there are a few apps to do this, it's easier to do it with PowerShell and Windows. First off, be sure to boot into safe mode. Open the Command Prompt or PowerShell and type in the following in order, followed by entering:
bootrec /RebuildBcd
bootrec /fixMbr
bootrec /fixboot
If you get an "Access is denied" message when trying bootrec /fixboot command, try bootsect /nt60 sys. (Thanks, donglacville)
2: Disable UEFI in Boot Options
Every BIOS is different, so you'll want to check or download your owner's manual to find this setting. If you're going to poke around, look under the Boot Order menu or try and find Disable UEFI or EFI. First, let's see if you have a UEFI BIOS. Press the Windows Key + R and type in msinfo32 followed by enter. This opens system Information. You should see BIOS Mode on the right side of the screen. If it says UEFI, then this step could work for you.
If tinkering with your BIOS isn't your thing, and we don't blame you, try using EasyUEFI, a useful tool to manage your EFI/UEFI boot options.
Update Your Motherboard Drivers
There used to be a known issue, particularly with Windows 7, where Windows didn't recognize the Intel SATA RAID controller. While this issue is a bit dated, if nothing else has worked, consider updating your drivers so Windows identifies the controller correctly. We prefer a driver updater to accomplish this, and our pick is Driver Booster.
Of course, you can always head to the Intel website and find the driver you need.
If Windows is behaving oddly, be sure to boot into safe mode first.
If you're working on a Surface, try to recover your device using the recovery image (or Reset This PC) from Microsoft first and then retry.
comments powered by Disqus
