


Enhanced Phishing Protection: Is It Worth Turning On?
By selma čitakovićon 06/17/2026 |
![{$insert['content_title']](/content/file/6197_image4.jpg
)
You've probably seen Windows Defender SmartScreen at work before: it's that occasional, annoying pop-up that prevents you from running "unrecognized" apps. SmartScreen's other, lesser-known function is Enhanced Phishing Protection. In short, it keeps your Microsoft work or school passwords safe from phishing attempts, malicious apps, and websites.
Unlike SmartScreen's main app checking feature, I find this one to be significantly less intrusive. It works quietly in the background and doesn't flag every little thing as a security risk, so I keep it enabled (for now, at least). However, it only works if you actually use your password to sign in. If you rely on a PIN or other Windows Hello methods, it won't alert you.
If you'd like to give it a try or disable it, I can show you how below.
Via Windows Security
You can turn on or off Enhanced Phishing Protection right here:
- Click the Windows Security icon in the taskbar corner on the right to open it.
- Go to App & browser control > Reputation-based protection settings.
- Toggle on or off Phishing protection. You'll be prompted by UAC to confirm your choice.
- Additionally, you can check/uncheck the following options right under it:
- Warn me about malicious apps and sites
- Warn me about password reuse
- Warn me about unsafe password storage
- Automatically collect website or app content when additional analysis is needed to help identify security threats.
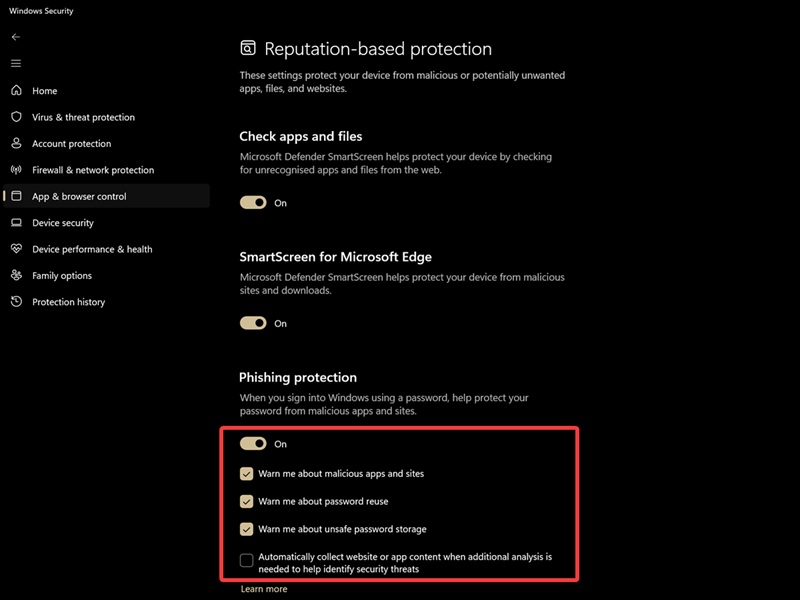
Feel free to keep the last option unchecked since it's just extra data collection. The rest you can enable - unless you keep getting false alarms for safe apps and sites.
Via Local Group Policy Editor
Alternatively, you can use the Local Group Policy Editor to change these settings. This built-in tool is available by default in Windows Pro, Enterprise, and Education editions. If you own Home edition, you'll have to jump through a few hoops to enable it, but it's possible.
Anyway, here's how to use it to turn on/off phishing protection:
- Press Win + R, type gpedit.msc, and hit Enter.
- On the left side, go to Computer Configuration > Administrative Templates > Windows Components > Windows Defender SmartScreen > Enhanced Phishing Protection.
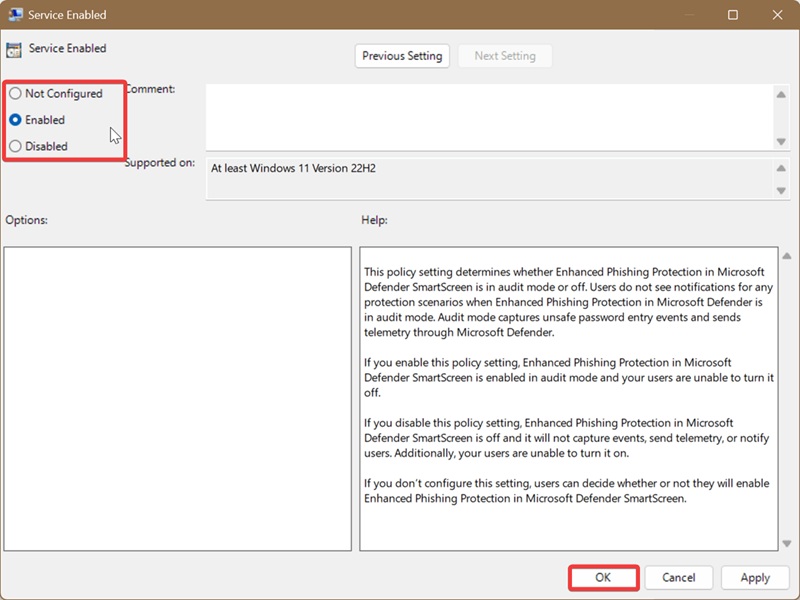
- While in Enhanced Phishing Protection, double-click Service Enabled on the right.
- To enable phishing protection: Select Enabled and OK.
- To disable it: Select Disabled and OK.
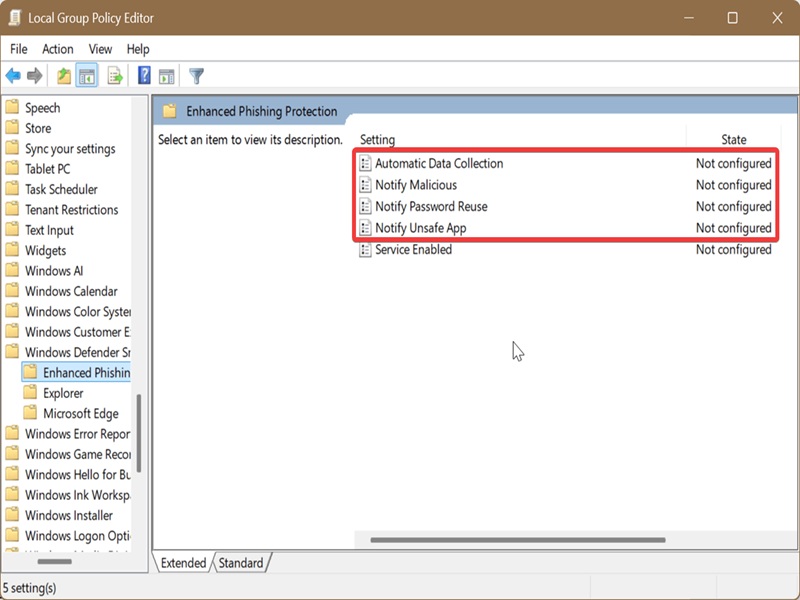
You'll also see other policies in the Enhanced Phishing Protection folder. They're pretty much the same options you can check/uncheck in Windows Security:
- "Automatic Data Collection" is "Automatically collect website or app content when additional analysis is needed to help identify security threats"
- "Notify Malicious" is "Warn me about malicious apps and sites"
- "Notify Password Reuse" is "Warn me about password reuse"
- "Notify Unsafe App" is "Warn me about unsafe password storage."
You can double-click them and enable or disable them.
However, changing any of these will override the first method. Users won't be able to simply go to Windows Security and adjust the settings.
To undo it, you'll have to select Not Configured for each policy and click on OK.
Hopefully, this security feature works as designed for you. If you find it too distracting, you can always turn it off.

|
selma citakovic
Selma is a gamer, geek and gremlin hunter with a passion for cyber security and smashing Windows bugs before they bite. She’s IBM-certified, loves real freeware, despises bloatware, and powers most of her troubleshooting with an unhealthy amount of coffee. |
comments powered by Disqus
