


How To Backup and Restore Device Drivers With Built-in Tools
By selma čitakovićon 06/15/2026 |
![{$insert['content_title']](/content/file/6189_image4.jpg
)
When clean installing Windows, there's one part that's especially time-consuming: tracking down and installing certain device drivers. If you have any third-party drivers that are hard to find or replace, your best bet is to back them up and restore them when needed.
You can use freeware options for this, or built-in Windows tools. In this guide, we'll focus on the latter.
But first, make sure you create a dedicated folder for your driver backups. You'll also need this folder for all the methods we're about to show.
Back up via PnPUtil
PnPUtil is a command-line tool for managing driver packages. To use it:
- Press Win + X and select Terminal (Admin). Open either PowerShell or Command Prompt.
- Type the following command and hit Enter: pnputil /export-driver * "full path of your driver folder" but replace the placeholder with the actual path to your folder. For example: pnputil /export-driver * "C:\Users\Anselma\Desktop\Device Driver Backup"
- The command will list all the driver packages that have been exported successfully. It might take a while, though.
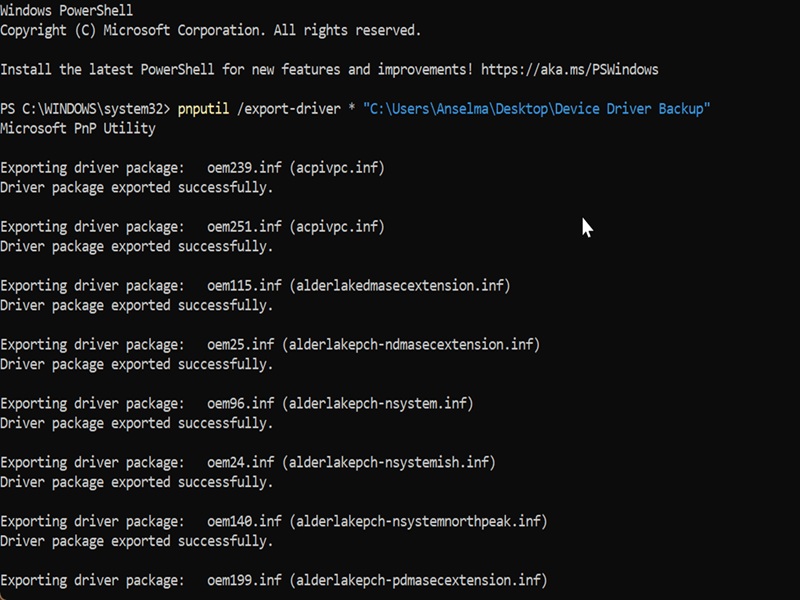
After this, when you check the backup folder, it should have all your drivers organized in subfolders.

Back up via DISM command
Alternatively, you can use DISM.exe for the same purposes:
- Press Win + X, select Terminal (Admin), and open PowerShell or Command Prompt.
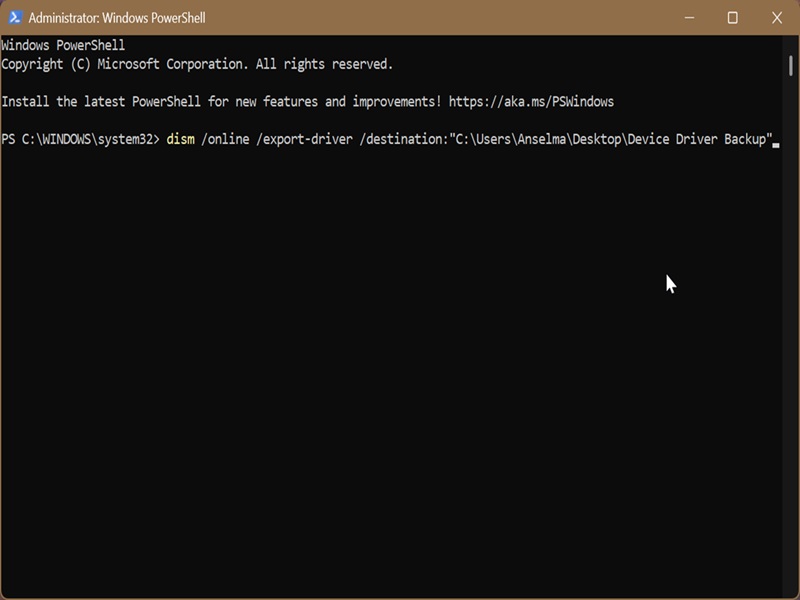
- Type this command and press Enter: dism /online /export-driver /destination:"full path of your driver folder" but substitute the placeholder with the real path.
- DISM will export all your driver packages into the specified folder.
Restore via PnPUtil
Now, to restore all exported drivers at once, do the following:
- Open elevated PowerShell or Command Prompt.
- Paste the following command and press Enter: pnputil /add-driver "full path of folder\*.inf" /subdirs /install /reboot
- Replace "full path of folder" with the path to the one you've previously used for your driver backup.
- After importing the drivers, this command will also automatically reboot your PC. So, save and close anything you've been working on before running it.
Restore via Device Manager
You can also use Device Manager to restore all your third-party drivers:
- Press Win + X and select Device Manager.
- Right-click your computer's name in the list of devices, and select Add drivers.
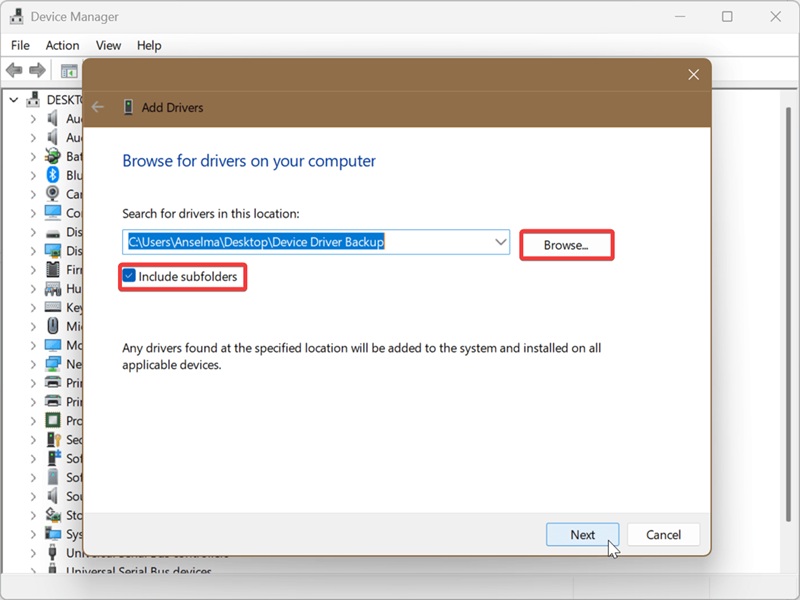
- Click the Browse button and navigate to the driver backup folder.
- Click on OK when you find it.
- Check Include subfolders and click Next.
- Wait for Device Manager to install all the drivers, and click Close when it's done.
However, if you want to restore just one specific device driver, try this instead:
- Press Win + X and select Device Manager.
- Find the device you need, right-click it, and select Update driver.
- Select Browse my computer for drivers.
- Click the Browse button and find your backup folder.
- Click OK.
- Check Include subfolders and click Next.
- Device Manager will install the driver (unless the latest version is already installed). Click Close.
Once you create your backup folder and import your drivers, you can keep it somewhere safe (a USB drive, for example) and use it whenever you need it. Even if manufacturers stop providing certain device drivers or Microsoft stops supporting them, you can rest easy. The same goes for old/obsolete hardware.

|
selma citakovic
Selma is a gamer, geek and gremlin hunter with a passion for cyber security and smashing Windows bugs before they bite. She’s IBM-certified, loves real freeware, despises bloatware, and powers most of her troubleshooting with an unhealthy amount of coffee. |
comments powered by Disqus
