


How To Disable (or Uninstall) OneDrive
By selma čitakovićon 03/12/2026 |
Want to get rid of OneDrive? I don't blame you. It's certainly not one of the best backup programs, especially the very limited free version. You can either disable it or uninstall it, with a couple of important differences between the two.
Disabling OneDrive stops it from working, but doesn't actually remove the program. It applies to all users, and you can always enable it again. On the other hand, uninstalling only applies to the current user, and you'll have to reinstall it if you change your mind about it. However, uninstalling is relatively simpler for most users, since there's no group policy/registry editing involved.
So, pick your method depending on your needs. Whichever you choose, your OneDrive folder won't get deleted, and you'll still be able to access the platform online. But first, I recommend you turn off OneDrive folder backup beforehand, to prevent potential problems.
Disable via Local Group Policy Editor
This editor is available to Windows 11 Pro, Education, and Enterprise editions (sorry, Home edition owners). If you can't use it but want to disable OneDrive, you can skip to the next method.
First, you should sign in as an administrator. Then, do the following:
- Press Win + R, type gpedit.msc, and press Enter.
- Go to Computer Configuration > Administrative Templates > Windows Components > OneDrive on the left pane.
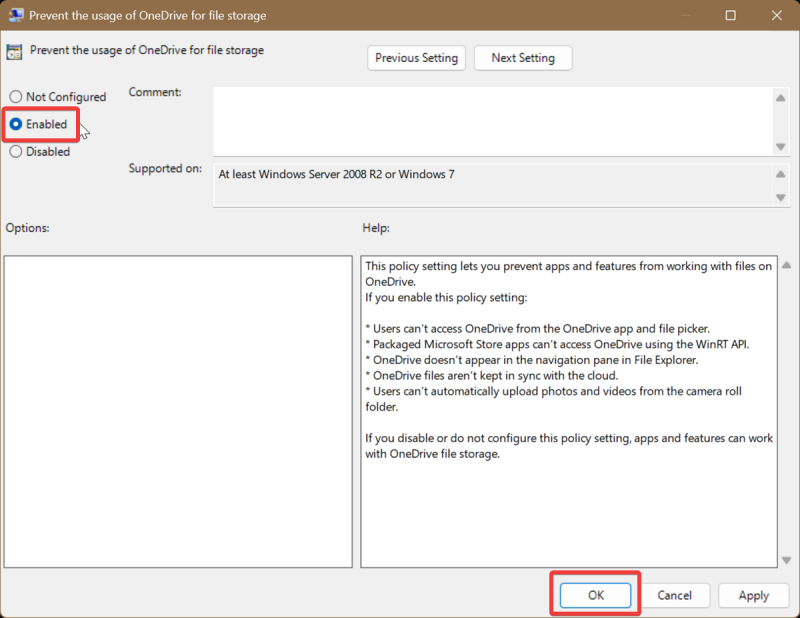
- While in the OneDrive subfolder, double-click Prevent the usage of OneDrive for file storage.
- In the new window, select Enabled and click OK.
- Restart your PC to apply the changes.
If you want to undo it, just select Not configured (in that same window), click OK, and restart.
Disable via Registry Editor
Alternatively, you can use the Registry Editor and achieve the same results. It's a slightly more convoluted process, though.
As always, if you feel uncertain about registry editing, I recommend you create a system restore point just in case. Still, the following steps are completely safe and will only affect OneDrive:
- Type regedit in Windows Search and click Run as administrator.
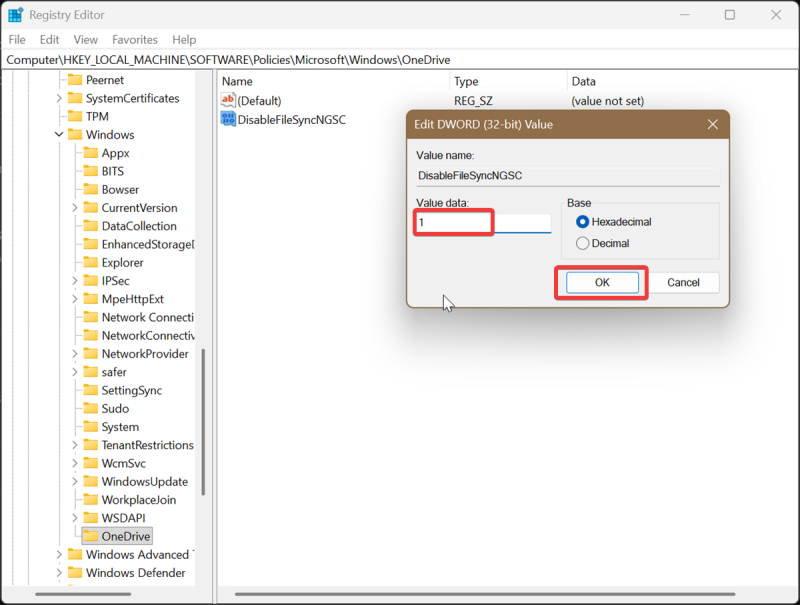
- Navigate to Computer\HKEY_LOCAL_MACHINE\SOFTWARE\Policies\Microsoft\Windows. You can paste this in the address bar at the top.
- Now, right-click the Windows folder on the left pane, and select New > Key. Name it OneDrive. (If you already have a OneDrive key created, ignore this step.)
- While in the OneDrive key, right-click the empty space on the right and select New > DWORD (32-bit) Value.
- Name it DisableFileSyncNGSC.
- Double-click DisableFileSyncNGSC and type 1 in the Value data field. Click OK.
- Restart your PC to apply the changes.
To undo this, right-click DisableFileSyncNGSC and select Delete. You'll also have to restart.
Uninstall via Settings
Before uninstalling, I recommend you move the files from your OneDrive folder back to a local folder just in case. You can then remove the program the "classic" way:
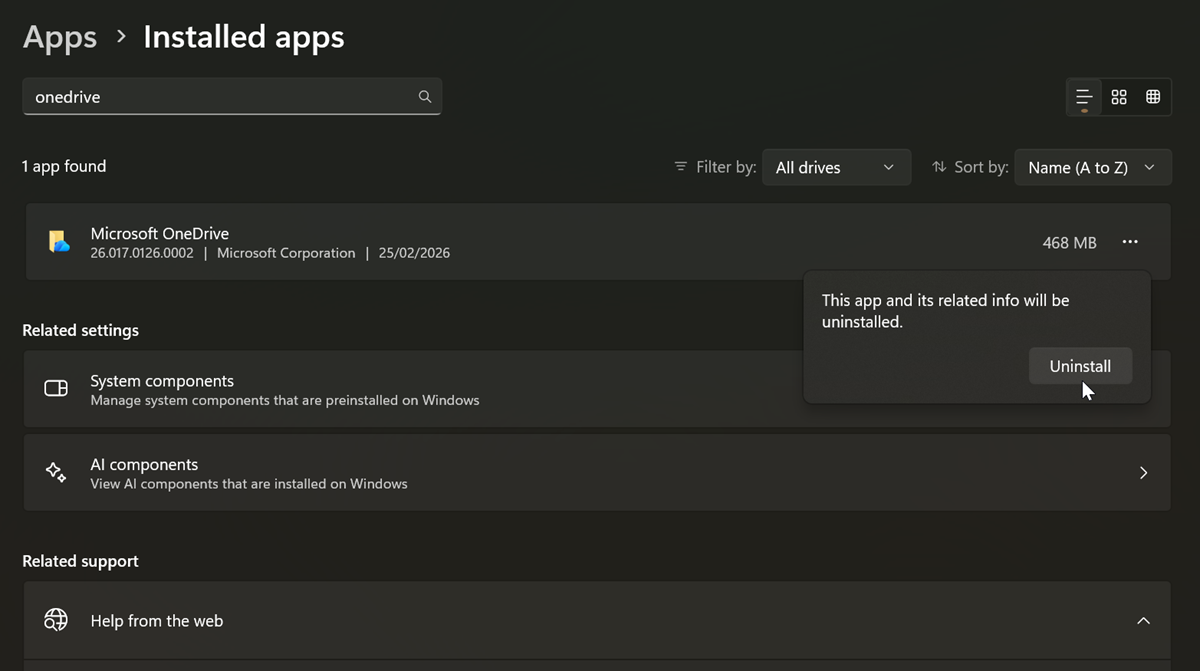
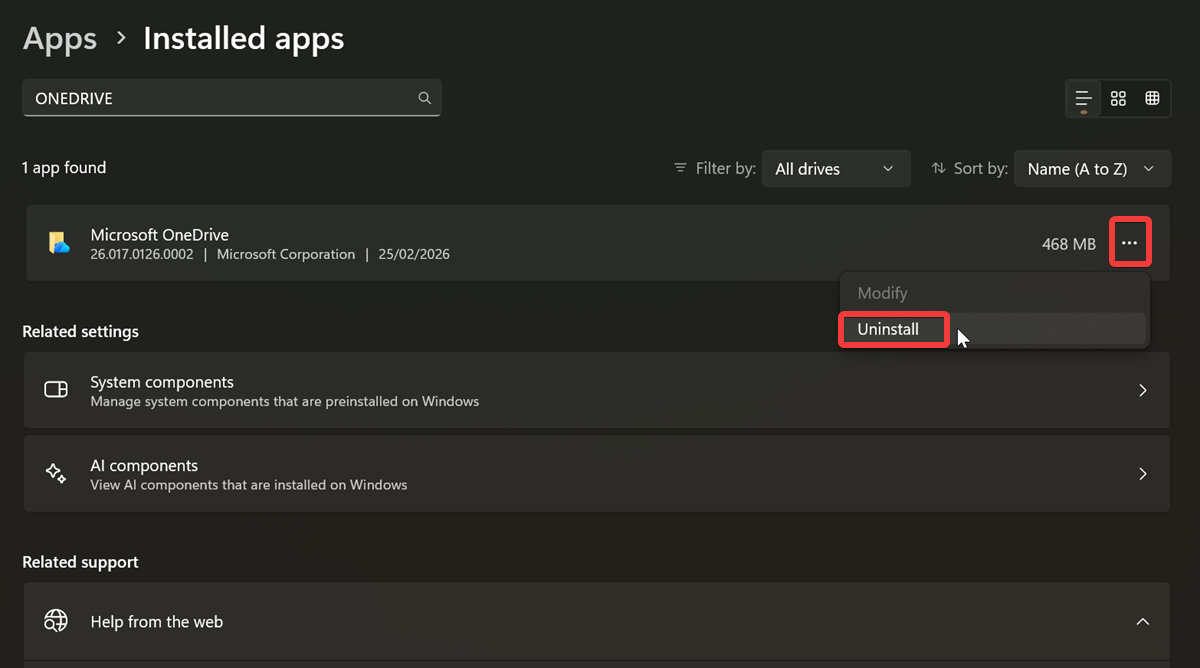
- Go to Settings > Apps > Installed apps.
- Find Microsoft OneDrive on the list, and click the three dots next to it.
- Select Uninstall, and click Uninstall again to confirm your decision.
Or, you can use a dedicated uninstaller. We recommend IObit for its ease of use and thoroughness, but there are many other uninstallers at your disposal.
Either way, enjoy your newfound freedom. If you've disabled OneDrive, don't forget this change applies to all users, but you can easily undo it.

|
selma citakovic
Selma is a gamer, geek and gremlin hunter with a passion for cyber security and smashing Windows bugs before they bite. She’s IBM-certified, loves real freeware, despises bloatware, and powers most of her troubleshooting with an unhealthy amount of coffee. |
comments powered by Disqus
