


How to Make Files and Folders Read-Only in Windows 11
By selma čitakovićon 09/20/2026 |
![{$insert['content_title']](/content/file/6387_image2.jpg
)
Read-only is an attribute you can apply to files and folders to prevent modification. In short, you can still open and view them (and even delete them!), but you can't "write" - you can't make changes to their content. Also, just to clear things up: if you want to apply this attribute to a folder, the folder itself can't be read-only, but everything inside it will be.
With all that out of the way, here's how to set or remove it in a few simple steps.
Via Properties
Here's the most straightforward method:
- Right-click the file you want and select Properties. You can also select the file and press Alt + Enter as a shortcut.
- In the General tab, check or uncheck Read-only in Attributes.
- Click OK.
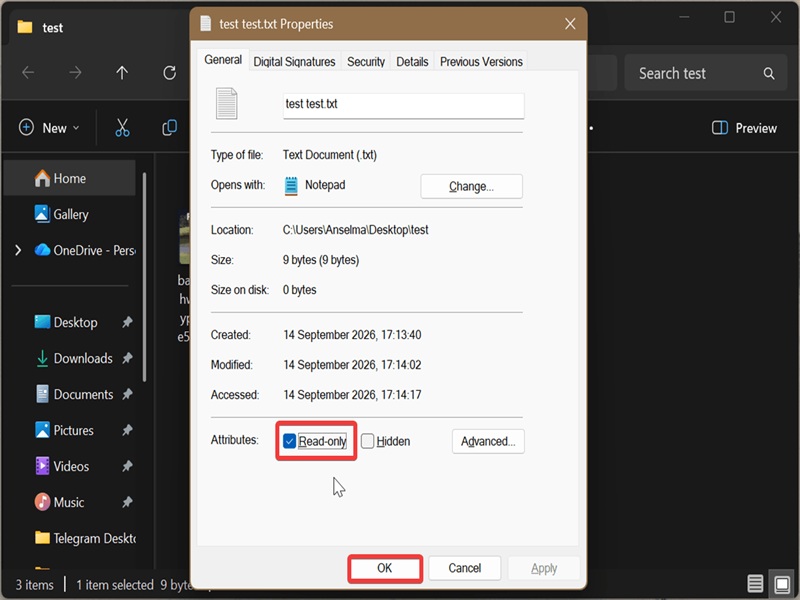
Now, to do the same for folders:
- Right-click the folder you want and select Properties.
- In the General tab, check or uncheck Read-only (Only applies to files in folder).
- Click OK.
- In the new window that opens, select Apply changes to this folder, subfolders, and files, and click OK.
In the same section, you can check or uncheck the Hidden attribute as well.
Via attrib command
Alternatively, you can try this approach:
- Press Win + X and select Terminal. If you need elevated rights, open Terminal (Admin).
- Open either PowerShell or Command Prompt.
- To set a file to read-only, paste the following command and press Enter: attrib +r "<full path of file with extension>"
- To unset read-only for a file: attrib -r "<full path of file with extension>"
- To set a folder and all its contents to read-only: attrib +r "<full path of folder>\*" /s /d
- To unset read-only for a folder and its contents: attrib -r "<full path of folder>\*" /s /d
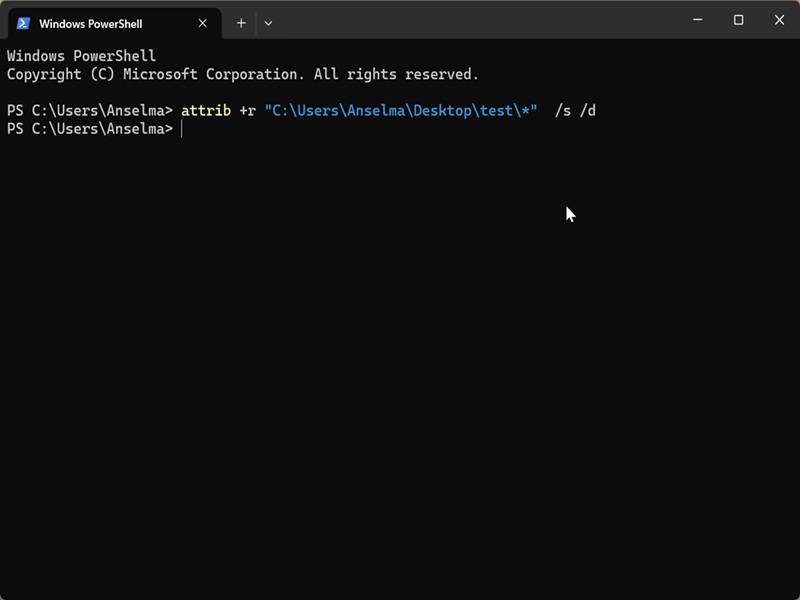
Just make sure you replace the placeholder
You can easily get the path by right-clicking the file/folder and selecting Copy as path. Then all you need to do is paste it.
Via PowerShell
Or, instead of using the attrib commands, you can go for these:
- Type PowerShell in Windows Search, and select either Open or Run as administrator. You can also open it with the Terminal app.
- To set a specific file as read-only, paste this command and hit Enter: Set-ItemProperty -Path "<full path of file with extension>" -Name IsReadOnly -Value $True
- To unset the read-only attribute for a file: Set-ItemProperty -Path "<full path of file with extension>" -Name IsReadOnly -Value $False
- To set a folder and its contents to read-only: Get-ChildItem -Path "<full path of folder>" -Recurse -File | % {$_.IsReadOnly=$True}
- To unset read-only for a folder: Get-ChildItem -Path "<full path of folder>" -Recurse -File | % {$_.IsReadOnly=$False}
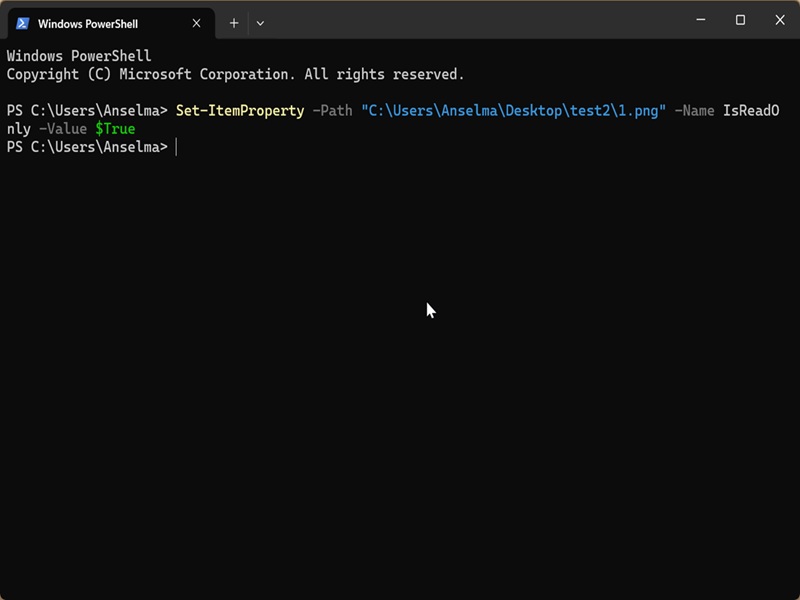
Again, make sure you replace the placeholder with the actual full path.
Finally, if you'd prefer to get a dedicated tool for modifying attributes instead, I recommend Attribute Changer. It's free and works like a charm.
Once you install it, you can find it in the right-click context menu. From there, you can quickly change the file system attributes to Read-only, Hidden, Archive, System, Compress, and Index. It also lets you modify the date and time stamps.

|
selma citakovic
Selma is a gamer, geek and gremlin hunter with a passion for cyber security and smashing Windows bugs before they bite. She’s IBM-certified, loves real freeware, despises bloatware, and powers most of her troubleshooting with an unhealthy amount of coffee. |
comments powered by Disqus
