


How to Manage Windows Defender Antivirus Found Threats
By Timothy Tibbettson 07/18/2023 |
When downloading files, you may see a warning from your web browser and Windows Defender that states, "Threats found. Windows Defender Antivirus found threats." In this guide, we look at how to allow and manage any threats found with Windows Security and Windows Defender.
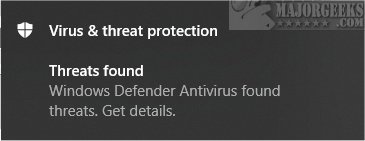
When Windows Defender finds a threat, you'll receive a popup window and a new notification. You can click on the popup window or, if you missed it, click on notifications in the lower right corner, and you can click there.
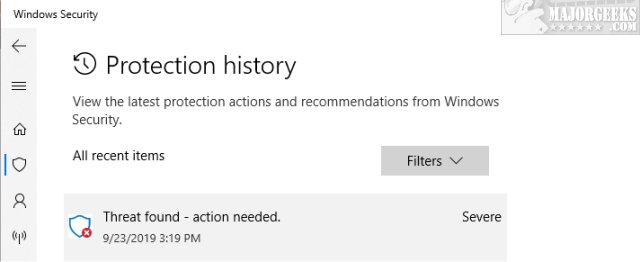
A window will open details with the file name and details.
If you're not sure about the file you downloaded, then you should always forget about it. Life goes on.
However, if you know that it's a false positive, you can allow the file to get through.
Scroll down to the bottom of the details and find the Actions dropdown. Click on that and click on Allow.
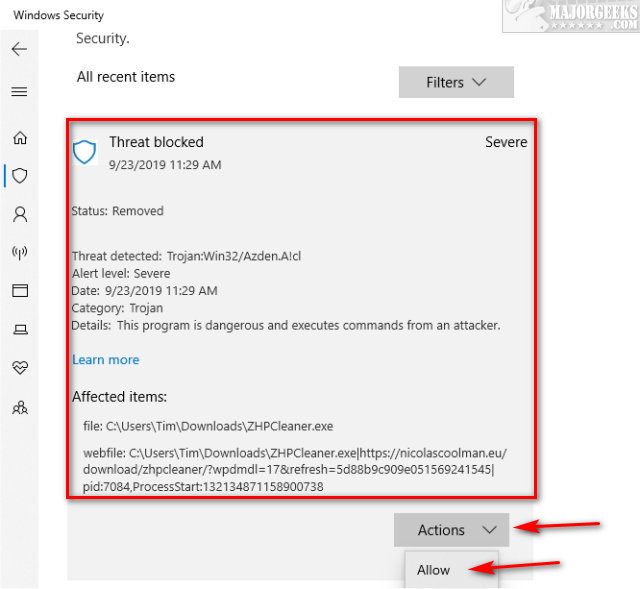
Remember that once you allow a file, you'll have to download it again.
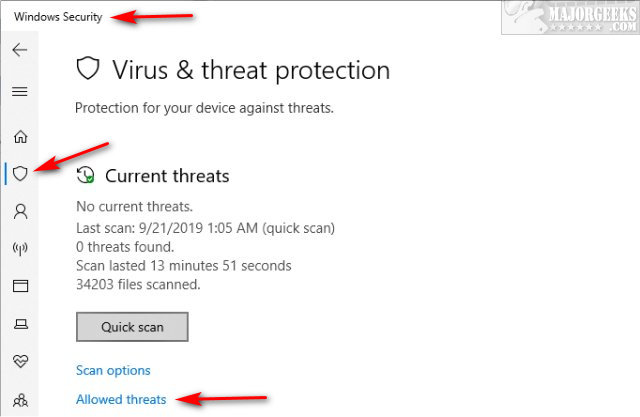
Also, that file is now permanently whitelisted. However, you can manage your Windows Defender Allowed Threats.
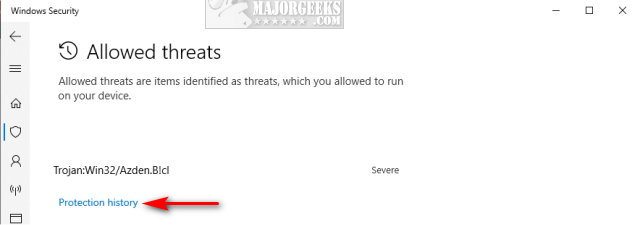
Click on the Windows Security icon in the lower-right corner. Click on Virus & threat protection > Allowed threats.
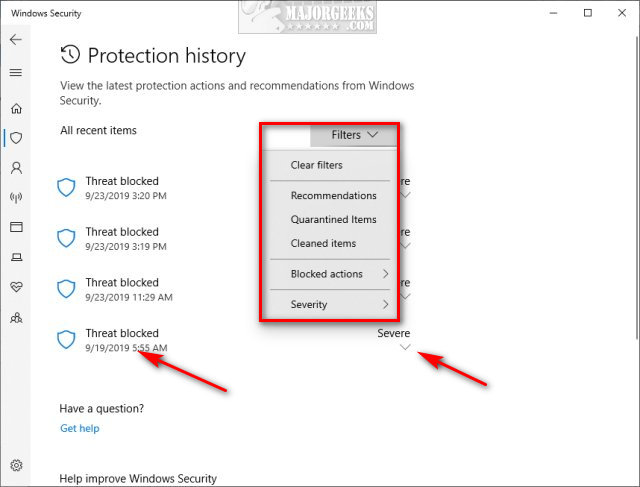
Click on Protection history.
You can now see a list of blocked threats. You can use filters to find recommendations, quarantined, cleaned, blocked, or severity. You can also clear your filter history from the filters dropdown.
As mentioned earlier, you can click on any blocked threat, scroll down to the bottom of the details, and find the Actions dropdown. Click on that and click on Allow. Other options include Remove for some items, although typically, they only stay on the list for a couple of weeks.
Similar:
What's the Best Antivirus and Is Windows Defender Good Enough
How to Manually Update Windows Defender Definitions
How to Enable Possibly Unwanted Applications Protection With Windows Defender
Hide the Windows Defender Security Center Icon on the Windows 10 Taskbar
Download May Be Dangerous, so Chrome Has Blocked It
comments powered by Disqus
When Windows Defender finds a threat, you'll receive a popup window and a new notification. You can click on the popup window or, if you missed it, click on notifications in the lower right corner, and you can click there.
A window will open details with the file name and details.
If you're not sure about the file you downloaded, then you should always forget about it. Life goes on.
However, if you know that it's a false positive, you can allow the file to get through.
Scroll down to the bottom of the details and find the Actions dropdown. Click on that and click on Allow.
Remember that once you allow a file, you'll have to download it again.
Also, that file is now permanently whitelisted. However, you can manage your Windows Defender Allowed Threats.
Click on the Windows Security icon in the lower-right corner. Click on Virus & threat protection > Allowed threats.
Click on Protection history.
You can now see a list of blocked threats. You can use filters to find recommendations, quarantined, cleaned, blocked, or severity. You can also clear your filter history from the filters dropdown.
As mentioned earlier, you can click on any blocked threat, scroll down to the bottom of the details, and find the Actions dropdown. Click on that and click on Allow. Other options include Remove for some items, although typically, they only stay on the list for a couple of weeks.
Similar:
What's the Best Antivirus and Is Windows Defender Good Enough
How to Manually Update Windows Defender Definitions
How to Enable Possibly Unwanted Applications Protection With Windows Defender
Hide the Windows Defender Security Center Icon on the Windows 10 Taskbar
Download May Be Dangerous, so Chrome Has Blocked It
comments powered by Disqus
