


How To Pause Windows Updates for Longer Than 5 Weeks (or As Long as You Want)
By selma čitakovićon 01/22/2026 |
We all know about Windows updates routinely breaking things. It's no wonder that many users pause updates and wait until the air is clear to safely install them. Public build Windows 11 users can pause them for a maximum of five weeks (35 days) before they automatically resume, while Windows Insider build users are limited to one week only.
So, if you feel like prolonging your update-free period, this guide is for you.
This will only extend the weekly range and won't change anything important, so you can rest assured it's safe. Moreover, Microsoft Defender definition updates will still install, which is what you want if you rely on it for protection. Also, this method consistently works, unlike completely disabling the Windows Update service. If you do that, chances are Windows will just sneakily re-enable it.
Now, let's get to it.
How to pause Windows updates for as long as you want
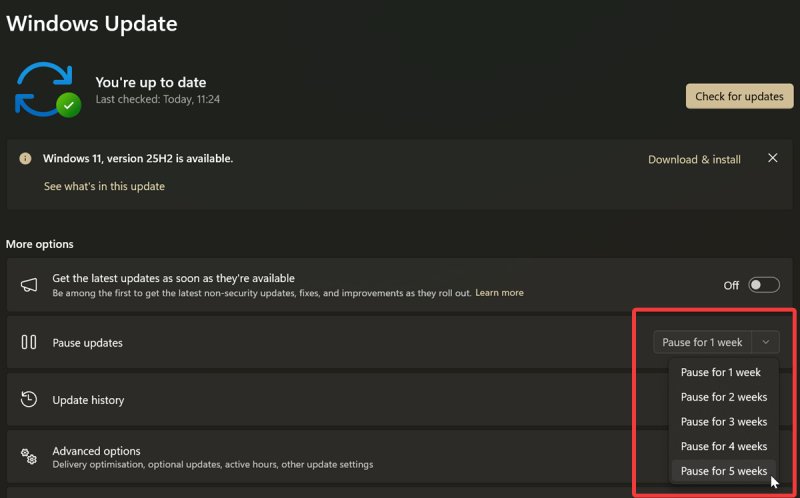
Normally, you'd go to Settings > Windows Update, and pause updates under More options. There, you'd click the dropdown arrow next to the button and select Pause for 1 week, 2 weeks, 3 weeks, 4 weeks, or 5 weeks.
To extend the range, we'll need to do some Registry tweaking. It's fairly simple, and as long as you closely follow these steps, completely safe as well. But if you want to play it extra safe, you can create a system restore point just in case.
Also, you should sign in as an administrator for this to work.
Here are the steps:
- Open the Registry Editor by pressing Win + R, typing regedit.exe, then pressing Enter. Or, find it via Windows Search and select Run as Administrator.
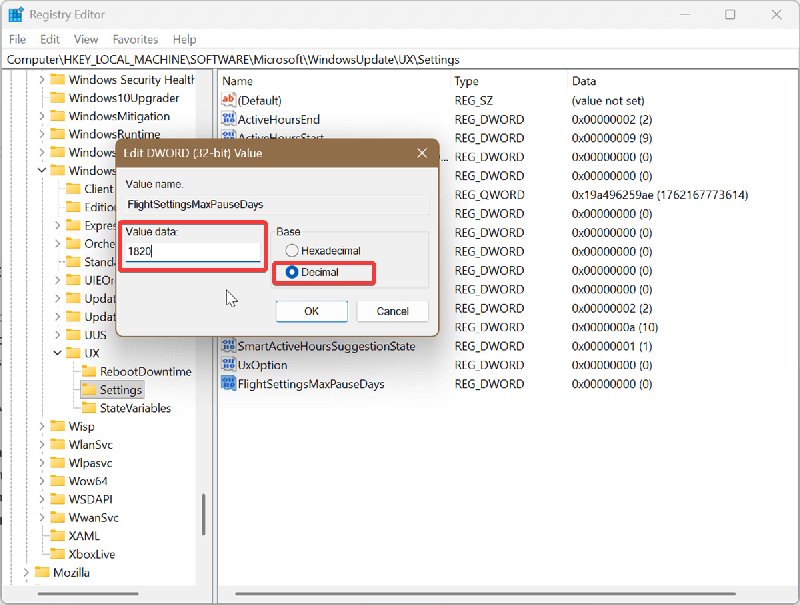
- On the left side of the open editor, navigate to HKEY_LOCAL_MACHINE\SOFTWARE\Microsoft\WindowsUpdate\UX\Settings. You can also paste this path in the bar at the top.
- While you're in the Settings directory, look for FlightSettingsMaxPauseDays. If you're part of the Insider program, you should be able to see it. But if you're using a public Windows 11 build, you'll have to add this value yourself.
- To create FlightSettingsMaxPauseDays, right-click the Settings key and select New > DWORD (32-bit) Value. Name the new value FlightSettingsMaxPauseDays, and press Enter.
- Double-click FlightSettingsMaxPauseDays. In the window that opens, select Decimal, and in the Value data field, type how many days you want to pause updates for. Since Windows formats this as weeks, you'll have to type in increments of 7. For example, if I want to pause updates for roughly 5 years, I'll put in 1820 days, which is 260 weeks.
- Click OK, and close the Registry Editor.
Now, let's check if it worked.
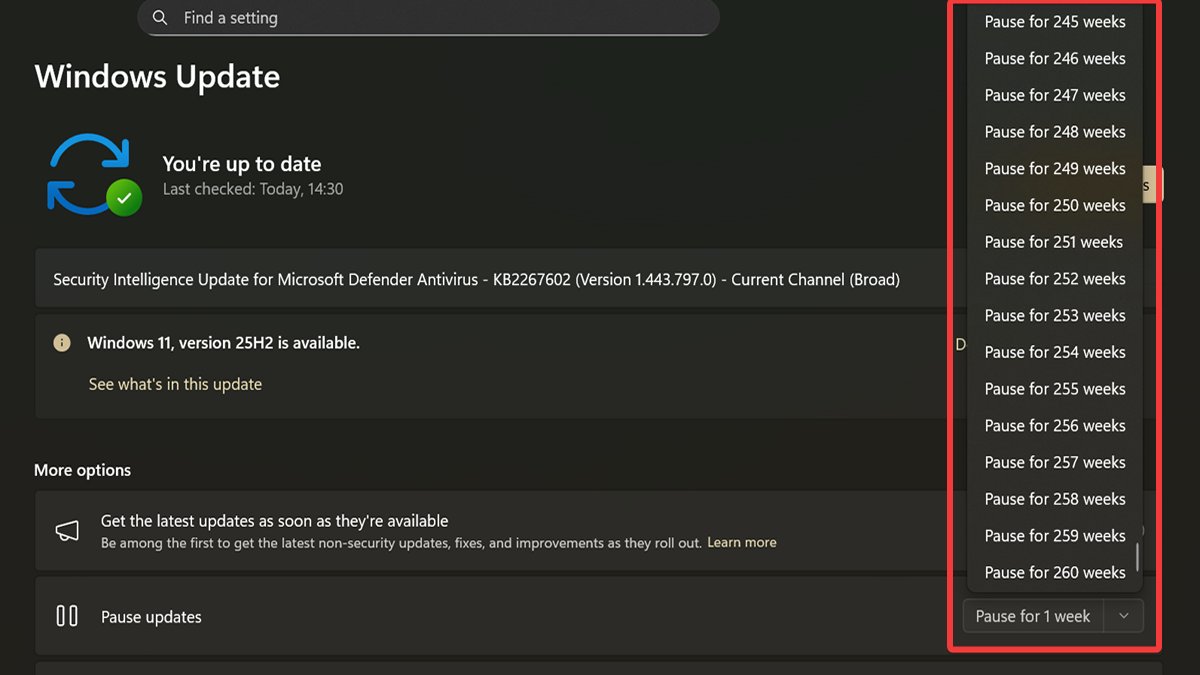
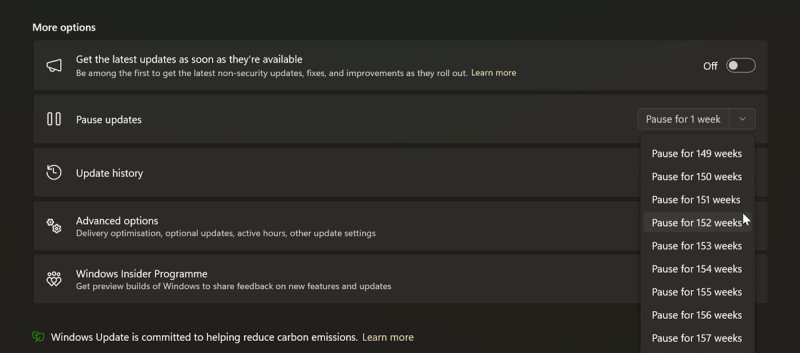
Go to Settings > Windows Update, and click the dropdown arrow next to Pause updates. You should see the expanded weekly range. Depending on your input, you might even have to scroll for a while to get to the bottom of the list.
Additionally, when you pause updates, you can always undo it by clicking the big Resume updates button at the top.
This means you could delay Windows updates pretty much indefinitely if you want to. For example, you could put in 7301 in the Value data field, which is approximately 20 years. Of course, we don't recommend never updating your PC, but now you can wait for as long as you want. It's your choice!

|
selma citakovic
Selma is a gamer, geek and gremlin hunter with a passion for cyber security and smashing Windows bugs before they bite. She’s IBM-certified, loves real freeware, despises bloatware, and powers most of her troubleshooting with an unhealthy amount of coffee. |
comments powered by Disqus
