


Memory Integrity Is Off? Here's How To Fix and Enable It
By selma čitakovićon 12/21/2025 |

Memory integrity is a virtualization-based security feature in Windows 10 and 11. It creates a virtual, isolated environment that protects the kernel from malware and iffy drivers. Basically, it's an extra security layer that isolates core Windows processes. If memory integrity is disabled, you'll see annoying yellow warnings in Windows Security and on the taskbar. This usually happens due to incompatible drivers, the occasional faulty Windows update, or if you disabled hardware virtualization (more on this in a bit).
Now, there are cases where you can ignore this situation altogether and just keep it turned off.
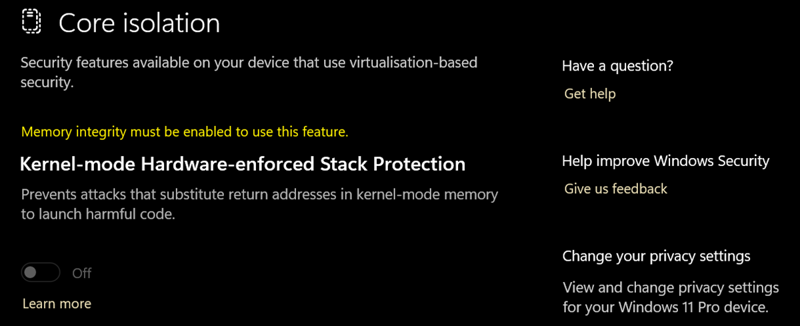
Memory integrity can sometimes lead to serious performance issues in CPU-intensive games, and it's better to disable it. The security benefits don't really outweigh the negative impact. Or, if you're undervolting like I am, it has to stay off. I need it that way for ThrottleStop to work. Otherwise, the program can't access my CPU voltage control register, and it can't undervolt. I had to disable hardware virtualization in BIOS, which also turned off memory integrity. You can see here how I don't even have the option to toggle it on in Windows Security.
In any case, if you'd like to keep memory integrity enabled, I'll show you how to fix the issues that are preventing it from working properly.
Remove incompatible drivers
If you see a message in Core isolation saying you have incompatible drivers, troubleshooting is fairly straightforward. You should see a list of drivers in Windows Security > Device security > Core isolation. Clicking on each should reveal more details, like its published name. Mark this info down, because you'll need it later.
If you can't see the published name from the driver details here, as some users have reported, you can use this workaround:
- Type CMD in Windows Search and select Run as administrator.
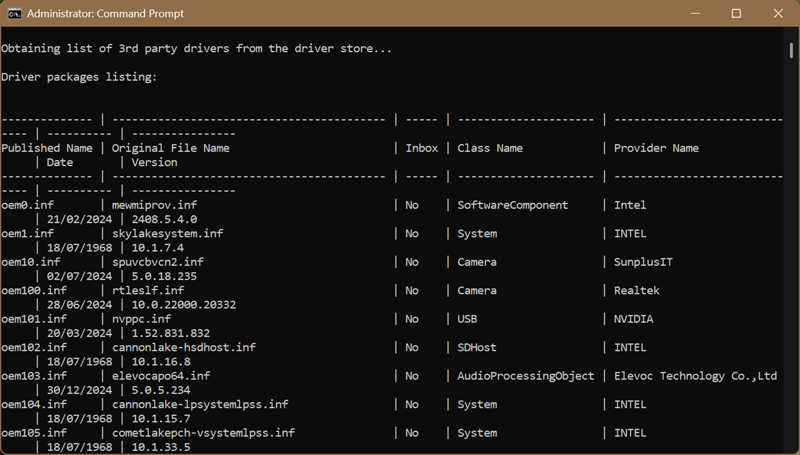
- Type the following command and press Enter: dism /online /get-drivers /format:table
- Wait for it to process, and you should see a table of all installed drivers with details. Find the problematic ones from the list in Windows Security, and remember their published names.
Either way, it's time to uninstall the faulty drivers. You can also try to just update them without removal, but it usually doesn't work in situations like this. It's better to do a clean install when there are conflicts and incompatibilities.
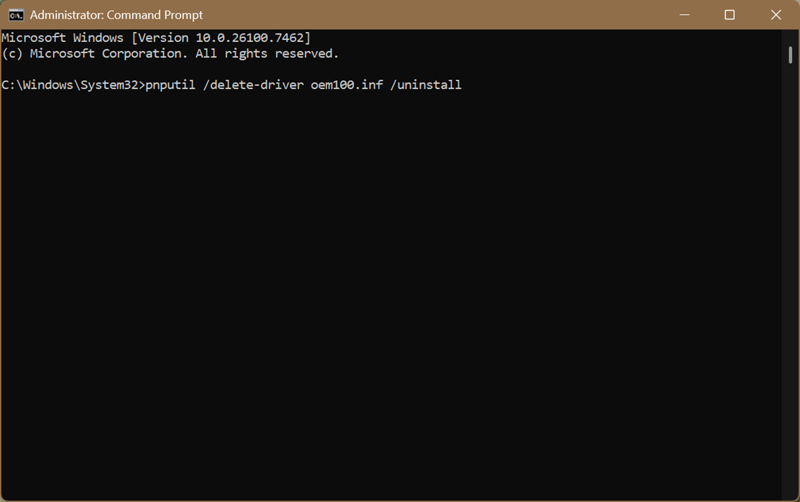
To delete them, open Command Prompt with elevated rights as I just described, and type:
pnputil /delete-driver
So, if I wanted to remove my Realtek camera driver (oem100.inf), I would type: pnputil /delete-driver oem100.inf /uninstall, and hit Enter.
Wait for the process to complete and reboot your computer. Windows will attempt to automatically reinstall the missing drivers. You can also get them from manufacturers' websites or use a driver updater. We recommend either Driver Booster or [1https://www.majorgeeks.com/files/details/snappy_driver_installer.html" onclick="window.open(this.href);return false;">Snappy Driver Installer but eveyone haa a favorite.
One last thing:
Sometimes you may see a warning message about incompatible drivers, but no list. Instead of cursing Windows and punching the wall, here's what you should do:
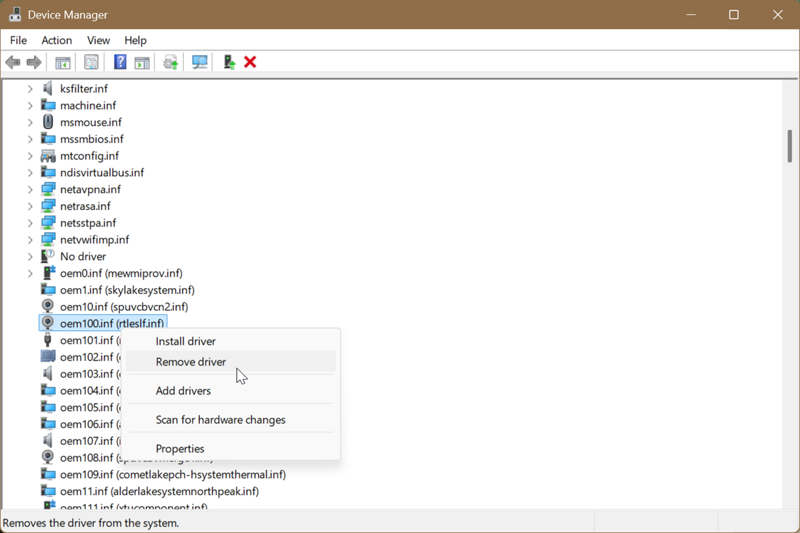
- Right-click the Start button and open Device Manager.
- Click the View tab, and check Show hidden devices and Devices by driver.
- Go through the list and look for drivers marked with a yellow triangle. That means they're not working correctly.
- Right-click the affected drivers and click on Remove driver.
- Alternatively, you can follow the previous steps to delete them.
Whichever method you choose, after rebooting your PC, toggle on Memory integrity in Core isolation, and you're done!
Turn on virtualization in BIOS/UEFI
As I've said in the intro, hardware virtualization has to be turned on for Memory integrity to work, since it's a virtualization-based feature. Depending on your CPU, you'll either have to enable Intel Virtualization Technology (Intel VT-x) or AMD Virtualization (AMD-V or SVM Mode).
One word of warning: As always, if you're about to tinker with your BIOS, follow the instructions closely, and don't touch anything you're unfamiliar with. Enabling/disabling
virtualization won't endanger your computer in any way, but touching other settings might.
Since BIOS options vary depending on your motherboard, I can't tell you exactly where to find these settings, but I can point you in the right direction. You can also visit your manufacturer's site for specific instructions.
But here's the gist of it:
- Reboot your PC and enter BIOS by repeatedly pressing F2, Delete, or F10 (again, it depends on your computer brand).
- Navigate your BIOS until you find a CPU configuration menu.
- Enable either Intel Virtualization Technology (Intel VT-x) or AMD Virtualization (AMD-V or SVM Mode). For example, I found Intel Virtualization Technology in the Configuration tab on my Lenovo Legion laptop.
- Save the changes and exit.
After doing that, revisit Memory integrity in Windows Security, and toggle it on. It should work this time!

|
selma citakovic
Selma is a gamer, geek and gremlin hunter with a passion for cyber security and smashing Windows bugs before they bite. She’s IBM-certified, loves real freeware, despises bloatware, and powers most of her troubleshooting with an unhealthy amount of coffee. |
comments powered by Disqus
