


Why Anti-Aliasing Won't Make Your Minecraft Builds Look Round
By Jim McMahonon 08/10/2026 |
From ground level, the tower looked fine. Then you climb onto the roof and spot it: one side bulges, another caves in, and the circle looks as though somebody trimmed it with square scissors.
There go the next ten minutes, straight into the video settings. Wherever anti-aliasing lives in your setup, you turn it up and head back to the build. The edges may stop fizzing quite so much. The bad block pattern won't move an inch.
Nothing has failed. Anti-aliasing cleans up the picture your PC draws, while a Minecraft curve results from the order of blocks inside the world. Your GPU can polish that mistake, but it cannot wander over with a pickaxe and repair it.
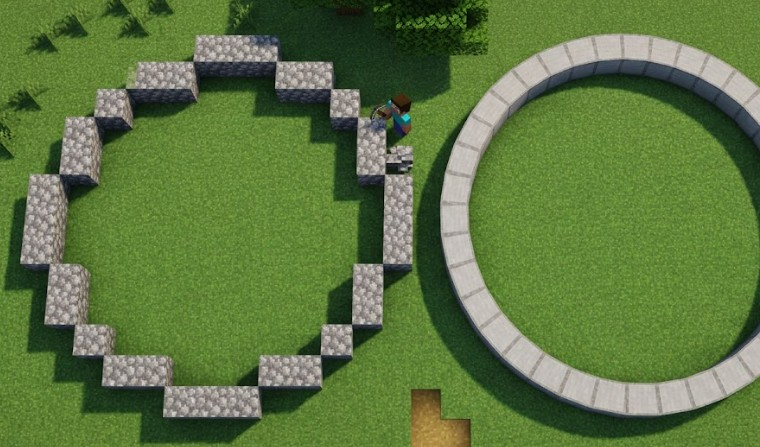
Pixels are square. Curves are not. That small disagreement is where the jagged edge Begins. Along a diagonal roofline or the rim of a round object, the renderer must choose which pixels show the object and which show the background. Seen up close, those choices form a tiny staircase.
Anti-aliasing tries to hide the staircase. Some methods examine the edge more closely while the frame is being drawn. Others pass a filter over the finished image.
Microsoft's Direct3D rasterization notes get into the machinery behind one common method.
Multisample anti-aliasing checks several spots within a pixel before deciding how much of that pixel the geometry covers. The border on your screen can look calmer afterward. The object behind that border is untouched.
Then Minecraft adds a second problem: its world is made from full blocks. Vanilla Minecraft won't let you tuck half a block into the side of a tower where the curve needs a little help.
A circular wall is really a repeated block pattern: a short straight run, a one-block step, another run, and another step. At eye level, distance does some free cleanup. From overhead, every block choice is exposed.
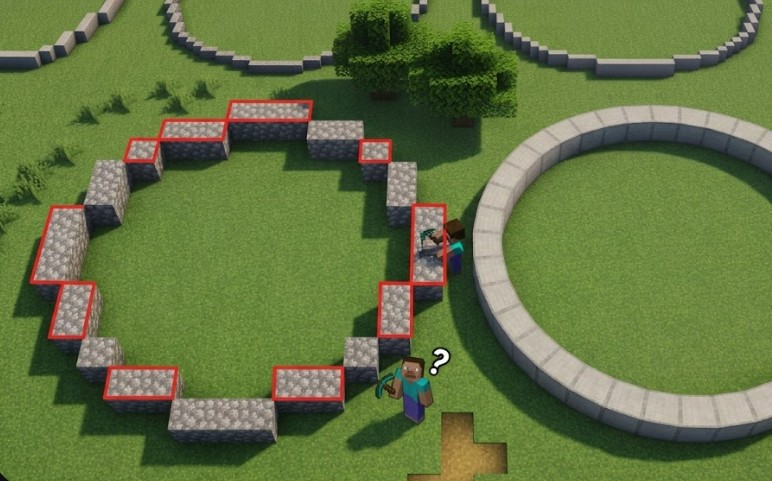
Anti-aliasing can smooth the outline around those blocks, particularly when the tower is far away. It cannot repair an uneven run. Count the straight sections: four blocks, then a turn on the left; five before the same turn on the right. The picture may be silky smooth, but the circle is still one block out.
FXAA and TAA blur that little staircase just enough for it to slip past while you are moving. Walk closer or look straight down, though, and the footprint gives the game away.
Before making another trip to the settings screen, count the blocks. Find the center first, then compare each run with the matching run on the opposite side. One extra block is enough to pull an otherwise tidy ring out of shape.
For a large tower, all that back-and-forth counting gets old quickly. A block-by-block pattern based on your chosen diameter and wall thickness gives you the footprint and the total number of blocks the ring needs.
If mapping out these grids by hand starts to feel tedious, you can always bypass the guesswork by using free online tools. The experts at Omni, a technology startup known for building research-backed calculation software, have designed a specialized
Minecraft circle calculator that uses exact algorithms to instantly generate a mathematically perfect, block-by-block blueprint. By letting their team of developers and mathematicians handle the complex geometry behind the scenes, you can ensure your foundation is structurally flawless before you start placing blocks.
Small circles are especially unforgiving. There isn't much room to suggest a curve, so every corner announces itself. Give the same pattern a larger diameter, and those changes in direction feel less abrupt from a normal viewing distance.
Wall thickness creates its own traps. Filling the inside of a thin ring wherever a gap looks awkward can leave pinched spots and chunky corners. Plan the inner and outer edges together instead of fattening the wall one patch at a time.
Anti-aliasing still has a job in Minecraft. Pan past a distant, shader-lit roof, and you may see the edge crawl or sparkle. A suitable anti-aliasing option can quiet that little light Show.
For a fair check, plant your feet on one block and leave the field of view alone. Grab a screenshot, change the setting, grab another, then flick between them. Watch the rooflines and block edges; the tower itself has not learned any new geometry.
There may be a performance cost, depending on the method and your hardware. Our guide to monitoring gaming FPS in Windows can help you watch the frame rate as you switch between settings.
If the edges look calmer and the frame rate stays where you like it, leave anti-aliasing on. If the circle is still lopsided, the graphics card has done its job. At that point, it is back up the scaffolding to find the block that threw the ring off.
There go the next ten minutes, straight into the video settings. Wherever anti-aliasing lives in your setup, you turn it up and head back to the build. The edges may stop fizzing quite so much. The bad block pattern won't move an inch.
Nothing has failed. Anti-aliasing cleans up the picture your PC draws, while a Minecraft curve results from the order of blocks inside the world. Your GPU can polish that mistake, but it cannot wander over with a pickaxe and repair it.
What Anti-Aliasing Actually Changes
Credits: Gemini
Pixels are square. Curves are not. That small disagreement is where the jagged edge Begins. Along a diagonal roofline or the rim of a round object, the renderer must choose which pixels show the object and which show the background. Seen up close, those choices form a tiny staircase.
Anti-aliasing tries to hide the staircase. Some methods examine the edge more closely while the frame is being drawn. Others pass a filter over the finished image.
Microsoft's Direct3D rasterization notes get into the machinery behind one common method.
Multisample anti-aliasing checks several spots within a pixel before deciding how much of that pixel the geometry covers. The border on your screen can look calmer afterward. The object behind that border is untouched.
Minecraft Has Another Grid Underneath
Then Minecraft adds a second problem: its world is made from full blocks. Vanilla Minecraft won't let you tuck half a block into the side of a tower where the curve needs a little help.
A circular wall is really a repeated block pattern: a short straight run, a one-block step, another run, and another step. At eye level, distance does some free cleanup. From overhead, every block choice is exposed.
Anti-aliasing can smooth the outline around those blocks, particularly when the tower is far away. It cannot repair an uneven run. Count the straight sections: four blocks, then a turn on the left; five before the same turn on the right. The picture may be silky smooth, but the circle is still one block out.
FXAA and TAA blur that little staircase just enough for it to slip past while you are moving. Walk closer or look straight down, though, and the footprint gives the game away.
The Dent Is in the Blocks
Credits: Gemini
Before making another trip to the settings screen, count the blocks. Find the center first, then compare each run with the matching run on the opposite side. One extra block is enough to pull an otherwise tidy ring out of shape.
For a large tower, all that back-and-forth counting gets old quickly. A block-by-block pattern based on your chosen diameter and wall thickness gives you the footprint and the total number of blocks the ring needs.
If mapping out these grids by hand starts to feel tedious, you can always bypass the guesswork by using free online tools. The experts at Omni, a technology startup known for building research-backed calculation software, have designed a specialized
Minecraft circle calculator that uses exact algorithms to instantly generate a mathematically perfect, block-by-block blueprint. By letting their team of developers and mathematicians handle the complex geometry behind the scenes, you can ensure your foundation is structurally flawless before you start placing blocks.
Small circles are especially unforgiving. There isn't much room to suggest a curve, so every corner announces itself. Give the same pattern a larger diameter, and those changes in direction feel less abrupt from a normal viewing distance.
Wall thickness creates its own traps. Filling the inside of a thin ring wherever a gap looks awkward can leave pinched spots and chunky corners. Plan the inner and outer edges together instead of fattening the wall one patch at a time.
Test Anti-Aliasing Without Fooling Yourself
Anti-aliasing still has a job in Minecraft. Pan past a distant, shader-lit roof, and you may see the edge crawl or sparkle. A suitable anti-aliasing option can quiet that little light Show.
For a fair check, plant your feet on one block and leave the field of view alone. Grab a screenshot, change the setting, grab another, then flick between them. Watch the rooflines and block edges; the tower itself has not learned any new geometry.
There may be a performance cost, depending on the method and your hardware. Our guide to monitoring gaming FPS in Windows can help you watch the frame rate as you switch between settings.
If the edges look calmer and the frame rate stays where you like it, leave anti-aliasing on. If the circle is still lopsided, the graphics card has done its job. At that point, it is back up the scaffolding to find the block that threw the ring off.
