


5 Ways To Unzip Files in Windows 11
By selma čitakovićon 11/13/2026 |
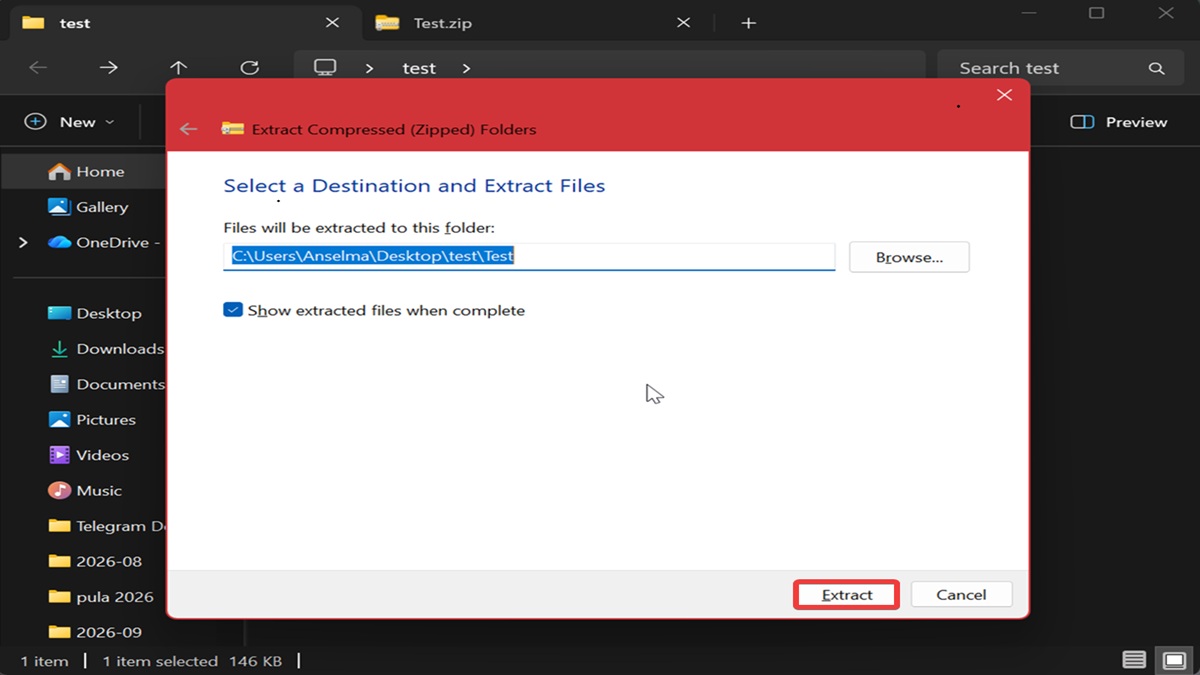
What do you do with a zipped folder? Unzip it, of course!
You can do it natively in Windows 11 without the help of third-party tools. Basically, you "unpack" the compressed and bundled files and reverse the compression process.
I'll show you how below, so read on.
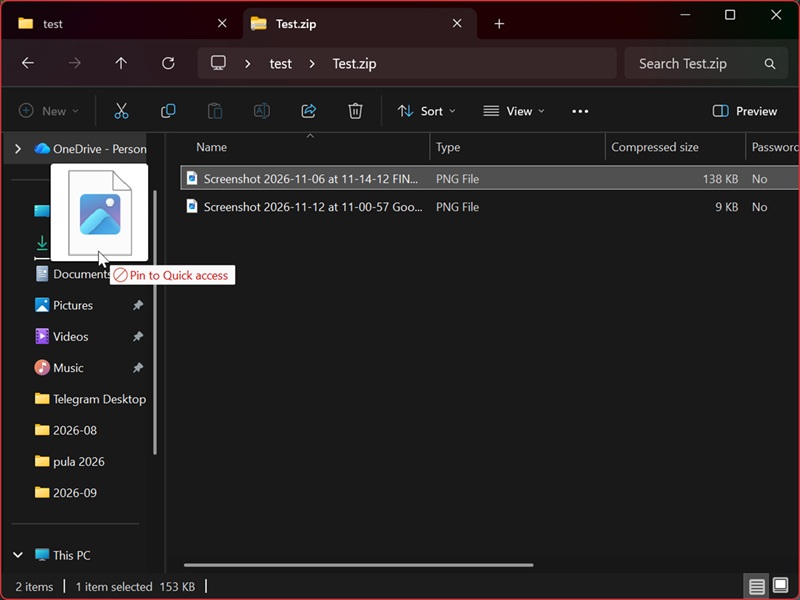
Via drag and drop
This one is easy, but it only works for specific files. Open the ZIP folder, and just drag and drop the files you want to extract to a new location.
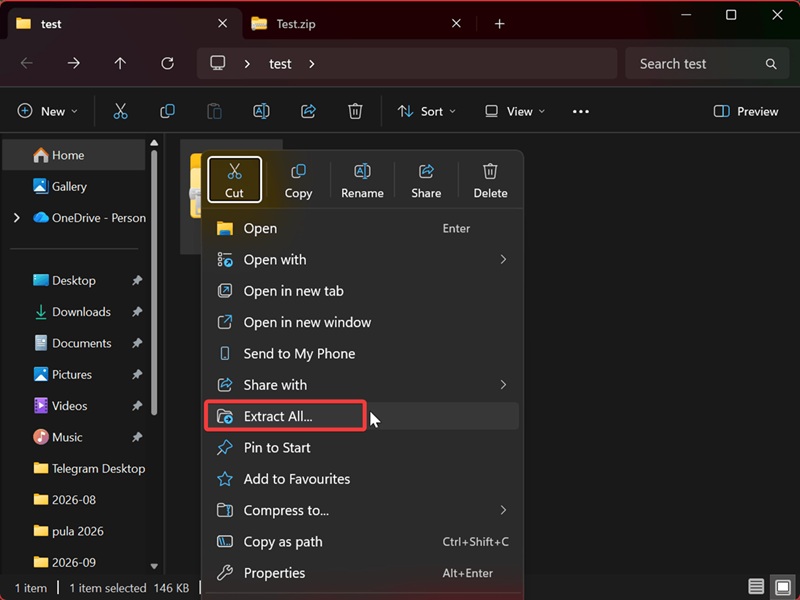
Via the right-click menu
If you want to unzip the whole folder instead, do this:
- Right-click it and select Extract All.
- Browse to where you want to extract it, or keep it in the same location.
- Check or uncheck Show extracted files when complete.
- Click the Extract button.
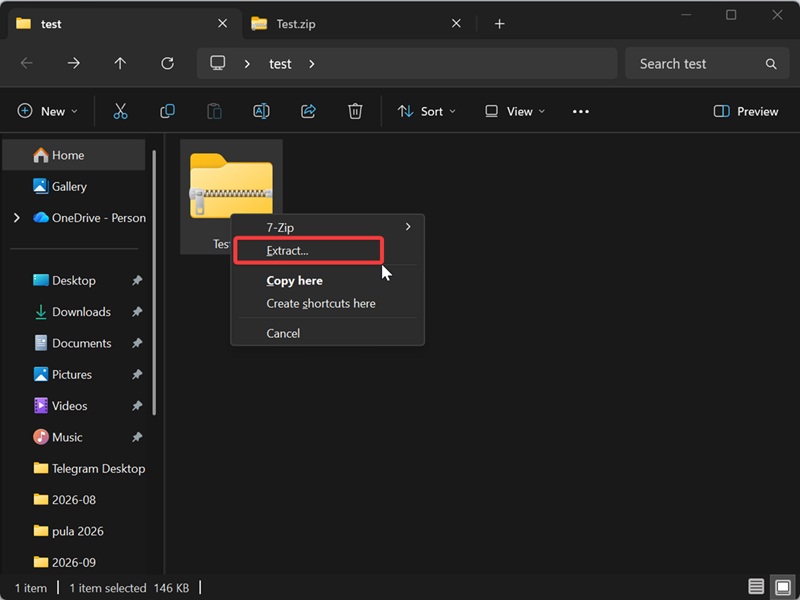
Via right-click drag and drop
You can also combine the previous two methods to unzip an entire folder, like this:
- Right-click the target folder, and drag and drop it to where you want to extract it.
- Select Extract from the context menu.
- Choose a location.
- Check or uncheck Show extracted files when complete.
- Click Extract.
Via File Explorer command bar
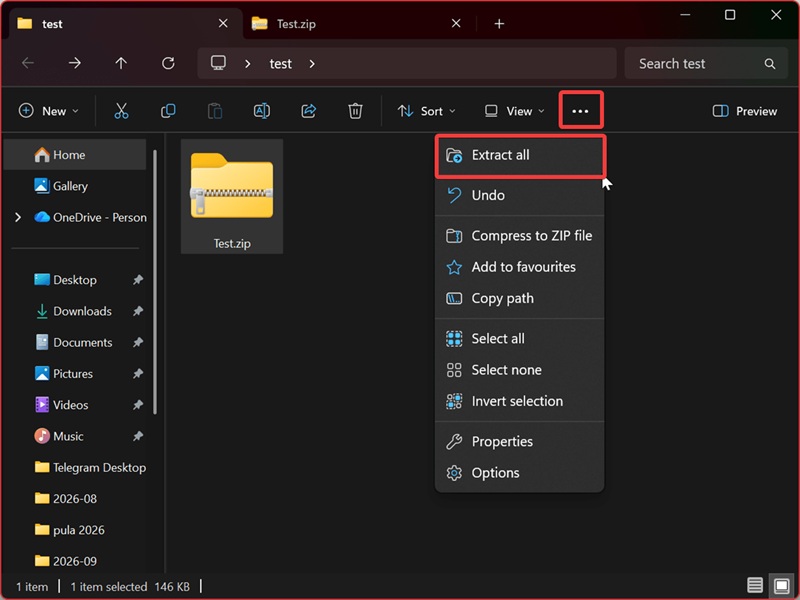
Alternatively, you can use the command bar at the top of File Explorer. Honestly, I often forget it exists, but it can be handy. Here are the steps:
- Find the ZIP folder in File Explorer and select it.
- Click on the three dots to expand the command bar menu, and select Extract all.
- Choose where you want to extract the folder.
- Check or uncheck Show extracted files when complete.
- Click the Extract button.
Via command
Finally, if you prefer using commands, try this method. Make sure you replace the placeholders in the command with the actual paths to the ZIP folder and destination folder.
Follow these steps:
- Press Win + X and select Terminal. Open either Command Prompt or PowerShell.
- Type the following command and hit Enter: PowerShell -Command "Expand-Archive -LiteralPath '<full path for ZIP>.zip' -DestinationPath '<full path of folder>'"
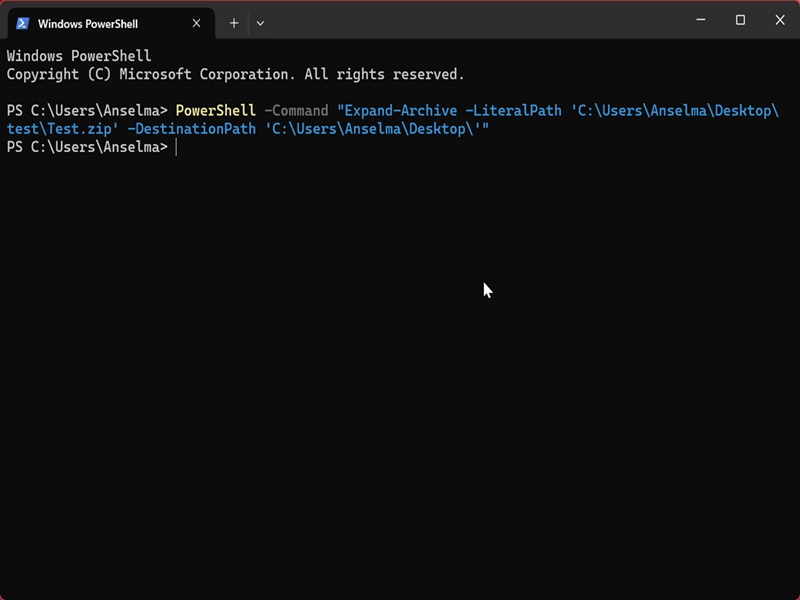
So, in my case, the full command looked like this: PowerShell -Command "Expand-Archive -LiteralPath 'C:\Users\Anselma\Desktop\test\Test.zip' -DestinationPath 'C:\Users\Anselma\Desktop\'". I wanted to extract the files to my desktop.
Overall, zipping and unzipping files is pretty easy in Windows 11. I hope these tips help!

|
selma citakovic
Selma is a gamer, geek and gremlin hunter with a passion for cyber security and smashing Windows bugs before they bite. She’s IBM-certified, loves real freeware, despises bloatware, and powers most of her troubleshooting with an unhealthy amount of coffee. |
comments powered by Disqus
