


How To Change the Name of a Local or Microsoft Account
By selma čitakovićon 04/11/2026 |
![{$insert['content_title']](/content/file/5916_image4.png
)
Need to change a user account's name?
Luckily, they're not set in stone - you're free to modify them as you like. However, there's a bit of a difference when it comes to Microsoft (online) and local (offline) accounts. You can change a local account's name in several ways, while only a couple of methods work on Microsoft usernames. Still, the most important thing is that they do work.
Additionally, doing this won't alter the name of your user profile folder (C:\Users
With all that out of the way, let's get into it.
Rename Microsoft Account Online
This is the "intended" way to modify your online account username. Here are the steps:
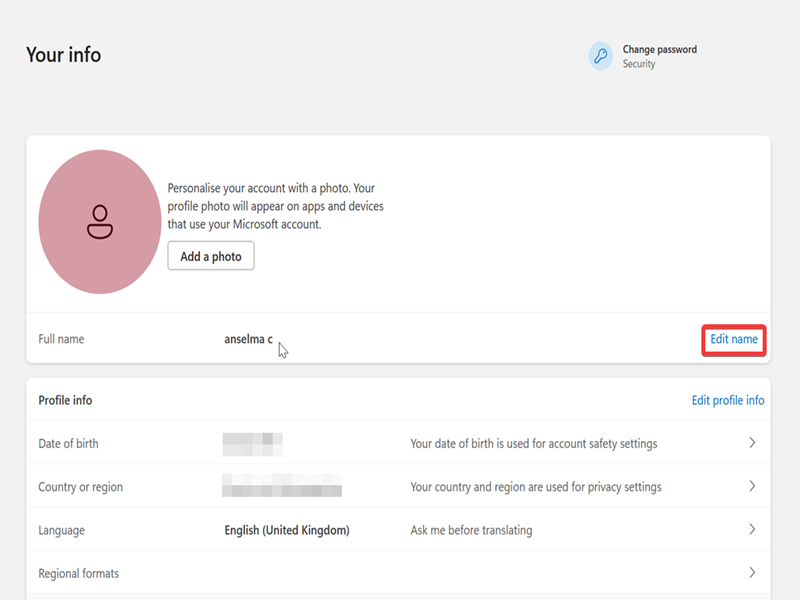
- Go to the Microsoft account website and sign in.
- On the Your info page, click Edit name next to your full name.
- Type the new first and last name, plus the captcha. Click Save.
- Sign out and then back in to apply the changes.
Rename Microsoft or Local Account via Settings
Alternatively, you can rename both types of accounts in the Settings. Still, this option is gradually rolling out to certain Windows 11 25H2 builds, so you might not be able to use it. I don't have it either, but I'll walk you through the steps in case you do:
- Go to Settings > Accounts > Other users.
- Select the account you want, and click on Change account name.
- Type the new name, and click OK.
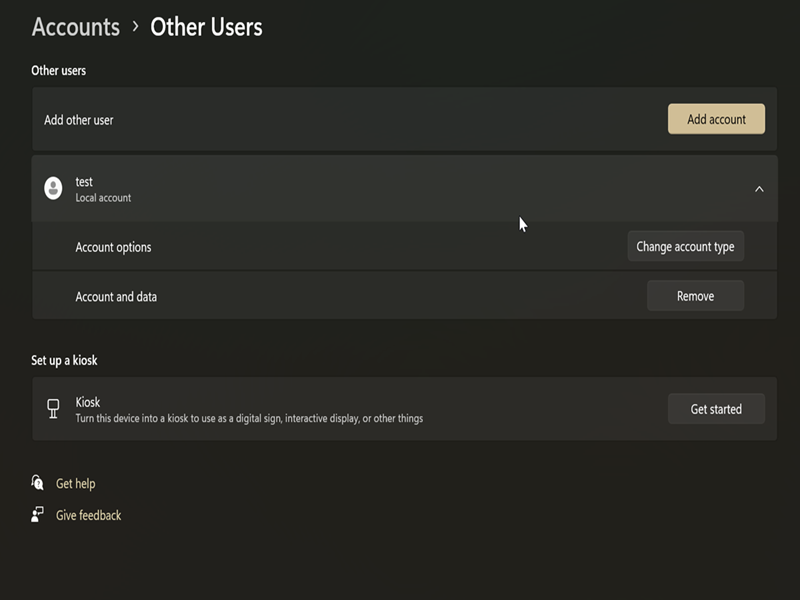
The Change account name option should be in the same expanded section as in my screenshot, but I don't have it (yet).
Rename Local Account via Control Panel
Let's focus on local account usernames now! You can do it the old-fashioned way and alter the name using the legacy Control Panel:
- Type Control Panel in Windows Search, and click Open.
- Select Small icons or Large icons in View by: in the top right corner.
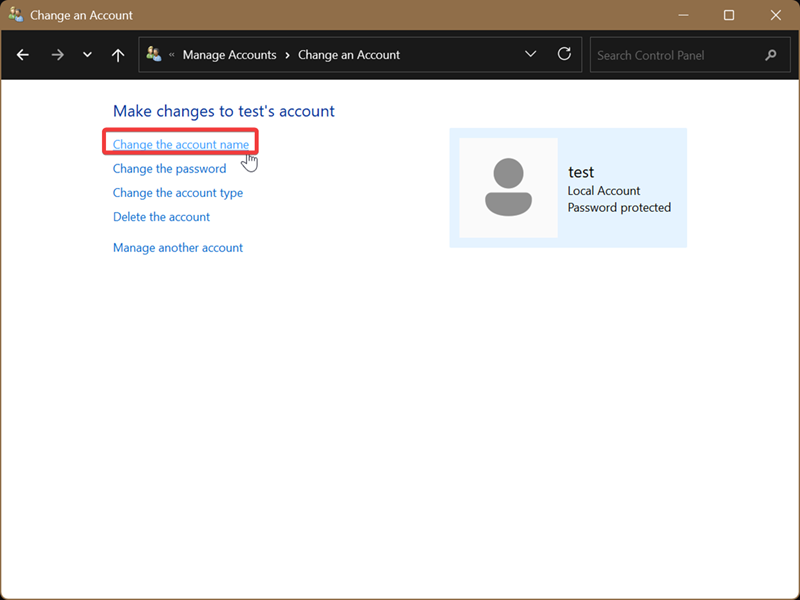
- Click on User Accounts, then Manage another account.
- Select the local account you want.
- Click on Change the account name.
- Type the new one, and click on Change Name to confirm your decision.
Rename Local Account via PowerShell
You can also use PowerShell with elevated rights to achieve the same results. Let me show you how:
- Type PowerShell into Windows Search, then select Run as administrator.
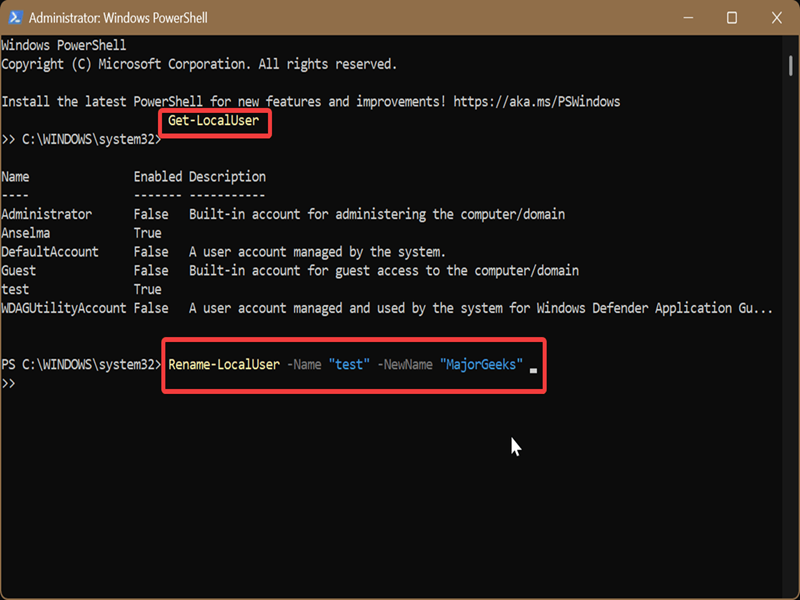
- Type the following command and press Enter: Get-LocalUser
- This will display a list of the existing user accounts. Remember the name of the one you want to change.
- Now, type this command and press Enter: Rename-LocalUser -Name "Current Name" -NewName "New Name"
- Substitute the placeholders ("Current Name" and "New Name") with the actual names.
Rename Local Account via Command Prompt
Or if you prefer Command Prompt:
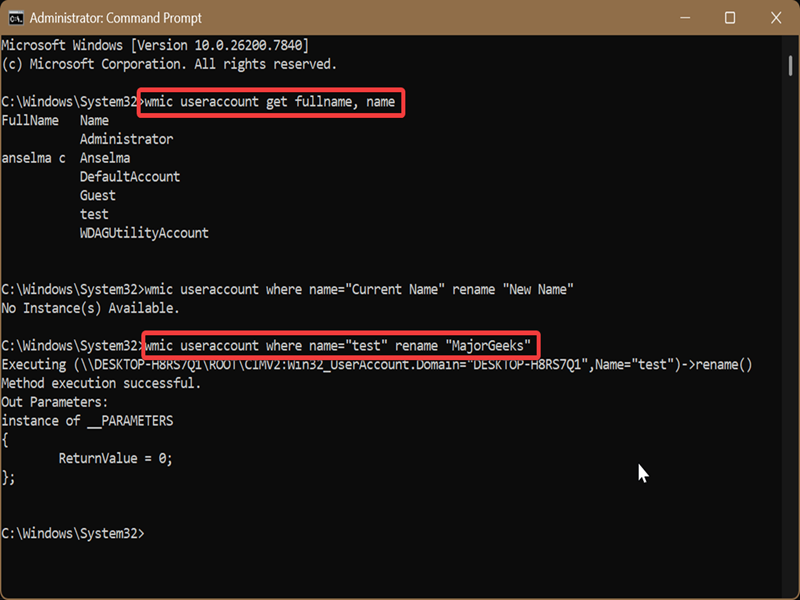
- Type CMD in Windows Search, and select Run as administrator.
- Type the following command and press Enter: wmic useraccount get fullname, name
- You'll see a list of existing user accounts. Note down the one you want to rename.
- Now, type this command and press Enter: wmic useraccount where name="Current Name" rename "New Name"
- Just like in the previous method, replace the placeholders with the real names.
Rename Local Account via Netplwiz
Netplwiz is a built-in tool for managing user accounts. It's often used for configuring automatic logins without passwords. To change a username with it:
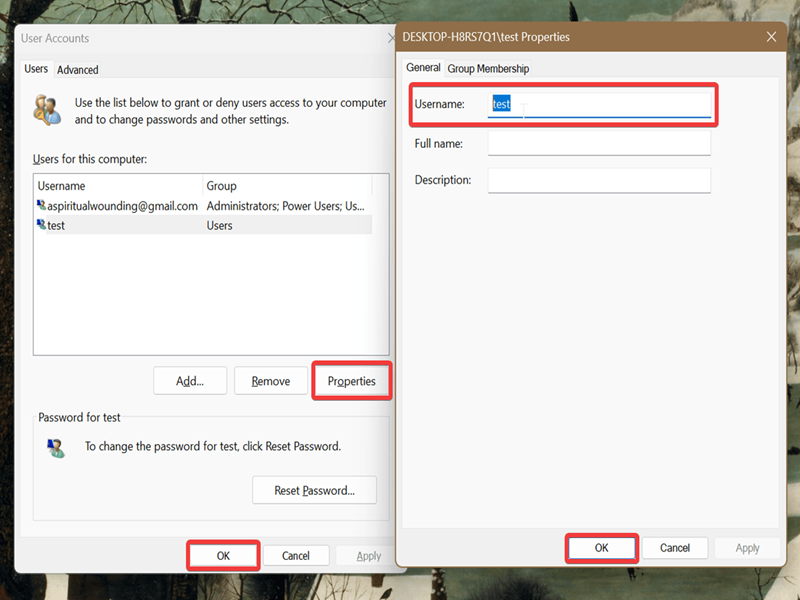
- Press Win + R, type netplwiz, and press Enter.
- In the Users tab, select the account you want to modify and click on the Properties button. (If you see Users must enter a user name and password to use this computer at the top, check the box for it.)
- In the Properties window that opens, type the new username and click OK.
- Click OK on the original window.
- If you're currently signed in to the local account you just renamed, you'll be prompted to sign out. Click Yes to apply the changes.
Rename the Built-in Administrator Account via Local Security Policy
Finally, you can change the name of the "super" administrator account on your device. It acts pretty much the same as a regular admin account, but it doesn't require UAC confirmation for its actions.
To rename it, we'll need to access the Local Security Policy. It's an administrative tool that's only available on Windows Pro, Education, and Enterprise editions. (Sorry, Home edition owners.)
Here's how to use it:
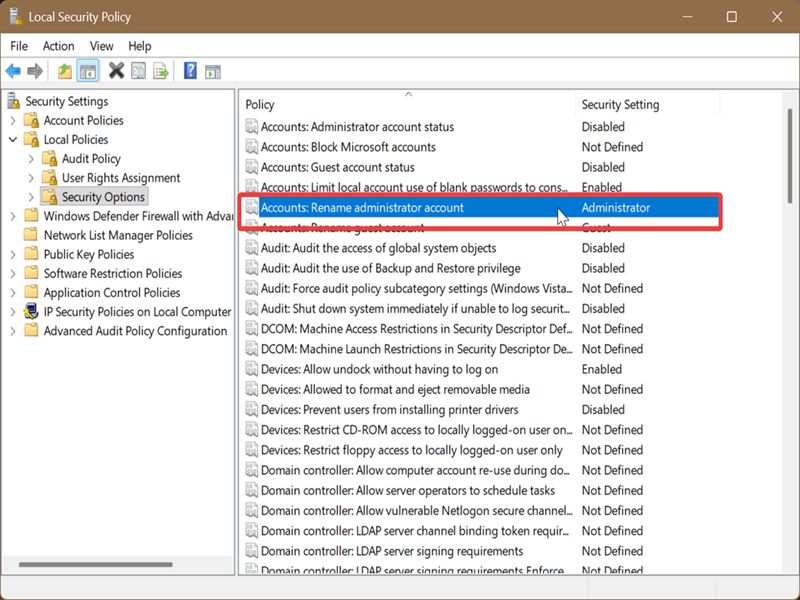
- Press Win + R, type secpol.msc, and press Enter.
- Navigate to Local Policies > Security Options on the left side.
- Double-click Accounts: Rename administrator account on the right side.
- Type the new name in the field and hit OK.
As long as the name doesn't include certain characters (< > + = , ? * % @/ \ [ ] " : ; | ), you're good.

|
selma citakovic
Selma is a gamer, geek and gremlin hunter with a passion for cyber security and smashing Windows bugs before they bite. She’s IBM-certified, loves real freeware, despises bloatware, and powers most of her troubleshooting with an unhealthy amount of coffee. |
comments powered by Disqus
