


How To Export/Import Default App Associations in Windows
By selma čitakovićon 03/28/2026 |

As you may know, Windows assigns you default apps for certain file or link types. You can set up your own custom defaults, of course. But what if you want all new users to have the same starting default apps?
In that case, you can export your custom set as an XML file and just copy and import it on other devices. This will only apply to new users signing in for the first time, so it doesn't work for existing accounts. Still, it's a decent way to speed things up! I'll show you how below, and also demonstrate how to undo it.
Make sure you're signed in as an admin before following this guide, though.
Export default app associations
First, you should set all the custom app associations you want to export to new users. Once you've chosen your default apps[a], follow these steps:
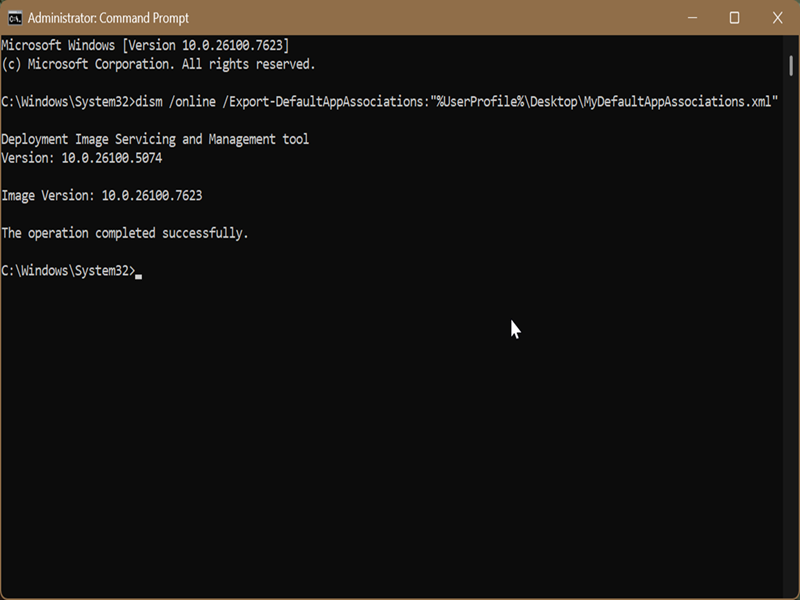
- Type CMD in Windows Search, and select Run as administrator. Click Yes on the UAC prompt.
- Type the following command and press Enter: dism /online /Export-DefaultAppAssociations:"%UserProfile%\Desktop\MyDefaultAppAssociations.xml"
- You should see a message saying: "The operation completed successfully." This will create an XML file called MyDefaultAppAssociations on your desktop.
This new file contains all your default app preferences, in a form that's easy to copy and import to your target.
Import default app associations
Now, copy MyDefaultAppAssociations.xml to the desktop where you want to import them. Of course, you can copy it elsewhere, but you'll need to specify the file path in the command.
Here are the steps:
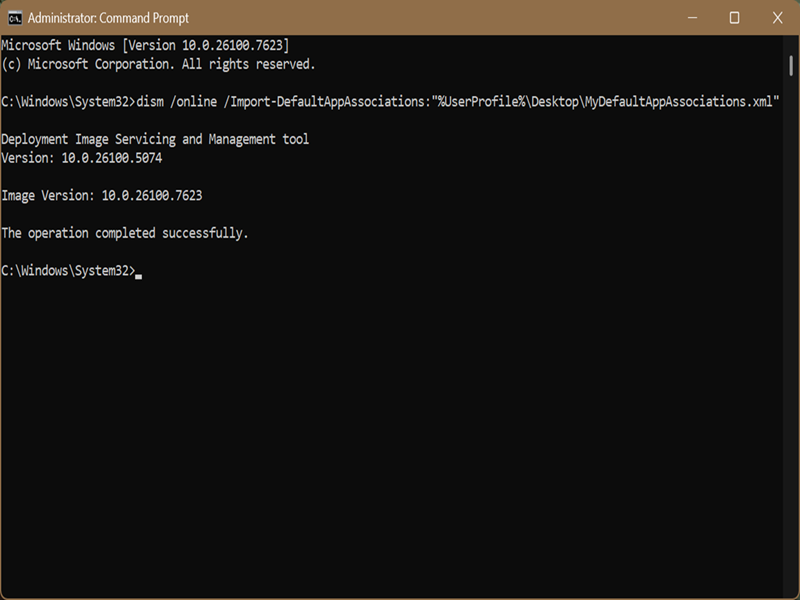
- Type CMD in Windows Search, and select Run as administrator (again). Confirm that you want to allow this app to make changes to your device.
- Type the following command and press Enter: dism /online /Import-DefaultAppAssociations:"%UserProfile%\Desktop\MyDefaultAppAssociations.xml" (If the XML file isn't on your desktop, change the file path in the quote marks.)
- If everything works, you should see: "The operation completed successfully." You can then close Command Prompt.
Remove imported default app associations
If you want to undo these changes and use the Windows default apps and file associations instead, read on:
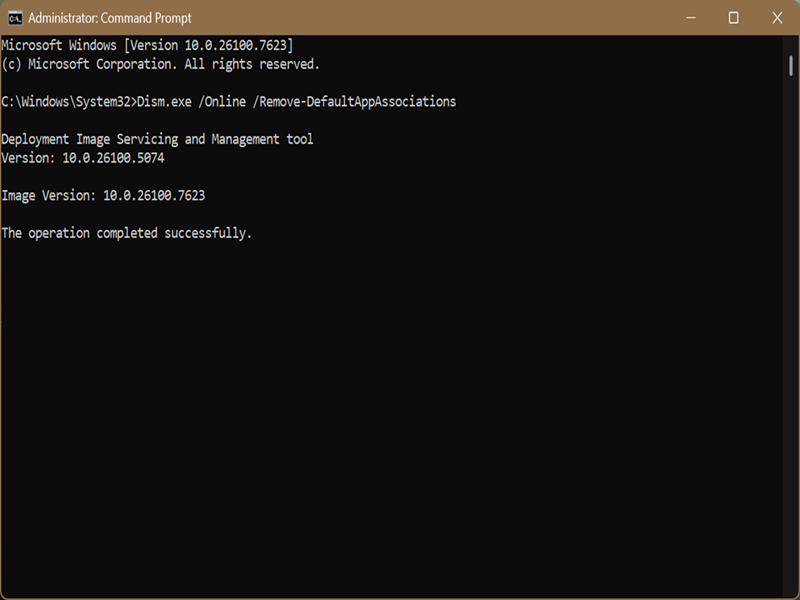
- Run Command Prompt as an administrator.
- Type the following command and press Enter: Dism.exe /Online /Remove-DefaultAppAssociations
- Close CMD when you see that the operation has completed successfully.
So, now you know how to easily import, export, and remove default apps in Windows 11 with DISM. I hope you'll find this useful the next time you're managing new accounts!
[a]https://www.majorgeeks.com/content/page/how_to_set_default_apps_in_windows_11.html

|
selma citakovic
Selma is a gamer, geek and gremlin hunter with a passion for cyber security and smashing Windows bugs before they bite. She’s IBM-certified, loves real freeware, despises bloatware, and powers most of her troubleshooting with an unhealthy amount of coffee. |
comments powered by Disqus
