


How To Reset Network Adapters in Windows 11
By selma čitakovićon 06/14/2026 |
![{$insert['content_title']](/content/file/6088_image3.png
)
If you're having persistent connection problems, you may need to reset your network adapters. This will completely remove and reinstall the adapters and set the network components to their defaults. It will also wipe your VPN and proxy settings, saved Wi-Fi profiles, and firewall configurations.
Basically, it acts as a fresh start for your network, so make sure you back up everything important first. You should only reset your network if the usual troubleshooting tricks don't work, as a last step. Here's how to do it!
Via Settings
You can reset right from the settings. Make sure you have access to an administrator account, and do the following:
- Go to Settings > Network & internet > Advanced network settings > Network reset (under More settings).
- Click the Reset now button.
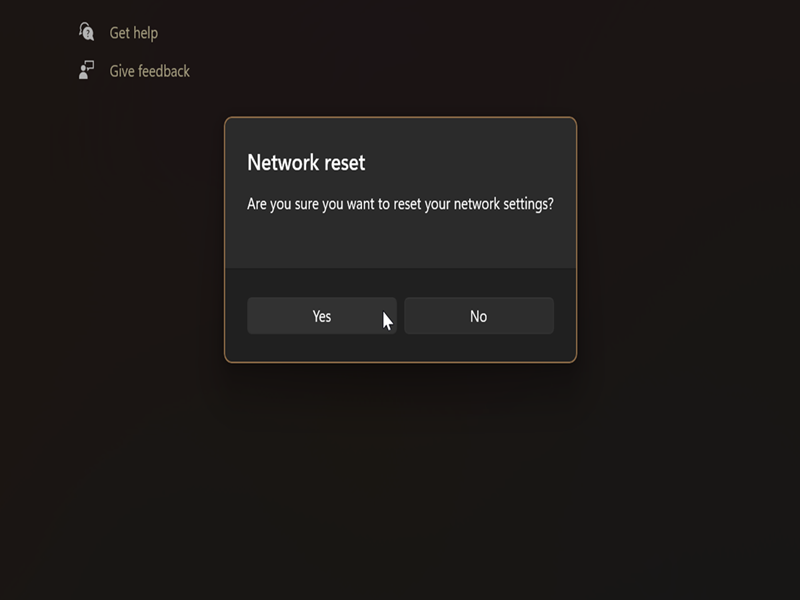
- Confirm your decision and click Yes.
- You'll be informed that your PC will restart in five minutes. Save and close whatever you were working on, and wait. Or just initiate the restart yourself.
Via Command Prompt/PowerShell
Alternatively, you can initiate a reset with a command. Here's how:
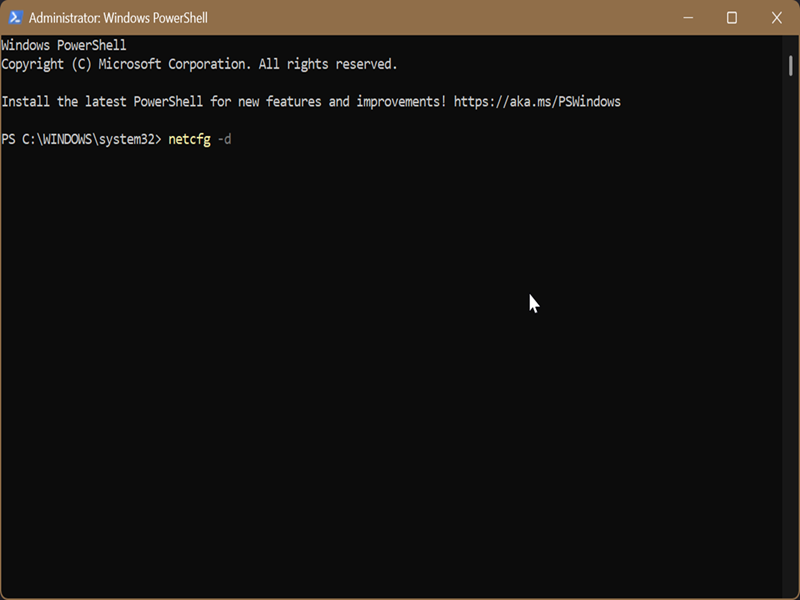
- Press Win + X, select Terminal (Admin), and open either PowerShell or Command Prompt.
- Type the following command and press Enter: netcfg -d
- Restart to apply the changes.
Hopefully, this will sort out your network issues! If you're encountering similar problems, like your Wi-Fi adapters disappearing, we can help you out.

|
selma citakovic
Selma is a gamer, geek and gremlin hunter with a passion for cyber security and smashing Windows bugs before they bite. She’s IBM-certified, loves real freeware, despises bloatware, and powers most of her troubleshooting with an unhealthy amount of coffee. |
comments powered by Disqus
