


How To Scan for Hardware Changes
By selma čitakovićon 03/13/2026 |

Is Windows not recognizing new hardware?
Whenever you connect a new device, Windows is supposed to detect it and automatically install relevant drivers. However, sometimes when you plug in new hardware (like USB peripherals or printers), your system may not recognize it. Specifically, the PnP (Plug and Play) manager is not doing its job, which is discovering new peripherals.
In that case, it's time to give Windows a helpful nudge and manually scan for hardware changes. This can also help with resolving driver issues.
I'll show you how below. Make sure you're signed in as an administrator for these steps to work.
Use Device Manager
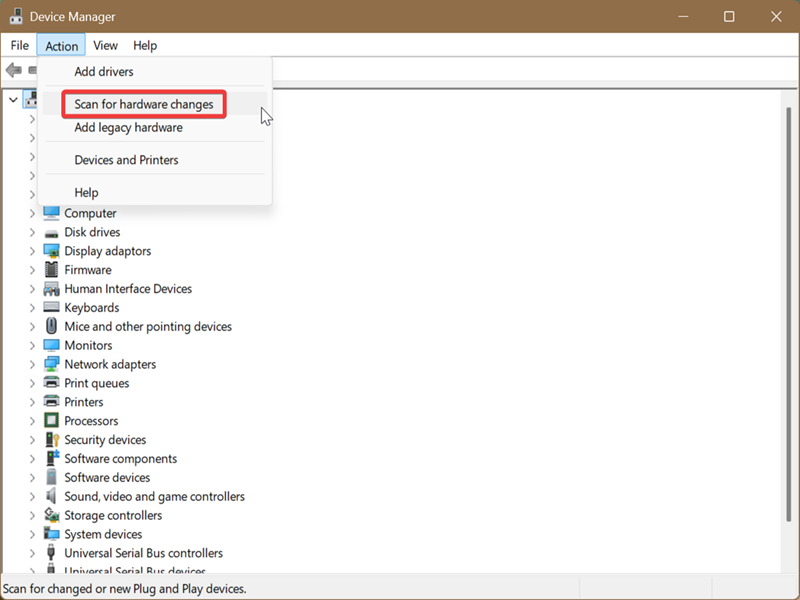
Device Manager is a built-in tool that displays detailed information about each device. You can view their properties, update or rollback drivers, manage driver problems, and more. In this situation, we'll use it to run a manual scan:
- Right-click the Windows Start button and select Device Manager. Or, simply look it up on Windows Search.
- Click the Scan for hardware changes button on the toolbar (the tiny blue monitor with a magnifying glass).
- Alternatively, select the device name at the top, then click Action > Scan for hardware changes.
- Wait for the quick scan to complete.
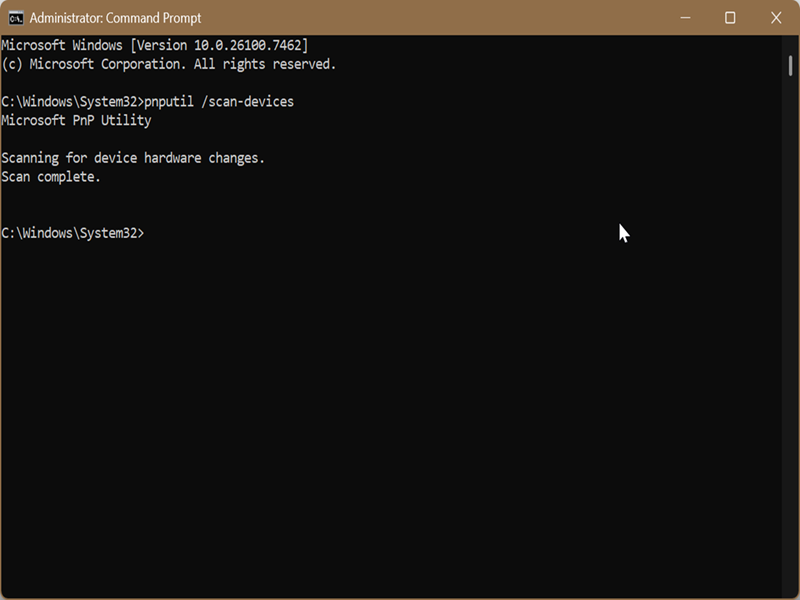
Use Command Prompt or PowerShell
It's the same PnPUtil command for both programs, so it doesn't matter which one you use. PnPUtil is a command-line tool for managing device drivers.
Anyway, here are the steps:
- Open either Command Prompt or PowerShell by typing their names in Windows Search. Select Run as Administrator.
- Type the following command and press Enter: pnputil /scan-devices
- Wait for the scan to finish; it will only take a second.
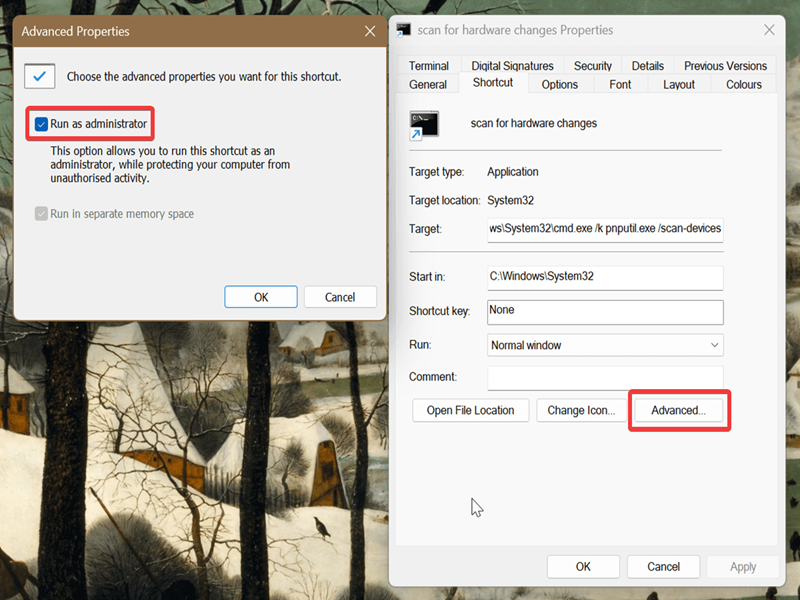
You can also create a desktop shortcut for this command if you often have to manually scan for devices:
- Right-click your desktop and select New > Shortcut.
- Type the following as the location of the item: C:\Windows\System32\cmd.exe /k pnputil.exe /scan-devices
- Select Next.
- Name the shortcut Scan for hardware changes (or whatever you want).
- Select Finish to create it.
- Right-click your new shortcut and click on Properties.
- Click the Advanced button.
- In Advanced properties, check Run as administrator and click OK.
- Finally, hit Apply and OK. You can now run the shortcut with elevated privileges.
And that's all there is to it! Your system should now recognize the new hardware addition.

|
selma citakovic
Selma is a gamer, geek and gremlin hunter with a passion for cyber security and smashing Windows bugs before they bite. She’s IBM-certified, loves real freeware, despises bloatware, and powers most of her troubleshooting with an unhealthy amount of coffee. |
comments powered by Disqus
