


How To Turn Auto HDR On or Off
By selma čitakovićon 03/18/2026 |
Want to try out HDR in older games? You can do so in Windows 11, thanks to Auto HDR.
HDR (High Dynamic Range) technology shows a wider range of light and colors compared to SDR (Standard Dynamic Range). It displays more details in both darker and brighter parts of the scene, and generally looks more vivid. With Auto HDR, you can experience this in older games (DirectX 10, 11, or 12) that were developed for SDR only. It will automatically increase their color range and brightness on HDR-capable monitors.
You can also achieve this with NVIDIA RTX HDR, but it has a bigger performance impact. Auto HDR is more lightweight, and you can use it if you own an AMD GPU.
Below, I'll show you how to activate it (or turn it off) in Windows 11.
Check if your display supports HDR and enable it
To use Auto HDR, you'll first have to enable HDR on your monitor - if it's capable of it, that is. To check if your display supports HDR, follow these steps:
- Go to Settings > System > Display > HDR. You should see right under the HDR option whether your display supports it.
- While in the HDR section, choose the display you want to check in the Select a display to view or change its settings drop-down menu.
- Under Display capabilities, make sure HDR video streaming and HDR video games, apps, and more are all supported. Alternatively, it might be Use HDR and Play streaming HDR video (depending on your Windows version). So, if your monitor only supports HDR video streaming, but not games, apps, and more, this means it isn't actually HDR capable. It can display HDR videos, but it doesn't meet the requirements for HDR10.
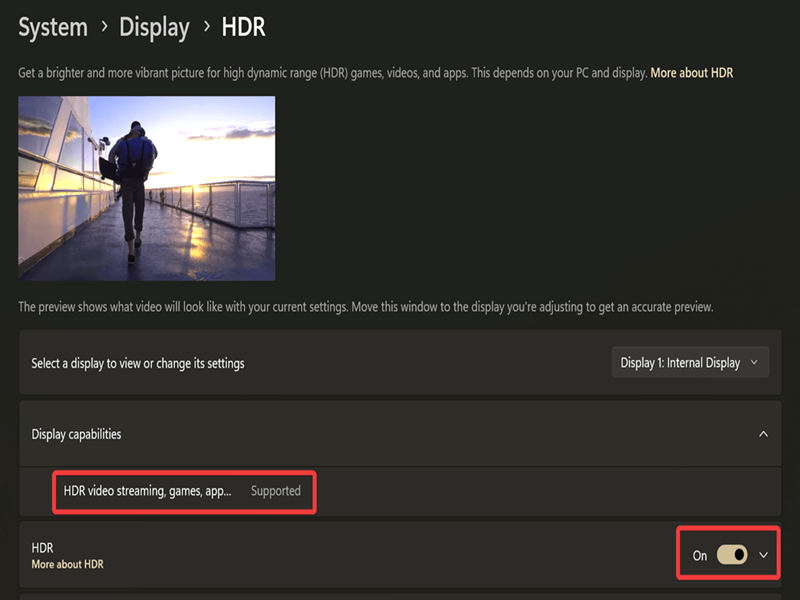
If everything is in order, you can enable HDR right there by toggling it on. You can also quickly turn it off/on with a keyboard shortcut: Win + Alt + B.
With that out of the way, let's move on to Auto HDR.
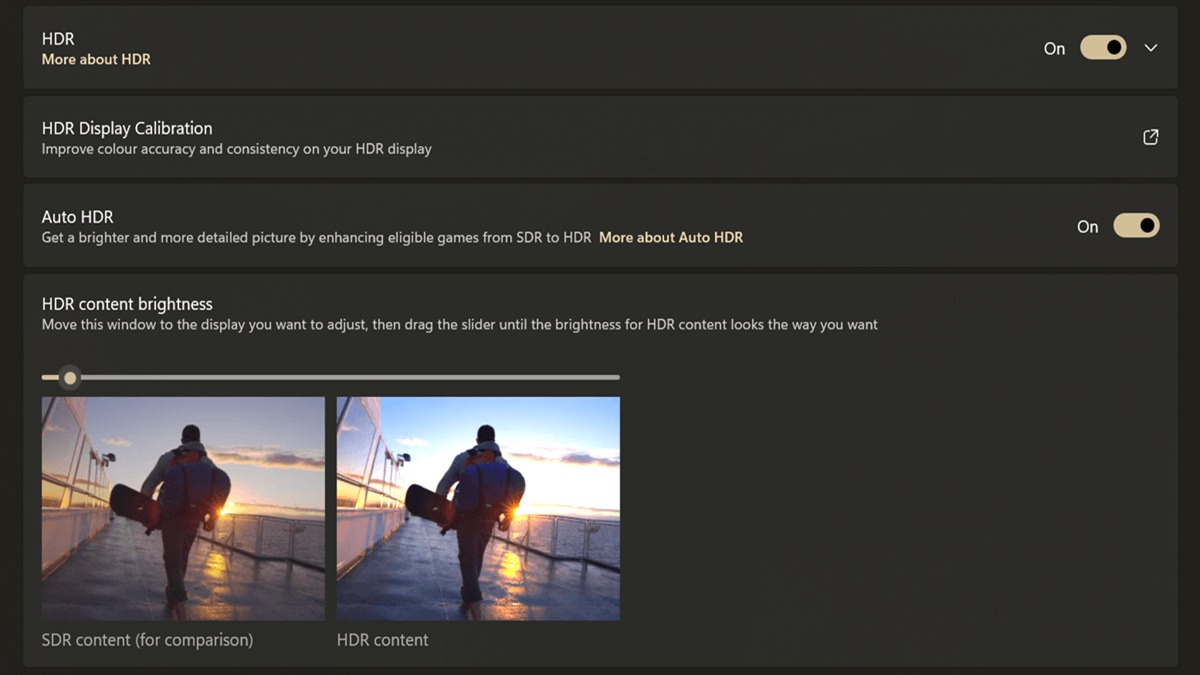
Enable/disable Auto HDR in HDR Settings
If you followed the previous section, you don't have to move:
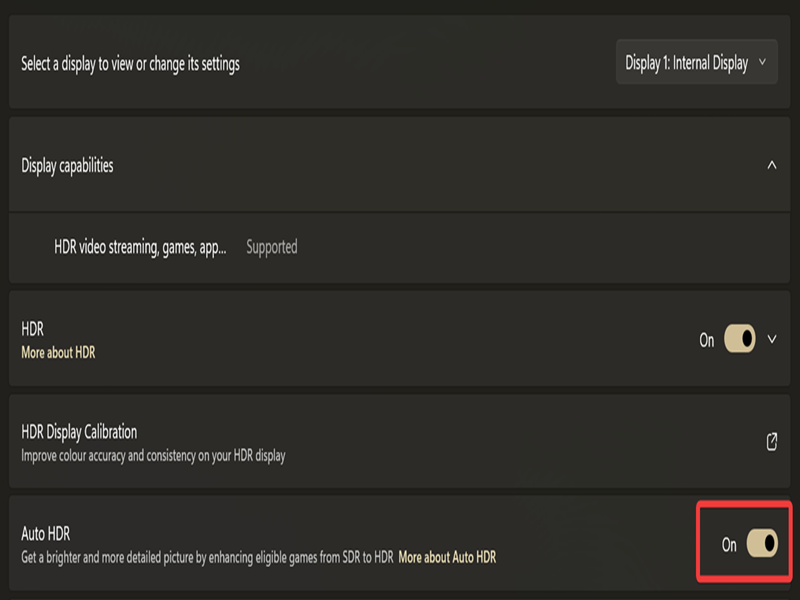
- Go to Settings > System > Display > HDR.
- Toggle on/off Auto HDR right under HDR Display Calibration.
It's as simple as that. Turning it on will also enable optimizations for windowed games.
Enable/disable Auto HDR in Graphics Settings
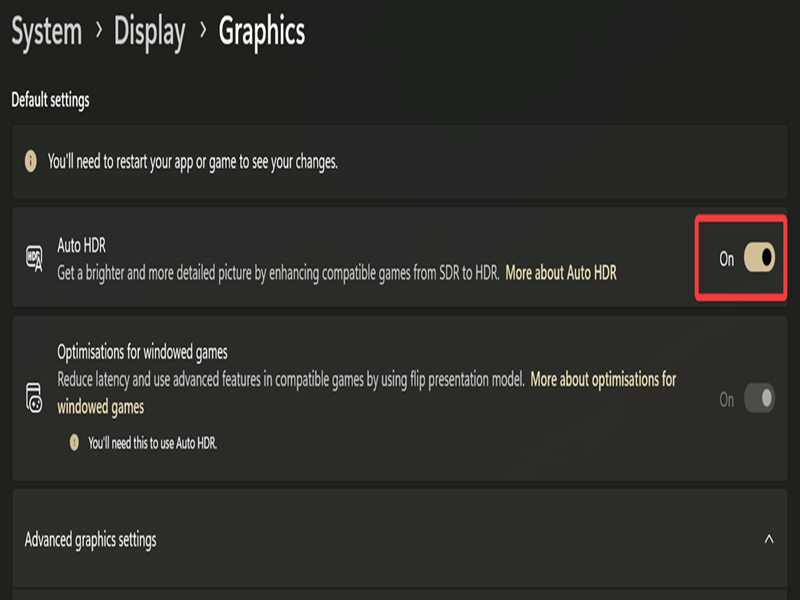
Depending on your Windows 11 build (25281 and newer), you can also access it this way:
- Go to Settings > System > Display > Graphics.
- Toggle on/off Auto HDR. It should be there, right at the top.
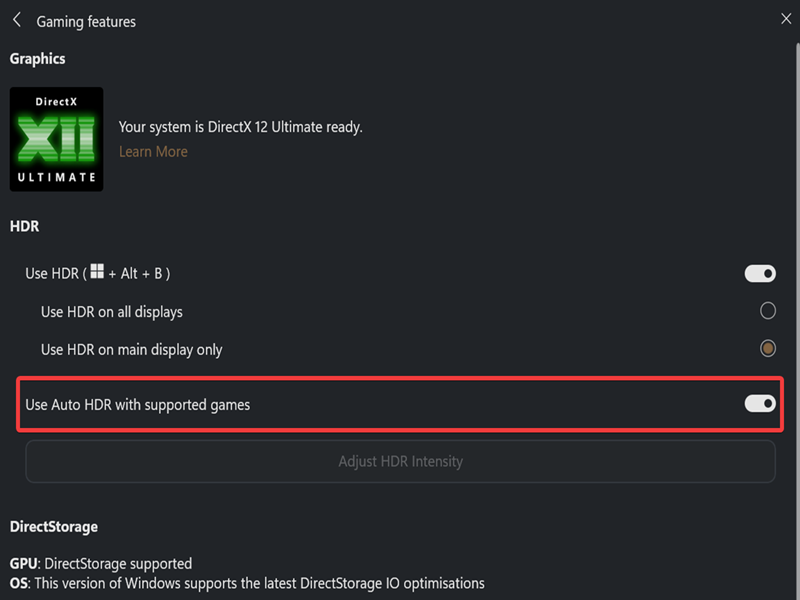
Enable/disable Auto HDR via Game Bar
Alternatively, you can use the Game Bar. You'll need to have the Xbox PC app downloaded and installed to access it, though.
Here are the steps:
- Press Win + G to bring it up.
- Click the Settings gear, then select More settings > Gaming features.
- Toggle on/off Use Auto HDR with supported games.
Enable/disable Auto HDR via Registry Editor
As always with Registry editing, you should closely follow the instructions so you don't accidentally break something important. You can also set up a system restore point just in case.
- Press Win + R, type regedit.exe, and press Enter. Or just look it up via Windows Search and open it.
- On the left side of the editor, go to HKEY_CURRENT_USER\Software\Microsoft\DirectX\UserGpuPreferences.
- In the UserGpuPreferences key, double-click DirectXUserGlobalSettings.
- To enable Auto HDR: Set the values for both SwapEffectUpgradeEnable and AutoHDREnable to 1. Click OK.
- To disable Auto HDR: Set the value for AutoHDREnable to 0. Click OK.

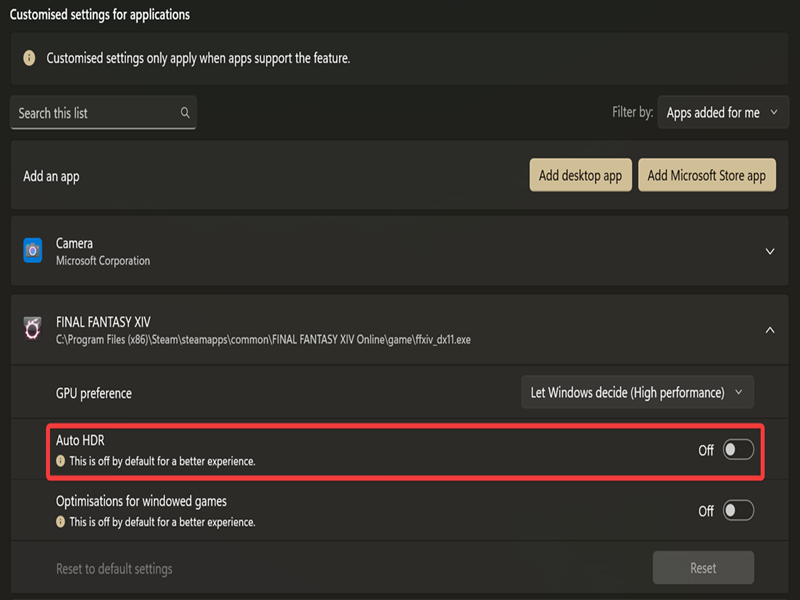
Enable/disable Auto HDR per app
Once you globally turn on Auto HDR, you can specify which apps to leave it on or off for. Let me show you how:
- Go to Settings > System > Display > Graphics.
- You should see a list of apps. Find the one you want to customize and click it.
- Toggle Auto HDR on or off.
And that's it! It works better in some games, worse in others, so you'll want to experiment a bit. It also makes the most difference in high-contrast scenes, so you might not notice much in flat, simple lighting. You can calibrate it and improve its color consistency with Windows HDR Calibration.
Additionally, not all HDR-capable monitors are made equal. You'll get a vastly better performance on an OLED display than on an IPS one, for example. But it doesn't take an expert to tell you that.
Lastly, HDR implementation in Windows is generally finicky, so don't expect excellent results out of the box. I tried setting it up properly once or twice, got frustrated, and gave up. It wasn't worth the effort on my 500-nit IPS display anyway. But I wish you better luck!

|
selma citakovic
Selma is a gamer, geek and gremlin hunter with a passion for cyber security and smashing Windows bugs before they bite. She’s IBM-certified, loves real freeware, despises bloatware, and powers most of her troubleshooting with an unhealthy amount of coffee. |
comments powered by Disqus
