


How to Use Disk Cleanup in Windows 11 (Step-by-Step)
By selma čitakovićon 07/18/2026 |
![{$insert['content_title']](/content/file/6251_image2.jpg
)
Introduced in Windows 98, Disk Cleanup is one of those old tools that's been part of Windows for generations. It hasn't been deprecated in Windows 11 - it's still very much active. You can use it to quickly free up disk space right from your Settings.
Additionally, there's Storage Sense, the more recent addition. If you toggle it on, it will automatically delete temporary files whenever you're running low on space. However, Disk Cleanup offers more options and is ideal for one-time manual cleans. Also, call me old-fashioned, but I prefer it over Storage Sense.
Here's how to use it!
Clean up the C: drive via Settings
Disk Cleanup is integrated into the Storage Settings in Windows 11. To find it:
- Go to Settings > System > Storage.
- Click on Cleanup Recommendations under Storage management.
- You'll see several sections, including Temporary files, Large or unused files, Files synced to the cloud, etc. Click to expand them and check all the items you want to delete.
- Click on the Clean up button in each section once you select the files.
- Confirm your decision by hitting the Continue button.
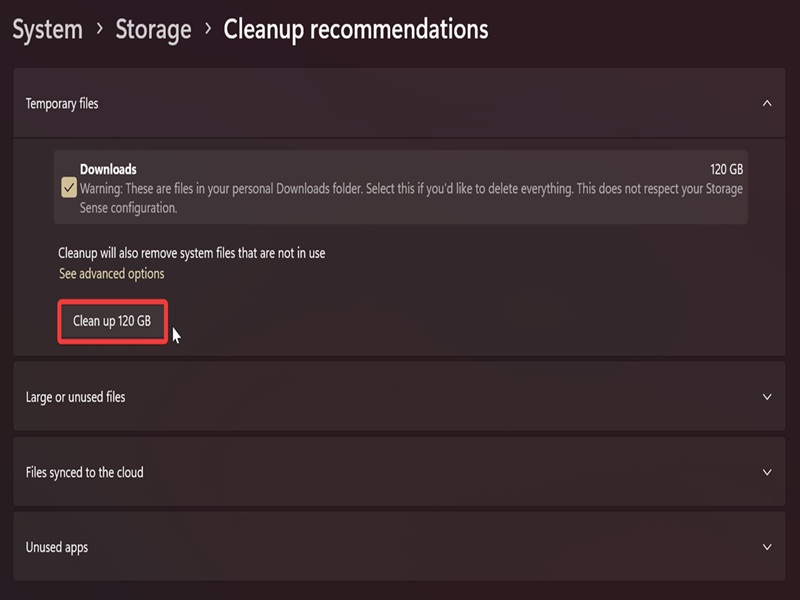
Additionally, you can click on See advanced options under Temporary files to select specific types of temporary files.
Clean up a specific drive via Settings
You can also target specific drives in the same section:
- Go to Settings > System > Storage.
- Select Advanced storage settings under Storage management.
- Click on Storage used on other drives right under it.
- Select the drive you want.
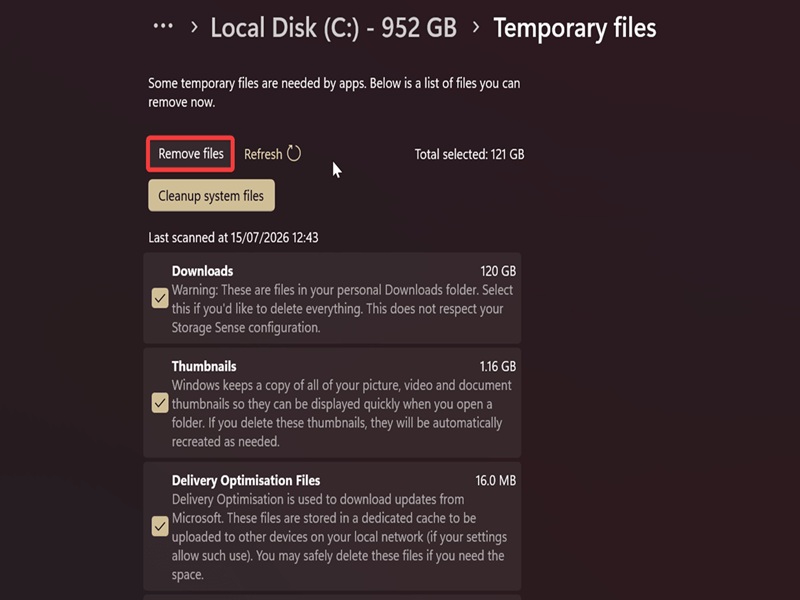
- Now, click on Temporary files.
- Uncheck the ones you want to keep, and check the ones you'd like to delete.
- Click the Remove files button at the top.
- Click on Continue to confirm.
Clean up a specific drive via cleanmgr.exe
Or, you can run the tool yourself:
- Press Win + R, type cleanmgr.exe, and hit Enter.
- Select the drive you want to clean, then click OK.
- Check the items you'd like to delete, and click OK.
- Select Delete Files on the confirmation window.
- Wait for the process to finish.
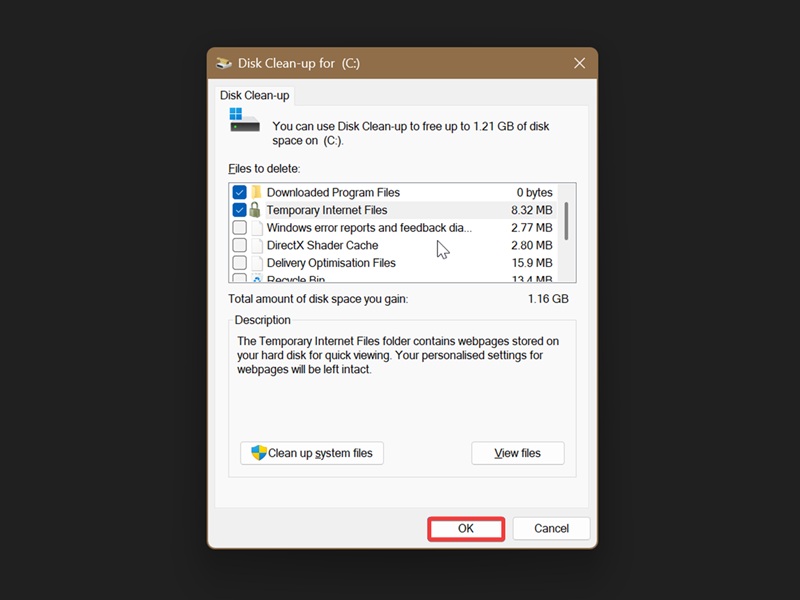
Additionally, if you'd like to target system files, hit the Clean up system files button instead (in step 3). You'll need elevated privileges for this, but the remaining steps are the same.
However, you should know that there's a last access limit on temp files if you use this method. Cleanmgr.exe won't display temporary files you've accessed in the last 7 days.
Clean up a specific drive via File Explorer
Alternatively, you can try this approach instead:
- Open File Explorer and go to This PC.
- Select a drive, click the three dots on the command bar, and click on Cleanup.
- Check the items you'd like to delete, and click OK.
- Confirm by clicking on Delete Files.
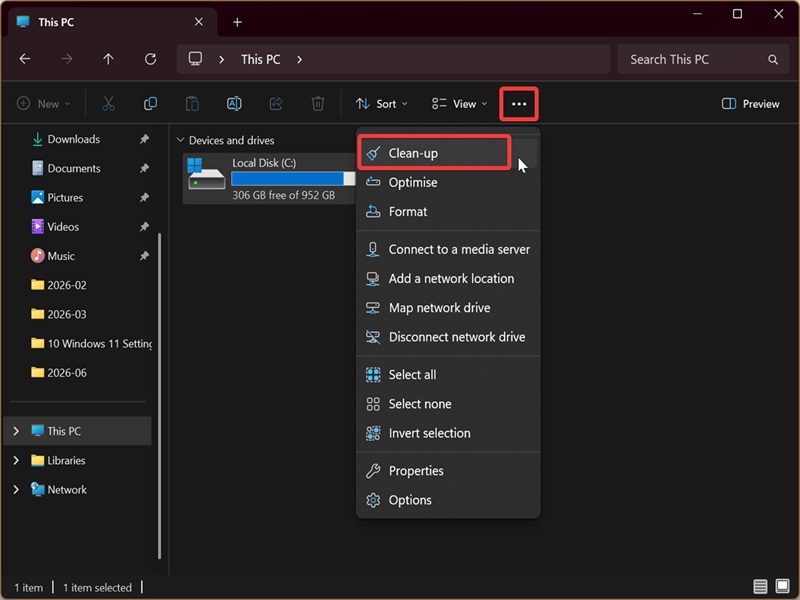
Just like in the previous method, you can also select Clean up system files.
Overall, Disk Cleanup might not be as comprehensive as some third-party tools, but it's convenient and safe. Most importantly, you can always count on it if you need to quickly reclaim much-needed storage space.

|
selma citakovic
Selma is a gamer, geek and gremlin hunter with a passion for cyber security and smashing Windows bugs before they bite. She’s IBM-certified, loves real freeware, despises bloatware, and powers most of her troubleshooting with an unhealthy amount of coffee. |
comments powered by Disqus
