


Tired of Microsoft Accounts? Here's How To Disable Them
By selma čitakovićon 06/09/2026 |
![{$insert['content_title']](/content/file/6173_image2.jpg
)
Microsoft's general push towards online accounts has hardly been subtle. It's practically mandatory while installing Windows 11. If you want to create a local account during setup, you'll have to jump through an astonishing number of hoops to get there.
So, if you'd like to fully commit to using local accounts, I've got good news for you. You can configure it so that users can't add new Microsoft accounts and/or sign in with existing ones. Or, to be more precise, you can disable and prevent:
- The creation of new online accounts
- Signing in with a Microsoft account
- Switching from a local account to an online one
- Connecting a domain account to a Microsoft one.
However, you can still add Microsoft accounts as a sign-in option for specific apps in the Settings. But that's pretty much the only exception; you can otherwise minimize their presence and usage.
Here's how!
Via Local Security Policy
You can configure the Accounts: Block Microsoft accounts security policy. However, only certain Windows editions support Local Security Policy. This includes Windows Pro, Education, and Enterprise (sorry, Home edition owners!). If you can't use it, try the next method.
Make sure you've signed in as an administrator, and do the following:
- Press Win + R, type secpol.msc, and hit Enter.
- On the left, navigate to Local Policies > Security Options.
- Double-click Accounts: Block Microsoft accounts on the right.
- In the Local Security Setting tab, click on the dropdown menu and select either Users can't add Microsoft accounts or Users can't add or log on with Microsoft accounts.
- Click OK.
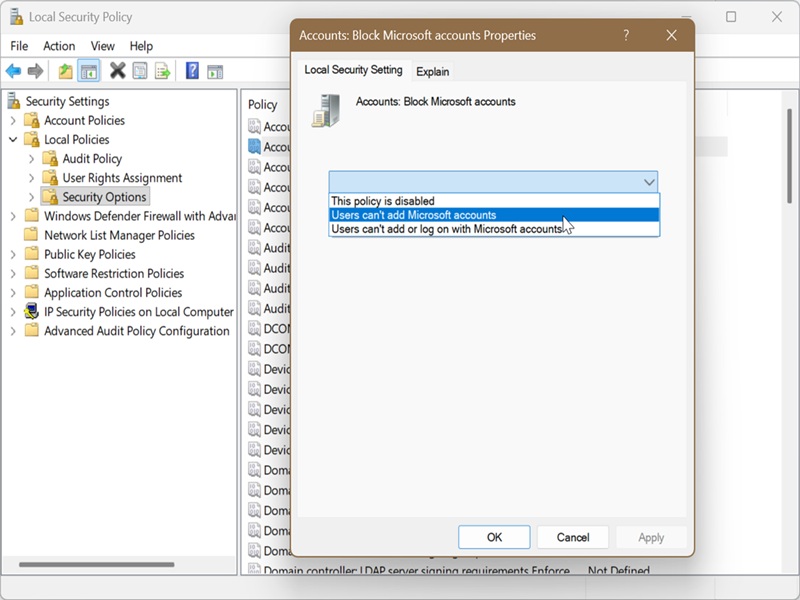
If you want to undo this, select This policy is disabled from the same menu. It's the default setting.
Via Registry Editor
Alternatively, you can create a DWORD value in the registry to disable adding online accounts and/or signing in with them. Before doing so, you can create a system restore point as a safety measure, in case you misclick something. But as long as you follow the instructions, it should be fine.
Here are the steps:
- Type Registry Editor in Windows Search, and click on Run as administrator.
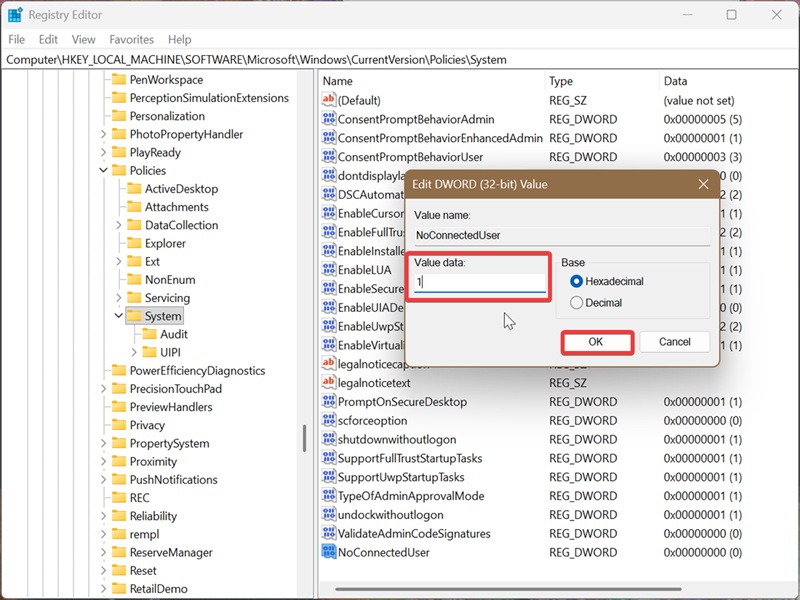
- Navigate to Computer\HKEY_LOCAL_MACHINE\SOFTWARE\Microsoft\Windows\CurrentVersion\Policies\System. You can also paste this in the address bar.
- While in the System folder, right-click an empty spot and select New > DWORD (32-bit) Value. Name it NoConnectedUser.
- To block new Microsoft accounts: Double-click NoConnectedUser, type 1 in the Value data field, and click OK.
- To prevent new Microsoft accounts and signing in with existing ones: Double-click NoConnectedUser, type 3 in the Value data field, and click OK.
To undo this, right-click NoConnectedUser and select Delete.
Both methods work, but the first one is a bit more user-friendly. Anyway, enjoy your new mostly local Windows!

|
selma citakovic
Selma is a gamer, geek and gremlin hunter with a passion for cyber security and smashing Windows bugs before they bite. She’s IBM-certified, loves real freeware, despises bloatware, and powers most of her troubleshooting with an unhealthy amount of coffee. |
comments powered by Disqus
