


How to Turn AutoPlay On or Off in Windows 10 & 11
By Timothy Tibbettson 06/26/2023 |
Windows AutoPlay goes back as far as we can remember, and it's one of those settings many prefer to disable. In Windows 10, you can enable or disable Windows AutoPlay for removable drives, memory cards, smartphones, and more.
Depending on the device, you might see:
Take no action
Open folder to view files
Ask me every time
Configure Storage Settings
Play (list of media players)
We can make the changes in Settings or enable or disable Autoplay with a registry file.
Video tutorial:
How to Turn AutoPlay On or Off in Windows 10 & 11 - Settings
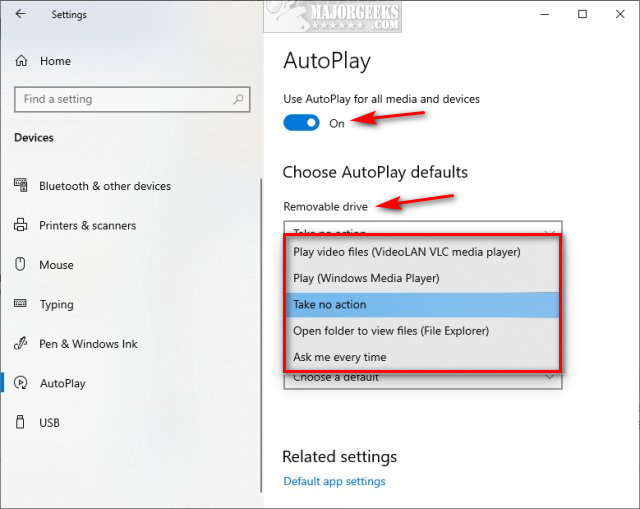
For Windows 10, click on Start > Settings > Devices > AutoPlay.
For Windows 11, click on Start > Settings > Devices > Bluetooth & devices > AutoPlay
Check or uncheck Use AutoPlay for all media devices to completly enable, or disable AutoPlay.
Click the dropdown next to any available devices to view and select from a list of available options.
How to Turn AutoPlay On or Off in Windows 10 & 11 - Control Panel
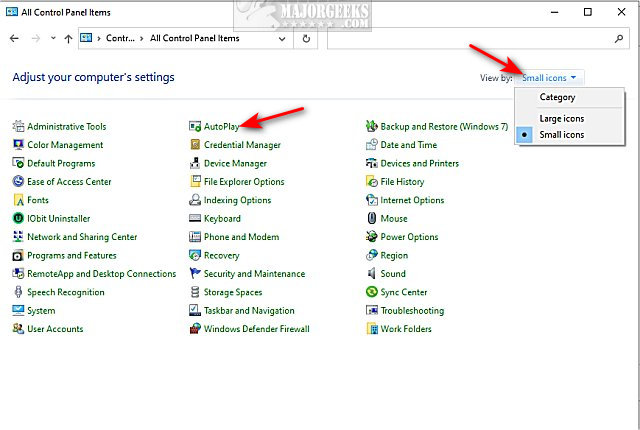
Open the Control Panel
Click on AutoPlay.
If you don't see AutoPlay, click on Small or Large icons next to View by.
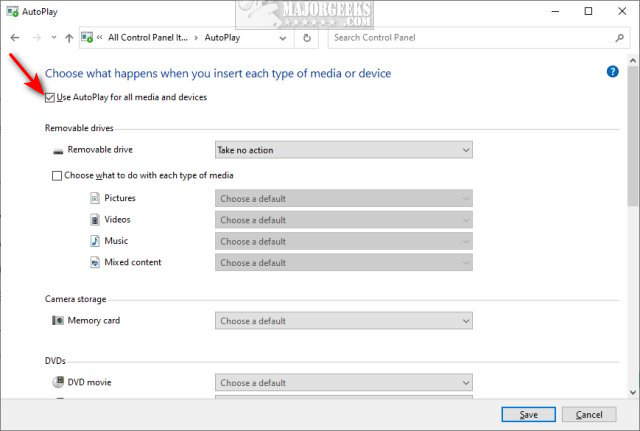
Check or uncheck the box next to Use AutoPlay for all media and devices.
How to Turn AutoPlay On or Off in Windows 10 & 11 - Registry Files
If you want to disable or enable AutoPlay for all devices, you can do so with our registry files.
The registry tweak is simple and should work on Windows 11, 10, 8, and 7.
Download Turn Windows AutoPlay On or Off and extract the two files.
Double-click Turn Off AutoPlay.reg or Turn On AutoPlay.reg (Default) to Turn Windows AutoPlay On or Off.
Click Yes when prompted by User Account Control.
Click Yes when prompted by Registry Editor.
Click OK when prompted by the Registry Editor.
Advanced users can go to HKEY_CURRENT_USER\Software\Microsoft\Windows\CurrentVersion\Explorer\AutoplayHandlers and change the DisableAutoPlay DWORD to 1 for off, 0 for on.
This tweak is included as part of MajorGeeks Windows Tweaks.
Similar:
How to Reset All File Associations to Microsoft Defaults on Windows 10
Manage Your Default Apps or Reset All File Associations
How to Optimize USB Drives for Better Performance
comments powered by Disqus
Depending on the device, you might see:
We can make the changes in Settings or enable or disable Autoplay with a registry file.
How to Turn AutoPlay On or Off in Windows 10 & 11 - Settings
For Windows 10, click on Start > Settings > Devices > AutoPlay.
For Windows 11, click on Start > Settings > Devices > Bluetooth & devices > AutoPlay
Check or uncheck Use AutoPlay for all media devices to completly enable, or disable AutoPlay.
Click the dropdown next to any available devices to view and select from a list of available options.
How to Turn AutoPlay On or Off in Windows 10 & 11 - Control Panel
Open the Control Panel
Click on AutoPlay.
If you don't see AutoPlay, click on Small or Large icons next to View by.
Check or uncheck the box next to Use AutoPlay for all media and devices.
How to Turn AutoPlay On or Off in Windows 10 & 11 - Registry Files
If you want to disable or enable AutoPlay for all devices, you can do so with our registry files.
The registry tweak is simple and should work on Windows 11, 10, 8, and 7.
Download Turn Windows AutoPlay On or Off and extract the two files.
Double-click Turn Off AutoPlay.reg or Turn On AutoPlay.reg (Default) to Turn Windows AutoPlay On or Off.
Click Yes when prompted by User Account Control.
Click Yes when prompted by Registry Editor.
Click OK when prompted by the Registry Editor.
Advanced users can go to HKEY_CURRENT_USER\Software\Microsoft\Windows\CurrentVersion\Explorer\AutoplayHandlers and change the DisableAutoPlay DWORD to 1 for off, 0 for on.
This tweak is included as part of MajorGeeks Windows Tweaks.
Similar:
comments powered by Disqus
