


VMWare Failed to Get Exclusive Lock on the Configuration File Error
By Timothy Tibbettson 06/15/2023 |
Recently while having some issues with VMWare, we received an error that said, "Failed to get exclusive lock on the configuration file. Another VMware process might be running using the configuration file." Once we clicked on OK, an "Internal error" followed. We found this easier to fix than expected. Here's how.
VMWare is a must-have here at MajorGeeks. We use VMWare to scan and test all the software found on MajorGeeks. Once VMWare broke, we had a real problem. The worst part was that we had just installed VMWare clean and could get Windows 10 installed once, but it wouldn't work, and we couldn't complete a second install.
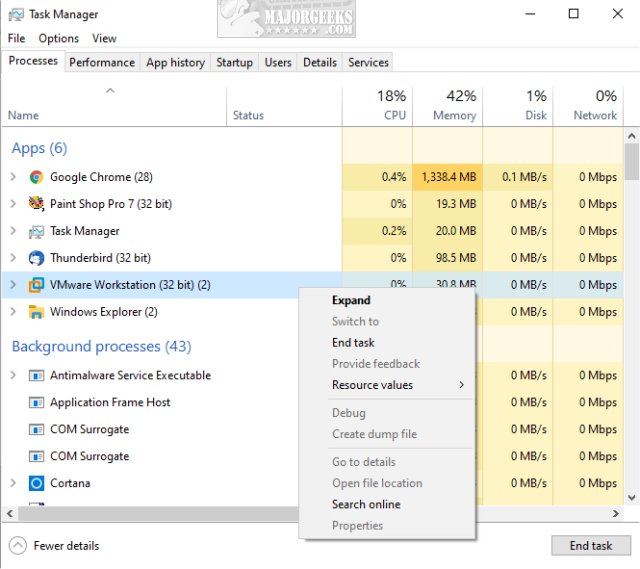
1: End VMware Process
Press CTRL + SHIFT + ESC, right-click on VMware and click on End task.
Often, you will see more than one process running. That's the problem.
Try VMware again.
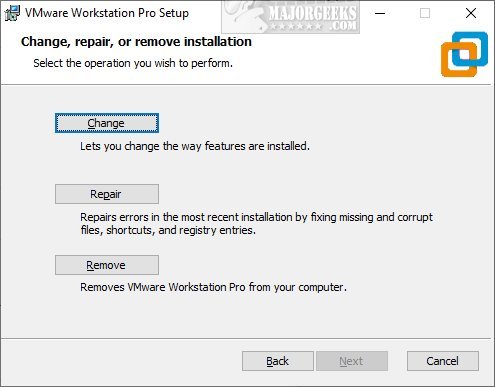
2: Repair VMWare Installation
We decided to go with repairing the installation before we uninstalled and reinstalled, and guess what? It worked. Not only did it work, but VMWare immediately found that there was a newer version of VMWare and the VMWare tools.
Click on Start > Settings > Apps. Scroll down to VMWare and click on that.
Click on Modify.
If you're told VMware is running, press CTRL + SHIFT + ESC, right-click on Vmware and click on End task.
Follow the prompts to install VMware. You may also update VMWare tools when you run VMWare for the first time.
3: Delete any .vmss and .vmem Files
Some suggestions we found included deleting all of the .vmss and .vmem files, which people say is the equivalent of pulling the plug on your computer. You can find these files located at C:UsersPublicDocumentsShared Virtual MachinesMicrosoft Windows 10 (64-bit).

Deleting these file may require you close all active VMWare processes by pressing CTRL + SHIFT + ESC and then click on Task Manager. Right-click on any running processes named VMWare and click on End Task.
If you can't delete these files, then booting into Safe Mode will do the trick; however, we found the next step worked for us without the hassle.
Similar:
Similar:
How to Run VMware Full Screen and Hide the 1 Pixel Toolbar
VMware Cannot Connect the Virtual Device sata0:1 Error
comments powered by Disqus
VMWare is a must-have here at MajorGeeks. We use VMWare to scan and test all the software found on MajorGeeks. Once VMWare broke, we had a real problem. The worst part was that we had just installed VMWare clean and could get Windows 10 installed once, but it wouldn't work, and we couldn't complete a second install.
1: End VMware Process
Press CTRL + SHIFT + ESC, right-click on VMware and click on End task.
Often, you will see more than one process running. That's the problem.
Try VMware again.
2: Repair VMWare Installation
We decided to go with repairing the installation before we uninstalled and reinstalled, and guess what? It worked. Not only did it work, but VMWare immediately found that there was a newer version of VMWare and the VMWare tools.
Click on Start > Settings > Apps. Scroll down to VMWare and click on that.
Click on Modify.
If you're told VMware is running, press CTRL + SHIFT + ESC, right-click on Vmware and click on End task.
Follow the prompts to install VMware. You may also update VMWare tools when you run VMWare for the first time.
3: Delete any .vmss and .vmem Files
Some suggestions we found included deleting all of the .vmss and .vmem files, which people say is the equivalent of pulling the plug on your computer. You can find these files located at C:UsersPublicDocumentsShared Virtual MachinesMicrosoft Windows 10 (64-bit).
Deleting these file may require you close all active VMWare processes by pressing CTRL + SHIFT + ESC and then click on Task Manager. Right-click on any running processes named VMWare and click on End Task.
If you can't delete these files, then booting into Safe Mode will do the trick; however, we found the next step worked for us without the hassle.
Similar:
Similar:
comments powered by Disqus
