


Find Out When You Installed the Latest Windows 11 Feature Update
By selma čitakovićon 11/08/2026 |
Wondering when you installed the latest feature update? Windows 11 keeps track of the installation dates of the last major updates for your system, like 26H2, 25H2, etc.
So, if you need to check the dates and refresh your memory, read on.
Via Settings
You can check the date directly here:
- Go to Settings > System > About (at the very bottom of the page).
- Under Windows specifications or Windows info, look for the date next to Installed on.
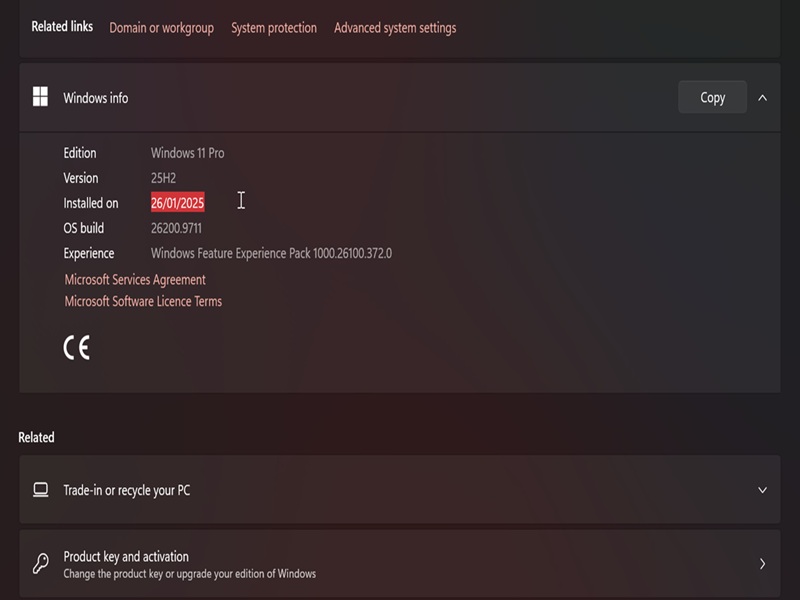
So, in my case, that's the date when I installed Windows 11 25H2.
Via systeminfo command
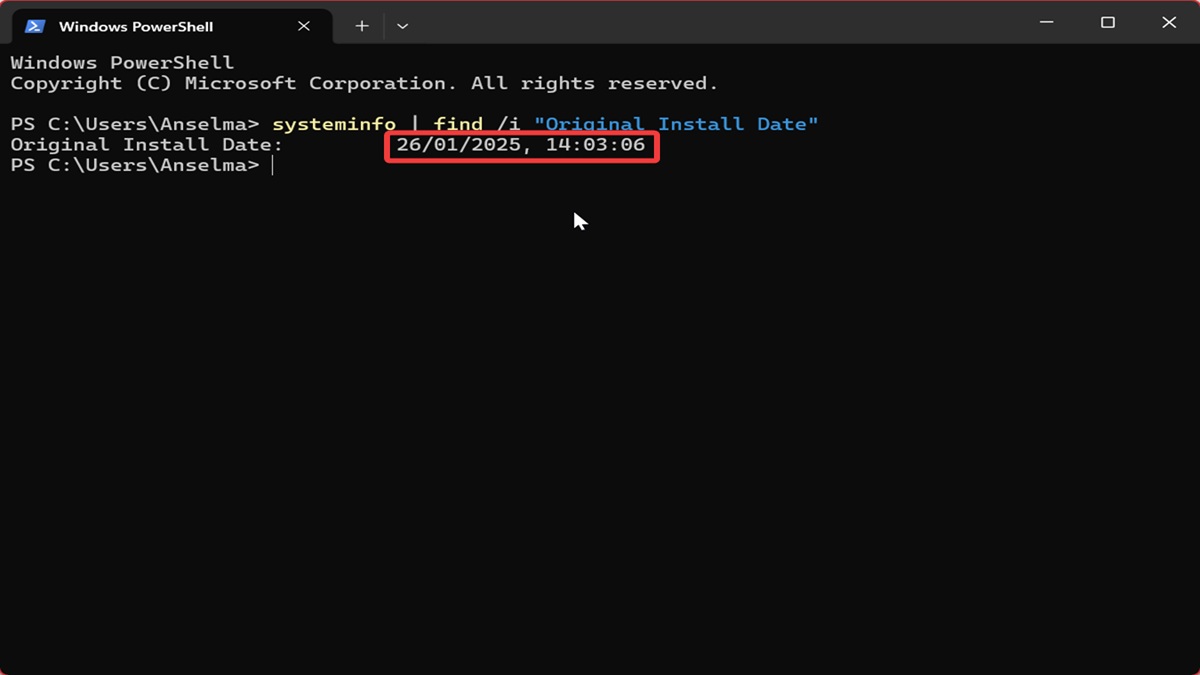
Or, you can use the systeminfo command. It's handy if you need to know specific configuration info about your PC and operating system.
Here are the steps:
- Press Win + X, select Terminal, and open either Command Prompt or PowerShell. The command is the same for both.
- Copy and paste this command, and hit Enter: systeminfo | find /i "Original Install Date"
Via Get-CimInstance command
Alternatively, you can try this one instead:
- Press Win + X, select Terminal, and open PowerShell or Command Prompt.
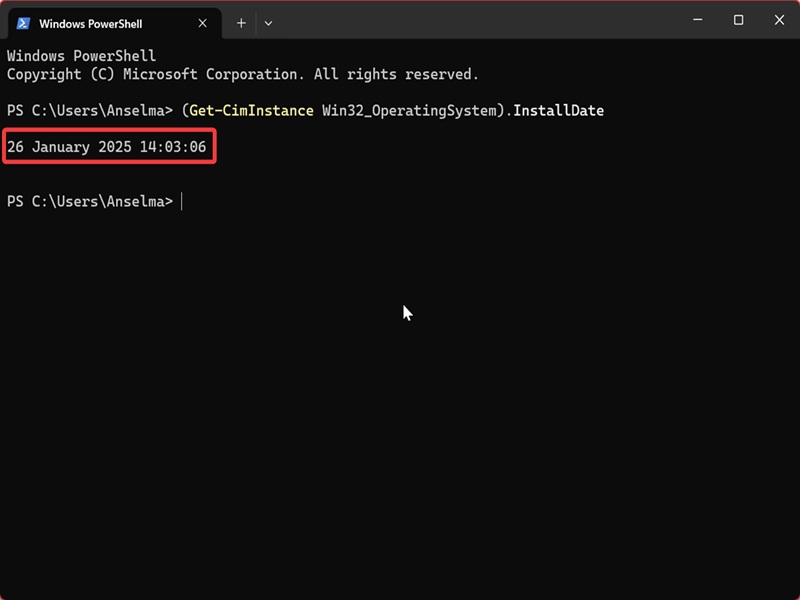
- For PowerShell, type this command and press Enter: (Get-CimInstance Win32_OperatingSystem).InstallDate
- For Command Prompt: PowerShell (Get-CimInstance Win32_OperatingSystem).InstallDate
Via WMI command
You can also use a WMI cmdlet in PowerShell:
- Press Win + X, select Terminal, and open PowerShell. (It won't work with Command Prompt.)
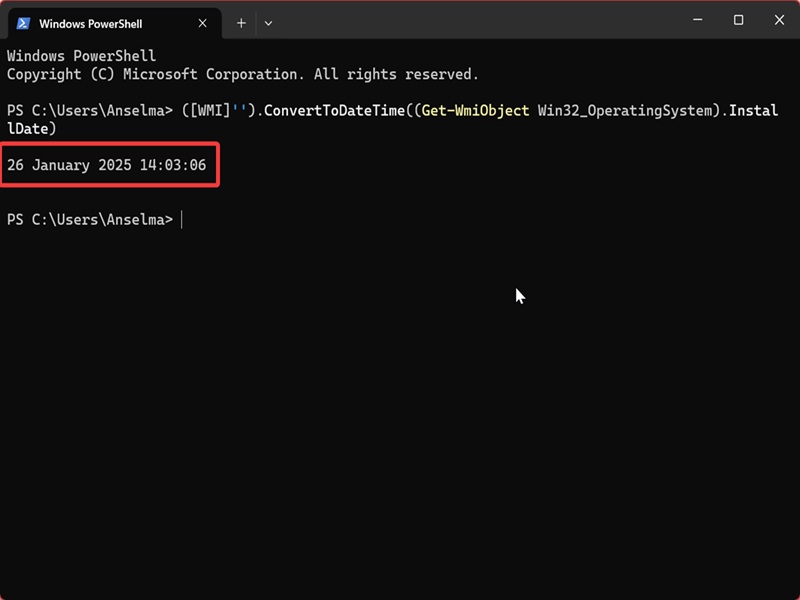
- Paste this command and hit Enter: ([WMI]'').ConvertToDateTime((Get-WmiObject Win32_OperatingSystem).InstallDate)
Via PowerShell
Here's one last command you can try out:
- Press Win + X, click Terminal, and open PowerShell.
- Copy and paste this command, and press Enter: Get-ChildItem -Path HKLM:\System\Setup\Source* | ForEach-Object {Get-ItemProperty -Path Registry::$_} | Select-Object ProductName, ReleaseID, CurrentBuild, @{n="Install Date"; e={([DateTime]'1/1/1970').AddSeconds($_.InstallDate)}} | Sort-Object "Install Date"
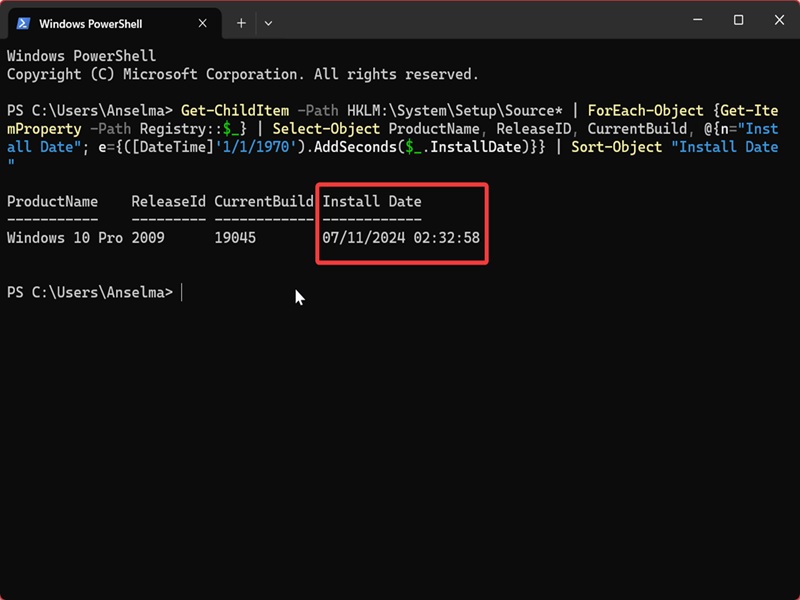
However, this one's output differs from the previous ones.
That's because it displays the time when I first installed Windows 10 Pro. I later upgraded to Windows 11, but this shows when I first clean-installed Windows 10.
Additionally, if you're looking for app installation dates, we've got you covered. We hope these tips help you with your search!

|
selma citakovic
Selma is a gamer, geek and gremlin hunter with a passion for cyber security and smashing Windows bugs before they bite. She’s IBM-certified, loves real freeware, despises bloatware, and powers most of her troubleshooting with an unhealthy amount of coffee. |
comments powered by Disqus
Find Out When You Installed the Latest Windows 11 Feature Update
Google Drive image folder
Wondering when you installed the latest feature update? Windows 11 keeps track of the installation dates of the last major updates for your system, like 26H2, 25H2, etc.
So, if you need to check the dates and refresh your memory, read on.
Via Settings
You can check the date directly here:
- Go to Settings > System > About (at the very bottom of the page).
- Under Windows specifications or Windows info, look for the date next to Installed on.
So, in my case, that's the date when I installed Windows 11 25H2.
Via systeminfo command
Or, you can use the systeminfo command. It's handy if you need to know specific configuration info about your PC and operating system.
Here are the steps:
- Press Win + X, select Terminal, and open either Command Prompt or PowerShell. The command is the same for both.
- Copy and paste this command, and hit Enter: systeminfo | find /i "Original Install Date"
Via Get-CimInstance command
Alternatively, you can try this one instead:
- Press Win + X, select Terminal, and open PowerShell or Command Prompt.
- For PowerShell, type this command and press Enter: (Get-CimInstance Win32_OperatingSystem).InstallDate
- For Command Prompt: PowerShell (Get-CimInstance Win32_OperatingSystem).InstallDate
Via WMI command
You can also use a WMI cmdlet in PowerShell:
- Press Win + X, select Terminal, and open PowerShell. (It won't work with Command Prompt.)
- Paste this command and hit Enter: ([WMI]'').ConvertToDateTime((Get-WmiObject Win32_OperatingSystem).InstallDate)
Via PowerShell
Here's one last command you can try out:
- Press Win + X, click Terminal, and open PowerShell.
- Copy and paste this command, and press Enter: Get-ChildItem -Path HKLM:\System\Setup\Source* | ForEach-Object {Get-ItemProperty -Path Registry::$_} | Select-Object ProductName, ReleaseID, CurrentBuild, @{n="Install Date"; e={([DateTime]'1/1/1970').AddSeconds($_.InstallDate)}} | Sort-Object "Install Date"
However, this one's output differs from the previous ones.
That's because it displays the time when I first installed Windows 10 Pro. I later upgraded to Windows 11, but this shows when I first clean-installed Windows 10.
Additionally, if you're looking for app installation dates, we've got you covered. We hope these tips help you with your search!
Find Out When You Installed the Latest Windows 11 Feature Update
Google Drive image folder
Wondering when you installed the latest feature update? Windows 11 keeps track of the installation dates of the last major updates for your system, like 26H2, 25H2, etc.
So, if you need to check the dates and refresh your memory, read on.
Via Settings
You can check the date directly here:
- Go to Settings > System > About (at the very bottom of the page).
- Under Windows specifications or Windows info, look for the date next to Installed on.
So, in my case, that's the date when I installed Windows 11 25H2.
Via systeminfo command
Or, you can use the systeminfo command. It's handy if you need to know specific configuration info about your PC and operating system.
Here are the steps:
- Press Win + X, select Terminal, and open either Command Prompt or PowerShell. The command is the same for both.
- Copy and paste this command, and hit Enter: systeminfo | find /i "Original Install Date"
Via Get-CimInstance command
Alternatively, you can try this one instead:
- Press Win + X, select Terminal, and open PowerShell or Command Prompt.
- For PowerShell, type this command and press Enter: (Get-CimInstance Win32_OperatingSystem).InstallDate
- For Command Prompt: PowerShell (Get-CimInstance Win32_OperatingSystem).InstallDate
Via WMI command
You can also use a WMI cmdlet in PowerShell:
- Press Win + X, select Terminal, and open PowerShell. (It won't work with Command Prompt.)
- Paste this command and hit Enter: ([WMI]'').ConvertToDateTime((Get-WmiObject Win32_OperatingSystem).InstallDate)
Via PowerShell
Here's one last command you can try out:
- Press Win + X, click Terminal, and open PowerShell.
- Copy and paste this command, and press Enter: Get-ChildItem -Path HKLM:\System\Setup\Source* | ForEach-Object {Get-ItemProperty -Path Registry::$_} | Select-Object ProductName, ReleaseID, CurrentBuild, @{n="Install Date"; e={([DateTime]'1/1/1970').AddSeconds($_.InstallDate)}} | Sort-Object "Install Date"
However, this one's output differs from the previous ones.
That's because it displays the time when I first installed Windows 10 Pro. I later upgraded to Windows 11, but this shows when I first clean-installed Windows 10.
Additionally, if you're looking for app installation dates, we've got you covered. We hope these tips help you with your search!
