


How to Add or Remove 'Select Power Plan' Context Menu in Windows 10 & 11
By Timothy Tibbetts |
Power Plans allow you to save energy, maximize performance, or balance the two. It would be nice to change power plans on the fly; for example, when gaming and with our registry files, you can change power plans directly from the Context Menu.
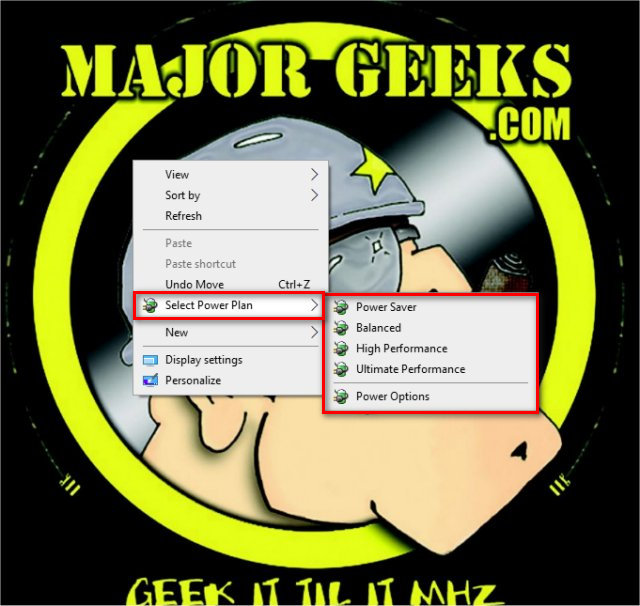
Three plans are available by default - Power Saver, High Performance, and Balanced. Windows 10 Pro users also have the Ultimate Performance plan.
After you apply the registry files:
Back up your Registry before proceeding.
Video tutorial:
Download Add or Remove Select Power Plan Context Menu and extract the two files.
Double-click Add Select Power Plan Context Menu.reg or Remove Select Power Plan Context Menu.reg (Default) to add or remove 'Select Power Plan' Context Menu.
Click Yes when prompted by User Account Control.
Click Yes when prompted by Registry Editor.
Click OK when prompted by the Registry Editor.
This tweak is included as part of MajorGeeks Windows Tweaks.
Similar:
How to Turn on the Windows 10 Ultimate Performance Power Plan
How to Change Power Plan Settings in Windows 10
How to Restore Missing Power Plans or the Add High Performance and Ultimate Performance Power Plans on Windows 10
How to Delete or Restore Windows Power Plans
How to Create a Power Plan in Windows
comments powered by Disqus
Three plans are available by default - Power Saver, High Performance, and Balanced. Windows 10 Pro users also have the Ultimate Performance plan.
After you apply the registry files:
Back up your Registry before proceeding.
Download Add or Remove Select Power Plan Context Menu and extract the two files.
Double-click Add Select Power Plan Context Menu.reg or Remove Select Power Plan Context Menu.reg (Default) to add or remove 'Select Power Plan' Context Menu.
Click Yes when prompted by User Account Control.
Click Yes when prompted by Registry Editor.
Click OK when prompted by the Registry Editor.
This tweak is included as part of MajorGeeks Windows Tweaks.
Similar:
comments powered by Disqus
