


How to Create a Power Plan in Windows
By Timothy Tibbettson 06/30/2023 |
At some point, many of us have edited our power plans. In this tutorial, we look at how to create a custom power plan to suit your needs.
One of the neat features about creating a power plan is the ability to give your power plan a custom name. Anyone who needs to keep multiple custom power plans can quickly identify what plan is required at any time.
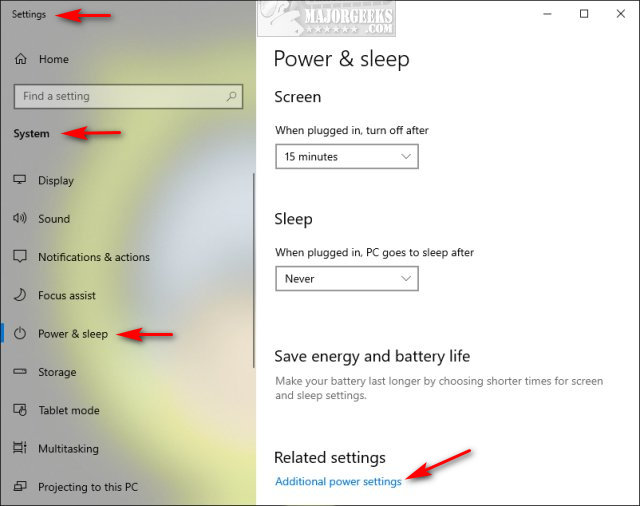
Click Start > Settings > System > Power & sleep > Additional power settings.
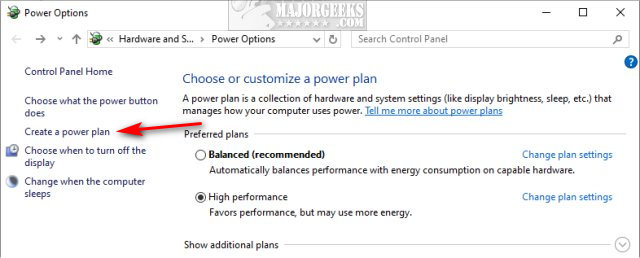
Click Create a power plan.
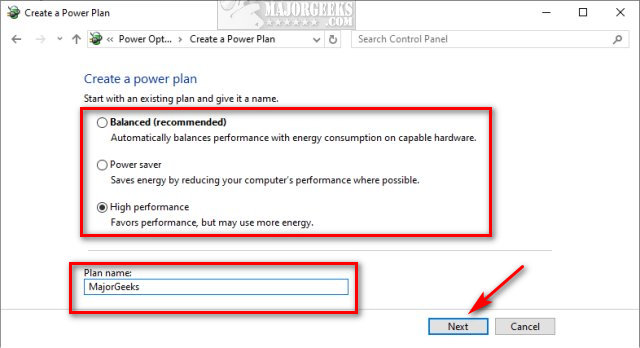
Chose from your existing power plans and enter a Plan name. Click Next.
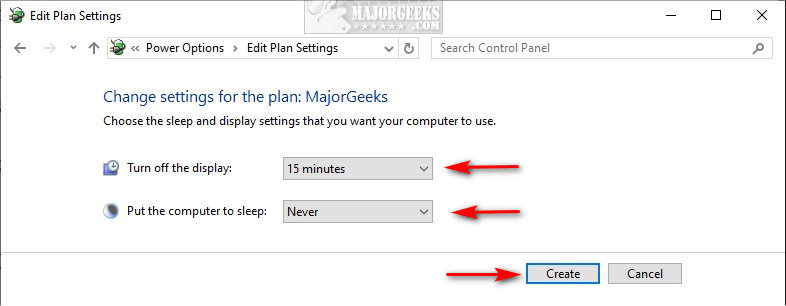
Choose a time to Turn off the display and Put the computer to sleep.
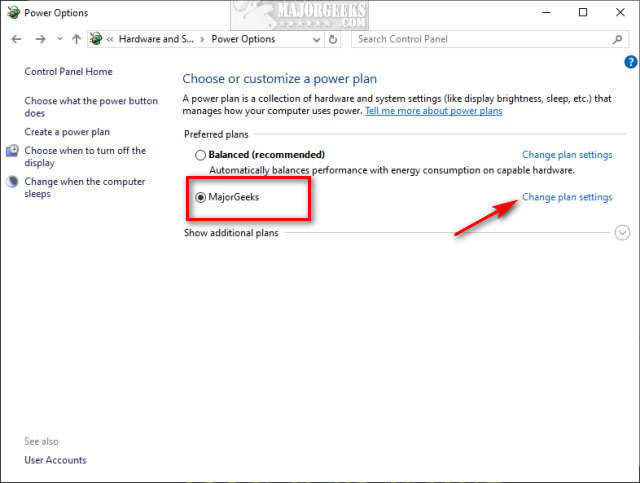
To make more advanced changes, click on your new power plan, and click on Change plan settings. Click on Change advanced power settings.
Similar:
How to Turn on the Windows 10 Ultimate Performance Power Plan
How to Import or Export a Power Plan in Windows 10
How to Turn Fast Startup On or Off in Windows 10
How to Delete or Restore Windows Power Plans
How to Add or Remove Sleep, Hibernate or Lock to the Start Menu in Windows 10.
Sleep, Hibernate or Shut Down Your PC?
How to See if Power Throttling is Enabled in Windows 10
comments powered by Disqus
One of the neat features about creating a power plan is the ability to give your power plan a custom name. Anyone who needs to keep multiple custom power plans can quickly identify what plan is required at any time.
Click Start > Settings > System > Power & sleep > Additional power settings.
Click Create a power plan.
Chose from your existing power plans and enter a Plan name. Click Next.
Choose a time to Turn off the display and Put the computer to sleep.
To make more advanced changes, click on your new power plan, and click on Change plan settings. Click on Change advanced power settings.
Similar:
comments powered by Disqus
