


How to Add 'Secure Delete' to the Windows 10, 8 and 7 Context Menu
By Timothy Tibbettson 06/30/2023 |
Anyone who needs to delete files regularly might appreciate the option to delete files securely by overwriting the blank space. In this tutorial, we show you how to add 'Secure Delete' to the right-click Context Menu.
By secure deleting a file, you will be bypassing the Recycle Bin. Once you secure delete a file using this method, it's gone.
To accomplish this, we're going to use SDelete from Microsoft Sysinternals and Mark Russinovich. SDelete will delete a selected file and overwrite the blank space three times, making recovery difficult, if not impossible.
If you're not comfortable with the registry, make a backup before proceeding.
Download Add Secure Delete to the Windows 10, 8, and 7 Context Menu.
Extract the files.
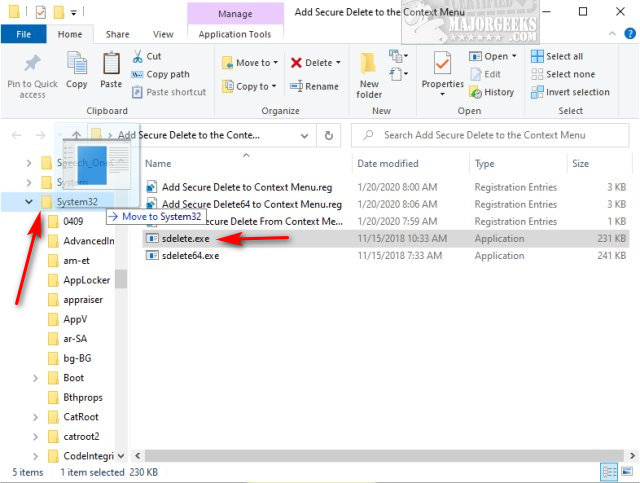
Open File Explorer (or Windows Explorer) and copy either sdelete.exe or sdelete64.exe to the C:\Windows\System32 folder. If you're not sure, copy sdelete.exe because it works for both 32-Bit and 64-Bit computers.
You will need to have administrator permission and click Continue when prompted.
Double-click Add Secure Delete to Context Menu.reg (sdelete.exe) or Add Secure Delete64 to Context Menu.reg (sdelete64.exe).
Right-click on any file to verify Secure Delete is now available.

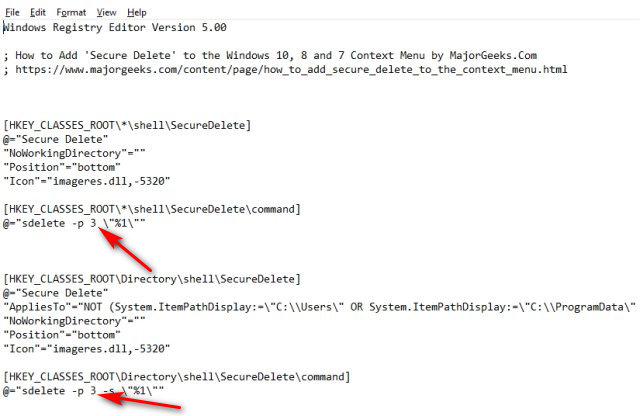
While three passes should be sufficient, some of you might want to do more passes. Open the registry file you used and look for the number 3 two times in the reg file. Change the 3 to however many passes you want.
Don't forget that the more passes you make, the longer it takes to delete a file. We wouldn't recommend going past 5.
To remove Secure Delete from the Context Menu, double-click on Remove Secure Delete From Context Menu.reg and delete sdelete.exe or sdelete64.exe from the C:\Windows\System32 folder.
Similar:
Support MajorGeeks and Show Your Geek Pride With MajorGeeks T-Shirts, Cups, and More!
How to Securely Delete Files in Windows 10 With PowerShell and Cipher
Best Drive Cleaner? CCleaner VS Wise Disk Cleaner VS PrivaZer
How to Use Storage Sense to Delete Junk Files in Windows 10 Automatically
How to Protect Files and Folders from Being Deleted
comments powered by Disqus
By secure deleting a file, you will be bypassing the Recycle Bin. Once you secure delete a file using this method, it's gone.
To accomplish this, we're going to use SDelete from Microsoft Sysinternals and Mark Russinovich. SDelete will delete a selected file and overwrite the blank space three times, making recovery difficult, if not impossible.
If you're not comfortable with the registry, make a backup before proceeding.
Download Add Secure Delete to the Windows 10, 8, and 7 Context Menu.
Extract the files.
Open File Explorer (or Windows Explorer) and copy either sdelete.exe or sdelete64.exe to the C:\Windows\System32 folder. If you're not sure, copy sdelete.exe because it works for both 32-Bit and 64-Bit computers.
You will need to have administrator permission and click Continue when prompted.
Double-click Add Secure Delete to Context Menu.reg (sdelete.exe) or Add Secure Delete64 to Context Menu.reg (sdelete64.exe).
Right-click on any file to verify Secure Delete is now available.
While three passes should be sufficient, some of you might want to do more passes. Open the registry file you used and look for the number 3 two times in the reg file. Change the 3 to however many passes you want.
Don't forget that the more passes you make, the longer it takes to delete a file. We wouldn't recommend going past 5.
To remove Secure Delete from the Context Menu, double-click on Remove Secure Delete From Context Menu.reg and delete sdelete.exe or sdelete64.exe from the C:\Windows\System32 folder.
Similar:
comments powered by Disqus
