


How To Delete a User Account in Windows 11
By selma čitakovićon 01/24/2026 |
Windows lets you create multiple accounts with separate files, settings, and apps. This means multiple users can share the same device while maintaining clear boundaries, thankfully. You're free to create either Microsoft or local accounts, although Windows "strongly encourages" you to choose the former option. Naturally, you can also remove them as soon as you don't need them.
However, you'll need to be logged in as an administrator to make those changes. You also can't delete an account you're currently signed into, which makes sense.
With that in mind, read on as I show you six methods to delete user accounts on Windows 11.
Settings
This is the simplest and most direct way to remove an account, but sadly, it doesn't always work. For example, if you've previously disabled the account, it won't show up in the Settings. You'll have to try other methods instead.
But let's try this first:
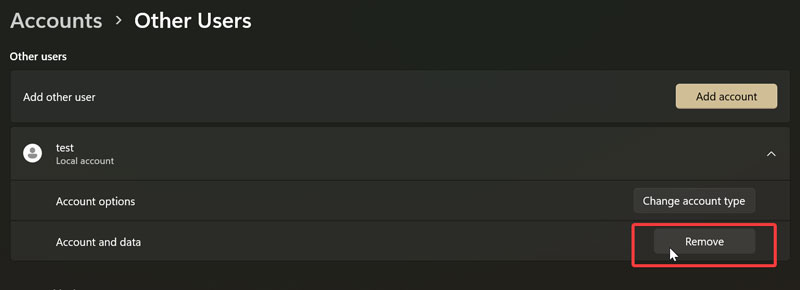
- Go to Settings > Accounts > Other users.
- Select the one you want to delete, then click Remove.
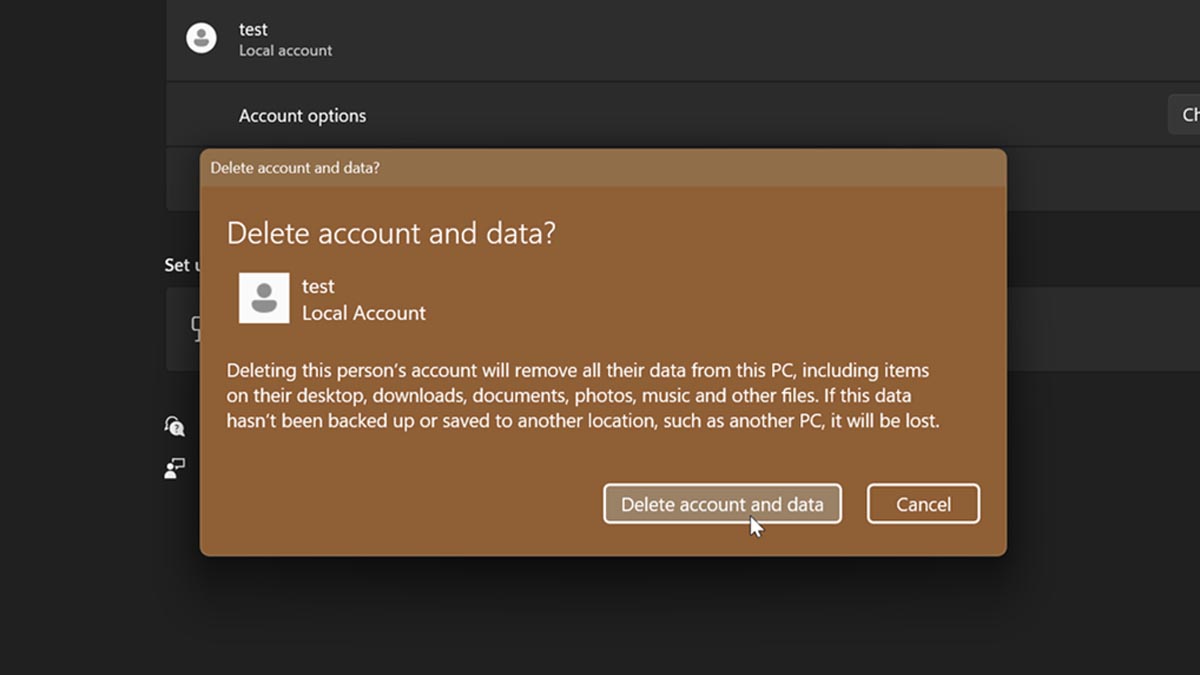
- You'll be asked to confirm your decision. Click on Delete account and data.
That's it!
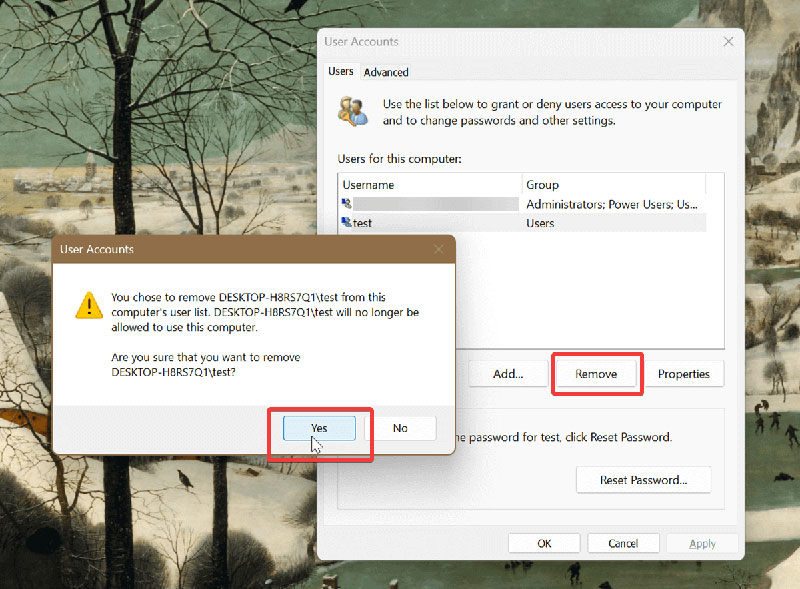
Control Panel
You can do the same with the Control Panel:
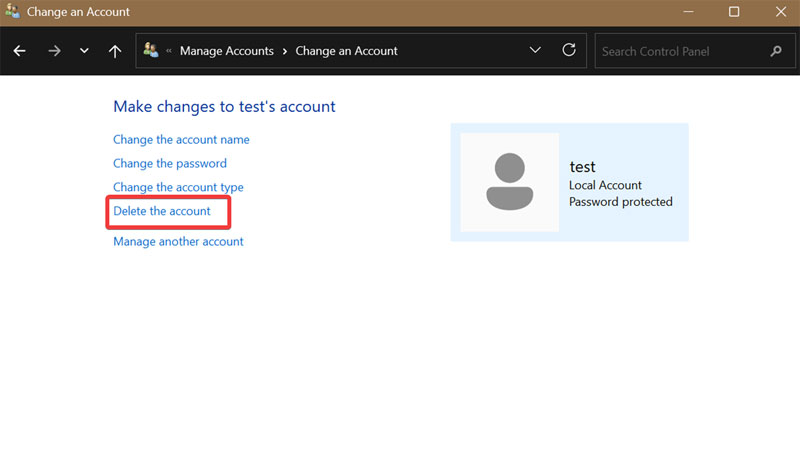
- Type Control Panel in Windows Search and open it.
- Select User Accounts, then Add or remove user accounts.
- Choose the one you want to get rid of, and click on Delete the account.
- You'll be asked whether you want to keep or delete the files.
- Confirm your decision by clicking on Delete Account.
Local Users and Groups
This option is only available to Windows 11 Pro, Education, and Enterprise editions. You won't be able to access it on the Home edition.
Anyway, here are the steps:
- Press Win + R and type in lusrmgr.msc.
- Click on the Users folder on the left side, and select the account you want to remove.
- Go to More Actions > Delete on the right side.
- Click Yes to confirm.

Command Prompt
It's time to type commands! This and the next step should work on disabled accounts.
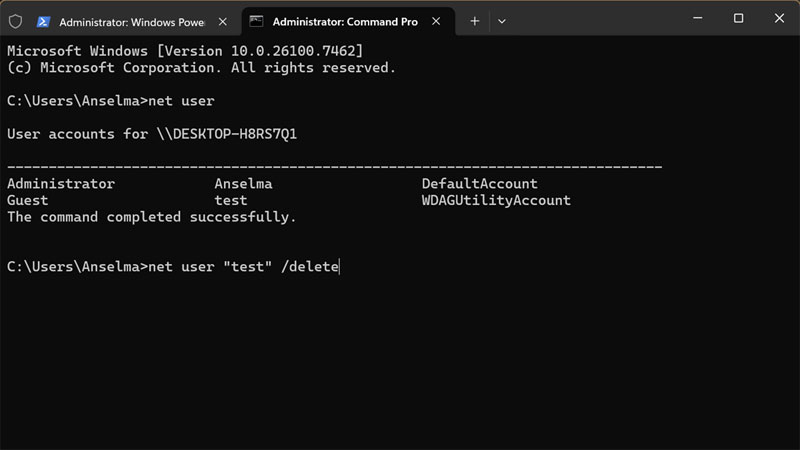
- Search for Command Prompt and click on Run as administrator.
- Type net user and press Enter. You'll see a list of account names on your device. Remember the one you want to delete.
- To delete a local or Microsoft account, type: net user "UserName" /delete
- To delete a domain user account, type: net user "UserName" /delete /domain
Of course, make sure you replace the placeholder "UserName" with the actual one.
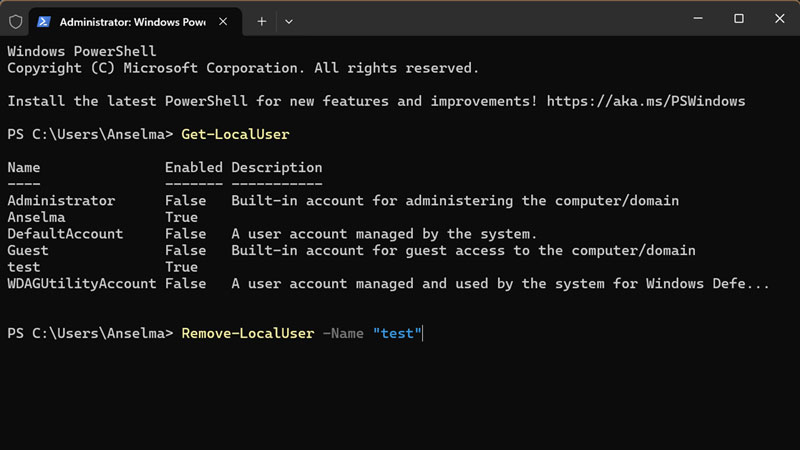
PowerShell
Alternatively, you can use PowerShell:
- Right-click the Start button and click on Terminal (Admin).
- Type Get-LocalUser and press Enter to bring up a list of all accounts on your PC. Again, note down the name you want to remove.
- Now, type Remove-LocalUser -Name "UserName" and press Enter. Make sure you insert the real account name instead of "UserName."
Netplwiz
Netplwiz.exe is a built-in tool for managing user accounts. It's most often used for disabling password or automatic logins. Here's how to delete user accounts with it:
- Press Win + R and type in netplwiz.exe and press Enter.
- Click on the target account from the list of users and hit the Remove button.
- Finally, select Yes to confirm.
At least one of these methods should work for you. I've covered every option just in case. Or, if you're still sticking to Windows 10, you can check out our other guide.

|
selma citakovic
Selma is a gamer, geek and gremlin hunter with a passion for cyber security and smashing Windows bugs before they bite. She’s IBM-certified, loves real freeware, despises bloatware, and powers most of her troubleshooting with an unhealthy amount of coffee. |
comments powered by Disqus
