


How to Fix Blue Screen Error 0x000000c2
By Timothy Tibbettson 07/18/2023 |
Blue screen error 0x000000C2 is an error that will crash your computer on Windows 10, 8, and 7. Try these steps to get up and running again.
Of course, since Windows won't start, you'll need to boot into Safe Mode with networking to try these steps.
1: Use Windows Repair
Windows Repair, run from Safe Mode, can fix most Windows problems by checking for and restoring system files and registry entries to their original state.
Windows Repair can take some time to run so we'd suggest using some of the prest repairs. Start by trying Preset: Common Repairs.
Boot into Safe Mode with Networking, and download Windows Repair.
You can watch this video to see how to use Windows Repair.
2: Uninstall Your Antivirus
Some corrupted or out of date antivirus programs are known culprits. Uninstall your antivirus and let Windows Defender take over.
You can remove your antivirus in Start > Settings > Apps. Click on your antivirus and click on Uninstall.
3: Run DISM and System File Checker
Windows 10, Windows 8.1 or Windows 8 users will need to first run the Deployment Image Servicing and Management (DISM) tool before running the System File Checker. DISM will use Windows Update to provide any files that are needed to fix corruptions. If you skip this step, System File Checker might not work. Windows 7 and Vista users can skip this step.
You will need to first open the Command Prompt or PowerShell as administrator.
Type in DISM.exe /Online /Cleanup-image /Restorehealth and press enter. This may take a few minutes.
Running System File Checker
All you need to do is type in sfc /scannow and press the Enter key.
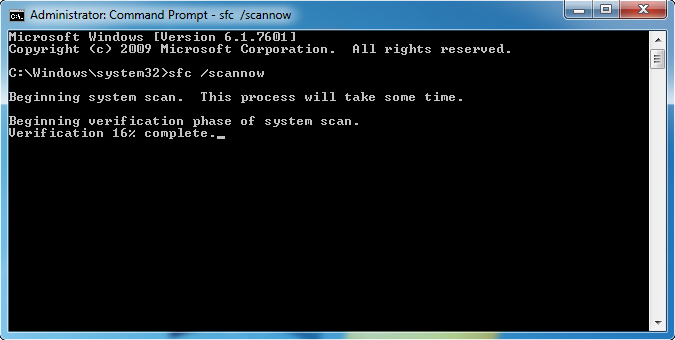
System File Checker will now scan for and replace files from the Windows cache, typically located at C:\Windows\System32\dllcache.
Once completed, you should see one of four possible results:
Windows Resource Protection did not find any integrity violations - You should be good to go as no issues were found.
Windows Resource Protection could not perform the requested operation - Run SFC from safe mode and also verify PendingDeletes, and PendingRenames folders exist under C:\WinSxS\Temp
Windows Resource Protection found corrupt files and successfully repaired them - Problems were found and fixed. Microsoft has a page here to show you how to view details.
Windows Resource Protection found corrupt files but was unable to fix some of them - Odds are the file couldn't be replaced, and you'll need to do so manually. Scroll back up to see how to view the log file to locate the file in question.
Reboot into normal mode to see if your computer boots.
4: Use System Restore or Reset This PC
Windows 10, 8, and 7 users can search for System Restore. Click on the System Restore button.
Windows 10 users can use Reset This PC to restore your computer to new. See How to Reinstall Windows 10 Without Losing Your Files.
comments powered by Disqus
Of course, since Windows won't start, you'll need to boot into Safe Mode with networking to try these steps.
1: Use Windows Repair
Windows Repair, run from Safe Mode, can fix most Windows problems by checking for and restoring system files and registry entries to their original state.
Windows Repair can take some time to run so we'd suggest using some of the prest repairs. Start by trying Preset: Common Repairs.
Boot into Safe Mode with Networking, and download Windows Repair.
You can watch this video to see how to use Windows Repair.
2: Uninstall Your Antivirus
Some corrupted or out of date antivirus programs are known culprits. Uninstall your antivirus and let Windows Defender take over.
You can remove your antivirus in Start > Settings > Apps. Click on your antivirus and click on Uninstall.
3: Run DISM and System File Checker
Windows 10, Windows 8.1 or Windows 8 users will need to first run the Deployment Image Servicing and Management (DISM) tool before running the System File Checker. DISM will use Windows Update to provide any files that are needed to fix corruptions. If you skip this step, System File Checker might not work. Windows 7 and Vista users can skip this step.
You will need to first open the Command Prompt or PowerShell as administrator.
Type in DISM.exe /Online /Cleanup-image /Restorehealth and press enter. This may take a few minutes.
Running System File Checker
All you need to do is type in sfc /scannow and press the Enter key.
System File Checker will now scan for and replace files from the Windows cache, typically located at C:\Windows\System32\dllcache.
Once completed, you should see one of four possible results:
Reboot into normal mode to see if your computer boots.
4: Use System Restore or Reset This PC
Windows 10, 8, and 7 users can search for System Restore. Click on the System Restore button.
Windows 10 users can use Reset This PC to restore your computer to new. See How to Reinstall Windows 10 Without Losing Your Files.
comments powered by Disqus
