


How to Fix File Explorer Stuck on 'Working on It' Error Message
By Timothy Tibbettson 06/15/2023 |
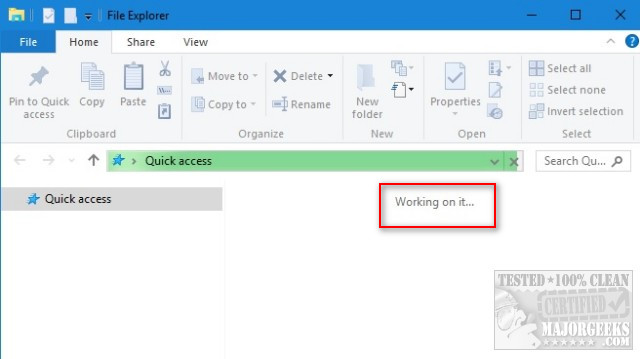
A long-running issue with Windows 10 is File Explorer getting stuck when loading the contents of a folder. You will usually see the green progress bar hang, or move very slowly while seeing a message that says "Working on it.." In this guide, we look at the steps you can take to resolve this problem.
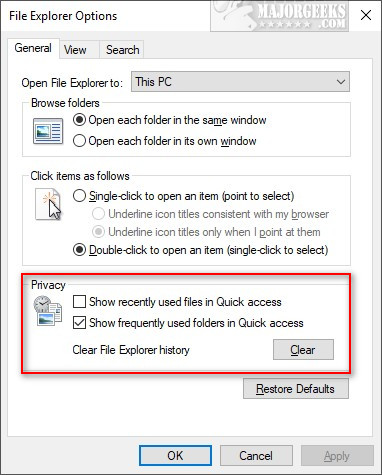
1: Uncheck Privacy Options
With File Explorer open, click on View Tab > Options. You should be in the General tab. Under Privacy at the bottom, verify that Show recently used files in Quick access and Show frequently used folders in Quick access are unchecked. While you're here, it won't hurt to click on Clear next to Clear File Explorer history.
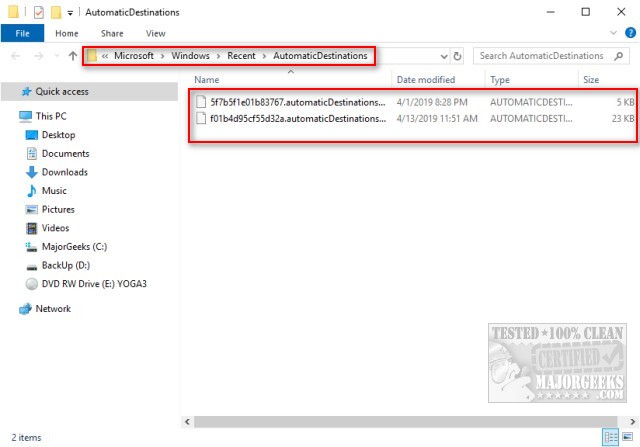
2: Delete the Contents of the Automatic Destinations Folder
Press the Windows Key + R, type in %AppData%MicrosoftWindowsRecentAutomaticDestinations and press Enter.
Click on one of the files in the right pane and press CTRL+A to highlight all the files. Press the Delete key.
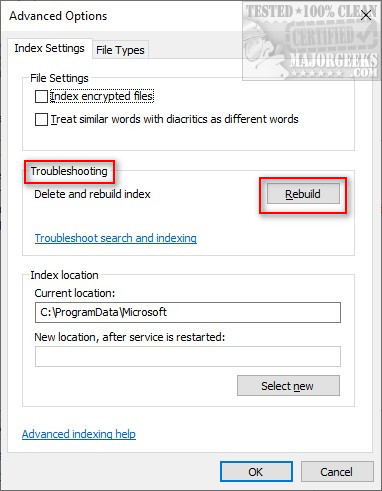
3: Rebuild the Search Index
Press the Windows Key + S and begin typing, then click on Indexing options. Click on Advanced at the bottom.
Under Troubleshooting, click on Rebuild. Finally, click on OK when completed.
4: Optimize the Folder for General Items
If you're able to right-click on the Folder causing the problem, click on Properties. Click on the Customize tab.
Under Optimize this folder for: click the dropdown and choose General items. Next, check the box next to Also apply this template to all subfolders. Click on Apply, then OK.

5: Use System Restore
We saved this one for last because the first four steps are easy to do, don't take long, and usually solves the problem. If you've made it down this far, we will use System Restore to go back to a point before your problem started.
Similar:
File Explorer or Windows Explorer Crashes or Freezes
How to Use Storage Sense to Delete Junk Files in Windows 10 Automatically
comments powered by Disqus
1: Uncheck Privacy Options
With File Explorer open, click on View Tab > Options. You should be in the General tab. Under Privacy at the bottom, verify that Show recently used files in Quick access and Show frequently used folders in Quick access are unchecked. While you're here, it won't hurt to click on Clear next to Clear File Explorer history.
2: Delete the Contents of the Automatic Destinations Folder
Press the Windows Key + R, type in %AppData%MicrosoftWindowsRecentAutomaticDestinations and press Enter.
Click on one of the files in the right pane and press CTRL+A to highlight all the files. Press the Delete key.
3: Rebuild the Search Index
Press the Windows Key + S and begin typing, then click on Indexing options. Click on Advanced at the bottom.
Under Troubleshooting, click on Rebuild. Finally, click on OK when completed.
4: Optimize the Folder for General Items
If you're able to right-click on the Folder causing the problem, click on Properties. Click on the Customize tab.
Under Optimize this folder for: click the dropdown and choose General items. Next, check the box next to Also apply this template to all subfolders. Click on Apply, then OK.
5: Use System Restore
We saved this one for last because the first four steps are easy to do, don't take long, and usually solves the problem. If you've made it down this far, we will use System Restore to go back to a point before your problem started.
Similar:
File Explorer or Windows Explorer Crashes or Freezes
How to Use Storage Sense to Delete Junk Files in Windows 10 Automatically
comments powered by Disqus
