


How to Fix Incorrect Date or Time With Windows Clock
By Timothy Tibbettson 06/15/2023 |
A common, unusual Windows problem is a clock showing the wrong date or time. In a perfect world, your clock should synchronize automatically and always show the exact, correct date and time. Should your Windows clock stop working correctly, here are the steps you can try to resolve the problem.
1: Verify Date & Time Settings
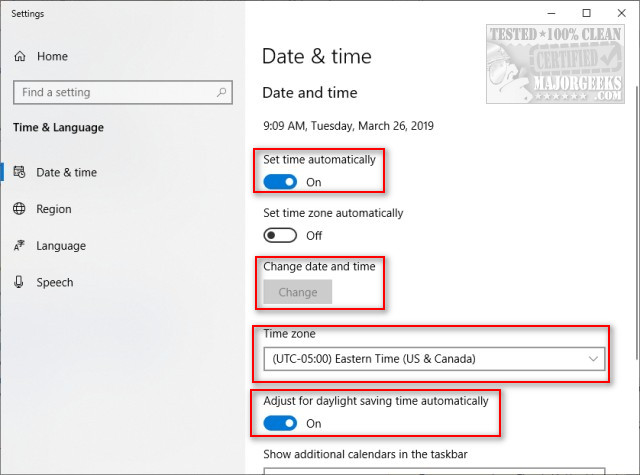
Press the Windows Key + S keys and type in Date and click on Date & Time. You can also go to Settings or the Control Panel.
Set time automatically and Adjust for daylight savings time automatically should both be on. If your Time zone is correct, leave Set time zone automatically unchecked. You can also change the date and time here. See if your time is working now.
2: Verify Windows Time Service
Press the Windows Key + R, type in services.msc and press Enter.
Scroll down and double-click on Windows Time.
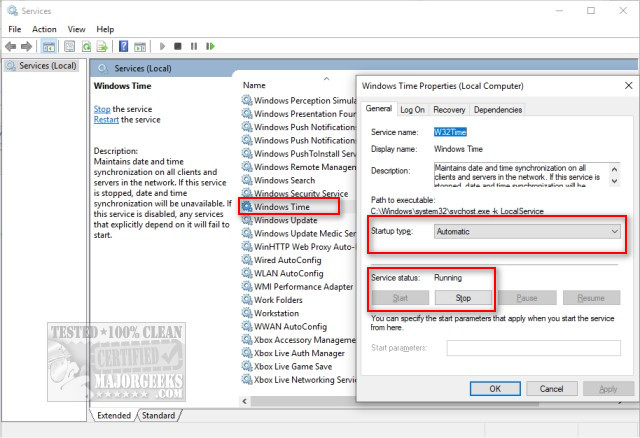
The Startup type should be Automatic, and the Service status should be running.
3: Re-Register the Windows Time Dll and Windows Time Process
We can re-register both the Windows Time process and DLL. If you've never used the Command Prompt, this is a safe and easy fix to accomplish. Keep the Command Prompt or PowerShell open for the next step as well.
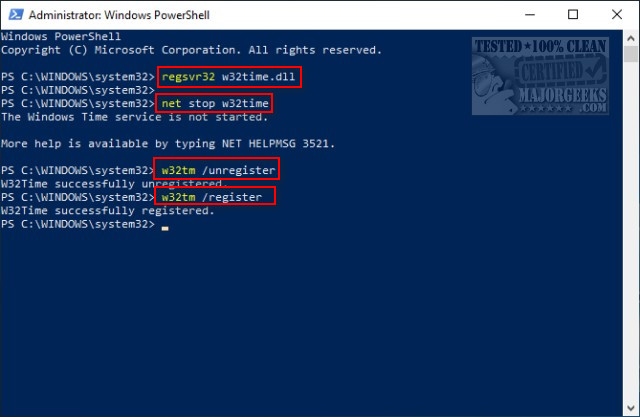
Open the Command Prompt or PowerShell as admin.
To re-register the Windows Time DLL, type in regsvr32 w32time.dll and press Enter. You should receive a succeeded message.
To re-register the Windows Time Process, type in net stop w32time (Enter), w32tm /unregister (Enter), and w32tm /register (Enter). If you get an error that says Windows Time is not started, that's OK, continue on.
4: Force Windows to Sync Time
With the Command Prompt or PowerShell still open from the above steps, let's force Windows to sync the time. Type in each of the following and press Enter after each line.
net stop w32time
w32tm /unregister
w32tm /register
net start w32time
w32tm /resync
-=- Advertisement -=-
5: Change the Windows Time Server
Right-click on the Clock in your system tray and click on Adjust date/time. Scroll down and click on Add clocks for different time zones. Click on the Internet Time tab and then Change settings.
You should only have two choices for servers, so try the other server. We wouldn't change anything else here, which is why this fix is towards the bottom of this guide.
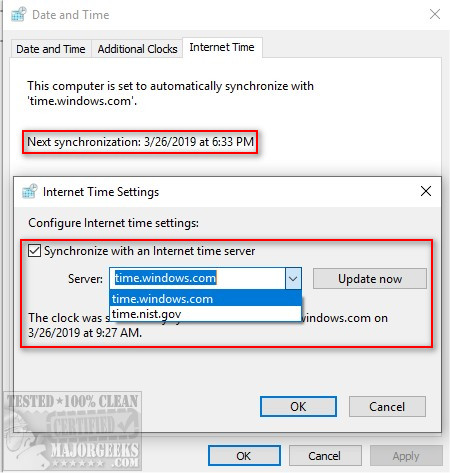
The only other possibility is to verify that your clock was updated today. If not, click on Update now to do so.
6: Replace Your Motherboard Battery
If nothing else has worked, there's a battery on your motherboard that stores the time. It's easy to replace. Open your computer case and look for the battery. The battery is a typical watch battery and is almost always easy to spot. Remove the battery and identify the model (CR2032 is the most common) and get a new battery at your local drug store, hardware store, or anywhere they sell batteries.

Similar:
How to Show Multiple Clocks on Windows
How to Show Time Only on the Windows 10 Taskbar
How to Remove the Clock From Windows 10 Taskbar
comments powered by Disqus
1: Verify Date & Time Settings
Press the Windows Key + S keys and type in Date and click on Date & Time. You can also go to Settings or the Control Panel.
Set time automatically and Adjust for daylight savings time automatically should both be on. If your Time zone is correct, leave Set time zone automatically unchecked. You can also change the date and time here. See if your time is working now.
2: Verify Windows Time Service
Press the Windows Key + R, type in services.msc and press Enter.
Scroll down and double-click on Windows Time.
The Startup type should be Automatic, and the Service status should be running.
3: Re-Register the Windows Time Dll and Windows Time Process
We can re-register both the Windows Time process and DLL. If you've never used the Command Prompt, this is a safe and easy fix to accomplish. Keep the Command Prompt or PowerShell open for the next step as well.
Open the Command Prompt or PowerShell as admin.
To re-register the Windows Time DLL, type in regsvr32 w32time.dll and press Enter. You should receive a succeeded message.
To re-register the Windows Time Process, type in net stop w32time (Enter), w32tm /unregister (Enter), and w32tm /register (Enter). If you get an error that says Windows Time is not started, that's OK, continue on.
4: Force Windows to Sync Time
With the Command Prompt or PowerShell still open from the above steps, let's force Windows to sync the time. Type in each of the following and press Enter after each line.
net stop w32time
w32tm /unregister
w32tm /register
net start w32time
w32tm /resync
5: Change the Windows Time Server
Right-click on the Clock in your system tray and click on Adjust date/time. Scroll down and click on Add clocks for different time zones. Click on the Internet Time tab and then Change settings.
You should only have two choices for servers, so try the other server. We wouldn't change anything else here, which is why this fix is towards the bottom of this guide.
The only other possibility is to verify that your clock was updated today. If not, click on Update now to do so.
6: Replace Your Motherboard Battery
If nothing else has worked, there's a battery on your motherboard that stores the time. It's easy to replace. Open your computer case and look for the battery. The battery is a typical watch battery and is almost always easy to spot. Remove the battery and identify the model (CR2032 is the most common) and get a new battery at your local drug store, hardware store, or anywhere they sell batteries.
Similar:
comments powered by Disqus
