


How to Hide Last Signed in Users in Windows 10
By Timothy Tibbettson 06/15/2023 |
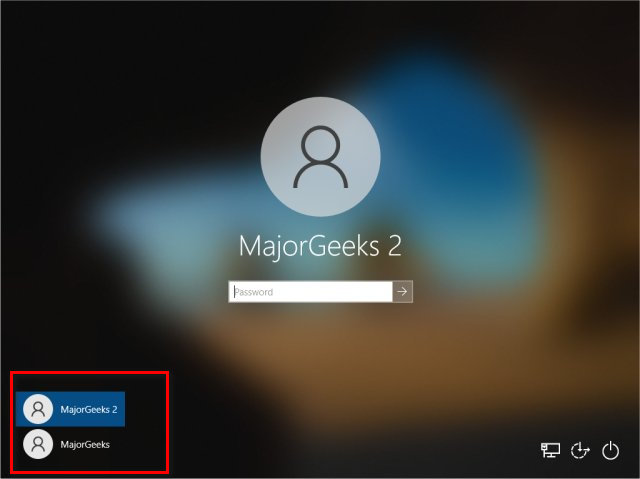
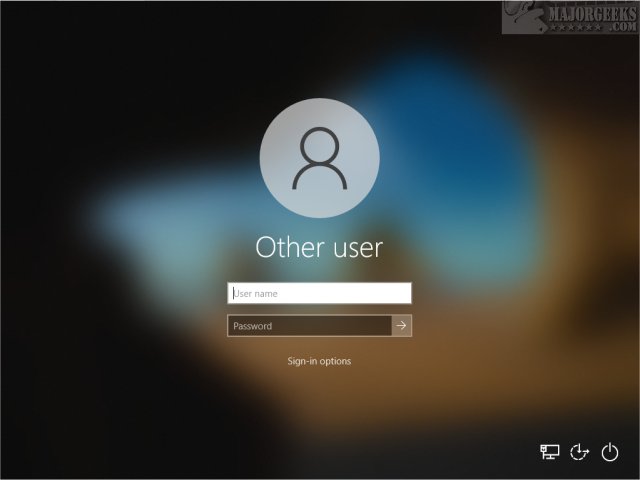
When you sign out of Windows 10 and have multiple user accounts, you can click on any user name to log into that account. If an account is not password protected, anyone can log in. For security purposes, you can hide all the user accounts from being displayed, forcing a user to enter their account name and password.
We have two ways you can hide the last signed-in user; Local Security Policy or the Registry Editor. Local Security Policy is only available in Windows 10 Pro and Enterprise, but you can enable it in Windows 10 Home.
Video tutorial:
Here's a before, and after:
Hide Last Signed in Users in Windows 10 With Local Security Policy (secpol.msc)
Open Local Security Policy by pressing the Windows Key + R, type in secpol.msc, and press Enter.
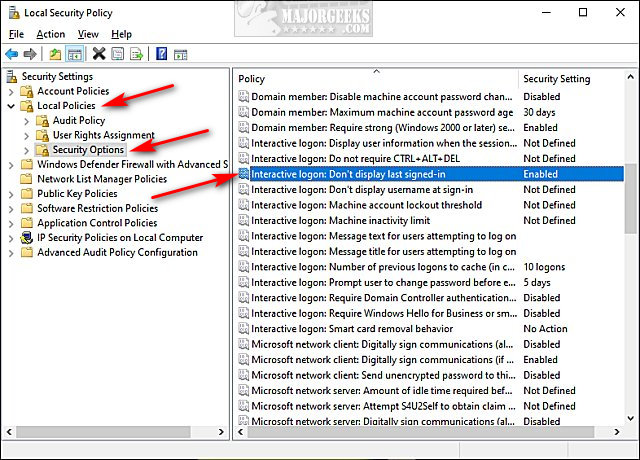
Expand Local Policies, and click on Security Options.
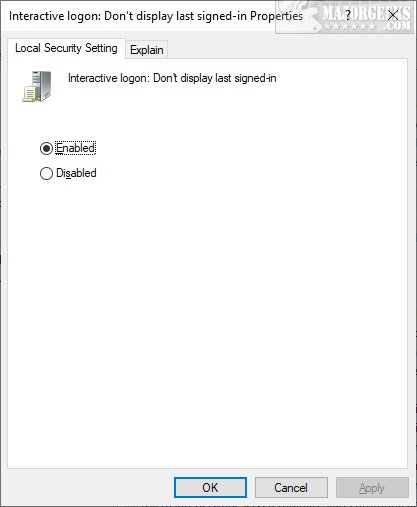
Double-click on Interactive logon: Don't display last signed-in.
Select Enabled (default) or Disabled.
Hide Last Signed in Users in Windows 10 With Registry Editor or Reg File
Download Hide Last Signed in Users in Windows 10 and extract the two files.
Double-click Hide Last Signed in Users in Windows 10.reg or Show Last Signed in Users in Windows 10.reg (Default) to hide or show Last Signed in Users in Windows 10.
Click Yes when prompted by User Account Control.
Click Yes when prompted by Registry Editor.
Click OK when prompted by the Registry Editor.
This tweak is included as part of MajorGeeks Windows Tweaks.
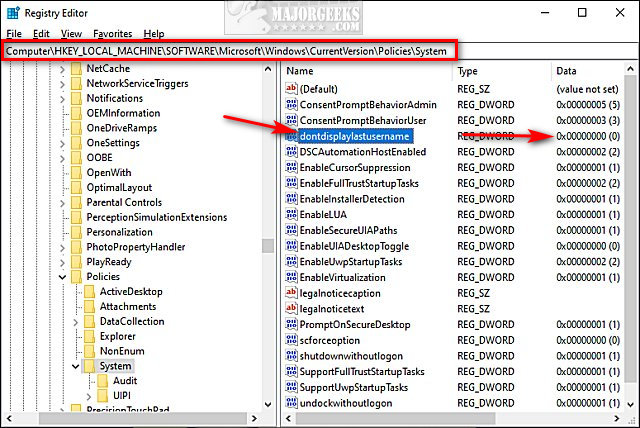
the registry file edits the Value data of dontdisplaylastusername located in HKEY_LOCAL_MACHINE\SOFTWARE\Microsoft\Windows\CurrentVersion\Policies\System.
Use 0 show or 1 to hide.
Similar:
9 Ways to Sign out of Windows 10
3 Ways to Log off Another User in Windows 10
How to Change Your User And Account Names in Windows 10
How to Check if User Accounts are Administrator or Standard Users
How to Delete a User Profile in Windows 10
comments powered by Disqus
We have two ways you can hide the last signed-in user; Local Security Policy or the Registry Editor. Local Security Policy is only available in Windows 10 Pro and Enterprise, but you can enable it in Windows 10 Home.
Here's a before, and after:
Hide Last Signed in Users in Windows 10 With Local Security Policy (secpol.msc)
Open Local Security Policy by pressing the Windows Key + R, type in secpol.msc, and press Enter.
Expand Local Policies, and click on Security Options.
Double-click on Interactive logon: Don't display last signed-in.
Select Enabled (default) or Disabled.
Hide Last Signed in Users in Windows 10 With Registry Editor or Reg File
Download Hide Last Signed in Users in Windows 10 and extract the two files.
Double-click Hide Last Signed in Users in Windows 10.reg or Show Last Signed in Users in Windows 10.reg (Default) to hide or show Last Signed in Users in Windows 10.
Click Yes when prompted by User Account Control.
Click Yes when prompted by Registry Editor.
Click OK when prompted by the Registry Editor.
This tweak is included as part of MajorGeeks Windows Tweaks.
the registry file edits the Value data of dontdisplaylastusername located in HKEY_LOCAL_MACHINE\SOFTWARE\Microsoft\Windows\CurrentVersion\Policies\System.
Use 0 show or 1 to hide.
Similar:
comments powered by Disqus
