


Quick Machine Recovery Explained: What It Is and How To Enable It
By selma čitakovićon 03/08/2026 |
Quick Machine Recovery is one of the more recent features, available on Windows 11 24H2 build 26100.4700 or later. It was part of the generally underwhelming December update. However, this one sounds alright, at least in theory. It automatically recovers your device from critical boot failures and searches for solutions in the cloud. It's kind of like an evolved version of Startup Repair.
So, let's see how it works, how to turn it on or off, and how it can help you!
What is Quick Machine Recovery?
Quick Machine Recovery is a new recovery option for boot failures. It automatically scans Windows Update for solutions and applies them. It contains two settings:
- Cloud remediation - your device can connect to the network and scan Windows Update for viable fixes
- Auto remediation - your device can automatically search for solutions and auto-retry if it doesn't find anything at first.
You can configure both in the Recovery settings. Currently, Quick Machine Recovery is enabled by default only on Windows 11 Home edition. When I looked it up for the first time on my Pro edition, it was disabled.
However, you should know that the feature won't work at boot if it can't connect to the internet. You'll have to rely on Startup Repair as the local recovery option instead. Quick Machine Recovery supports wired and WPA/WPA2 password-based Wi-Fi networks only, for the time being.
Anyway, let's take a closer look at how it works.
The entire process has five phases:
- If your PC fails to boot several times, the system initiates the recovery process.
- Once it boots into the recovery environment, the quick machine recovery process can start.
- Your PC first connects to an available network, then scans Windows Update for solutions.
- If it can't find any fixes, it will retry the process (if configured so). Otherwise, you'll be guided to other recovery options. Once it finds a solution, your system will download and apply it.
- Finally, your PC will reboot into Windows (if the process was successful) or the recovery environment again (if it didn't work).
Interestingly enough, Microsoft started working on Quick Machine Recovery as part of its Windows Resiliency Initiative in response to the massive CrowdStrike outages. If you don't remember, back in July 2024, CrowdStrike released a problematic security update that bluescreened millions of Windows devices in important sectors. To make things worse, the recovery process was painfully slow because administrators required physical access to the affected devices to fix them. Since Quick Machine Recovery is cloud-based, admins can minimize downtimes and hopefully prevent similar disasters from happening again.
How to disable/enable Quick Machine Recovery
You have to be signed in as an administrator to enable or disable the feature. Here are the steps:
- Go to Settings > System > Recovery.
- Select Quick machine recovery in the Recovery options section.
- Toggle Quick machine recovery on or off. This option is also known as Cloud remediation.
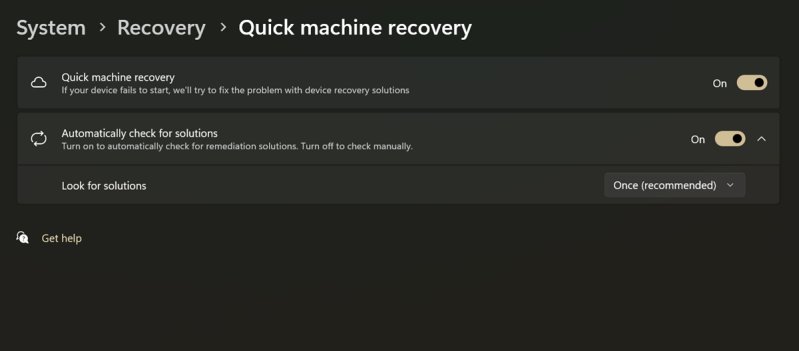
If you enable it, you'll be able to configure additional settings. Right under the toggle button, there should be an option called Automatically check for solutions, or Continue searching if a solution isn't found. They're basically the same setting called Auto remediation. If you turn it on, your PC will automatically re-attempt solutions if nothing worked the first time.
You can also choose how many times it will try to look for fixes again. Select Look for solutions, then the frequency you want (for example: once, every 10 minutes, 30 minutes, etc.).
How to activate Quick Machine Recovery manually
If you want to manually trigger the feature, you can do so via Advanced startup (WinRE). Here's how:
- Go to Settings > System > Recovery.
- Hit the Restart now button next to Advanced startup.
- Again, select Restart now to confirm your decision.
- Your PC should reboot to the blue screen (not the scary kind) of Windows Recovery Environment.
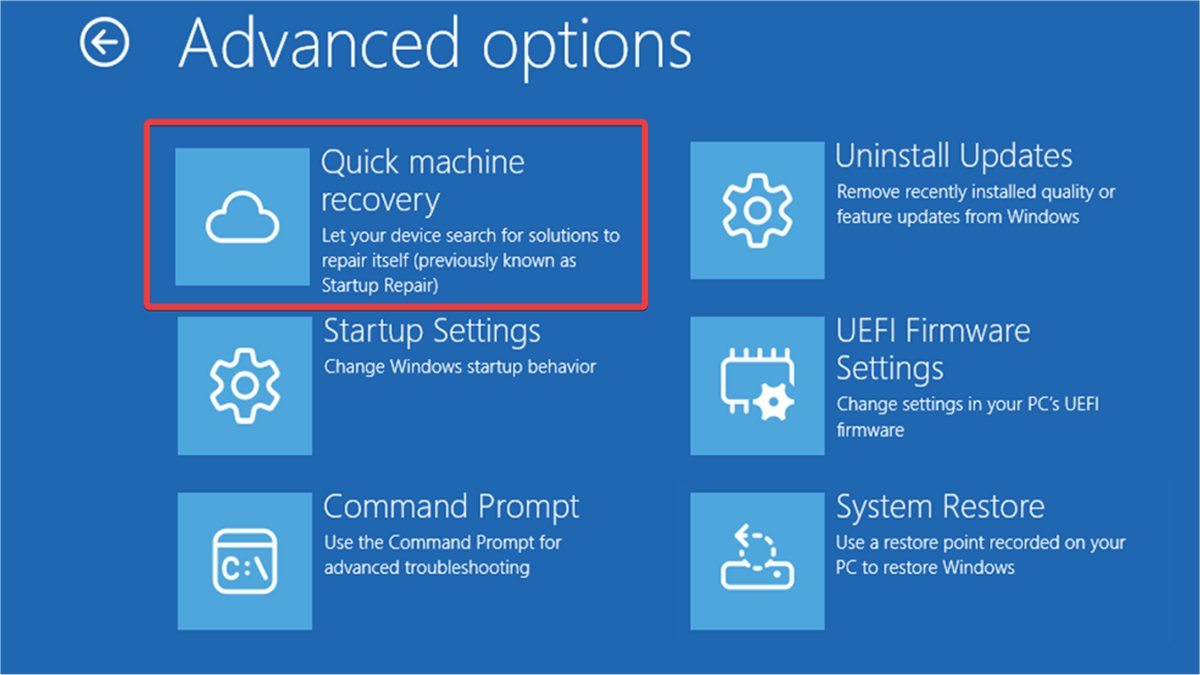
- Go to Troubleshoot > Advanced options.
- Choose Quick Machine Recovery from the list. If you didn't previously enable it, you'll see Startup Repair here instead.
And that's it!
Microsoft calls Quick Machine Recovery a "best-effort feature," which is a funny way of saying you shouldn't expect it to work 100% of the time. Sometimes it helps, sometimes it doesn't. I've enabled it on my system, but I haven't had the chance to see it in action yet. It's only been active for a short while, so I'll give it some time. If you've had any experiences with it, feel free to share them below.

|
selma citakovic
Selma is a gamer, geek and gremlin hunter with a passion for cyber security and smashing Windows bugs before they bite. She’s IBM-certified, loves real freeware, despises bloatware, and powers most of her troubleshooting with an unhealthy amount of coffee. |
comments powered by Disqus
