


Recently Opened Files - How To Hide or Show Them In Jump Lists, File Explorer, and Start Menu
By selma čitakovićon 04/11/2026 |
![{$insert['content_title']](/content/file/5924_image3.png
)
Windows 11 shows your recently opened files in the Recommended section in the Start menu, jump lists on the taskbar, and File Explorer. If that all sounds like a bit too much for you, you can hide them. And if you change your mind, you can just as easily turn them back on.
Here's how!
Via Settings
Turning off this option will clear your recent item lists:
- Go to Settings > Personalization > Start.
- Toggle on or off Show recommended files in Start, recent files in File Explorer, and items in Jump Lists.
- If you're on an older Win 11 version: Toggle on or off Show recently opened items in Start, Jump Lists, and File Explorer.
Via Registry Editor
Alternatively, you can modify an existing DWORD value in the registry and achieve the same effect. If you want to play it extra safe, you can create a system restore point in case you make a mistake. Still, as long as you follow the instructions closely, you should be good.
But first, you'll need to find out your user account's SID (Security Identifier). You'll need it to navigate to the correct key in the registry. To find it:
- Right-click the Start button and select Terminal. Choose either PowerShell or Command Prompt; both work.
- Type the following command and press Enter: whoami /user
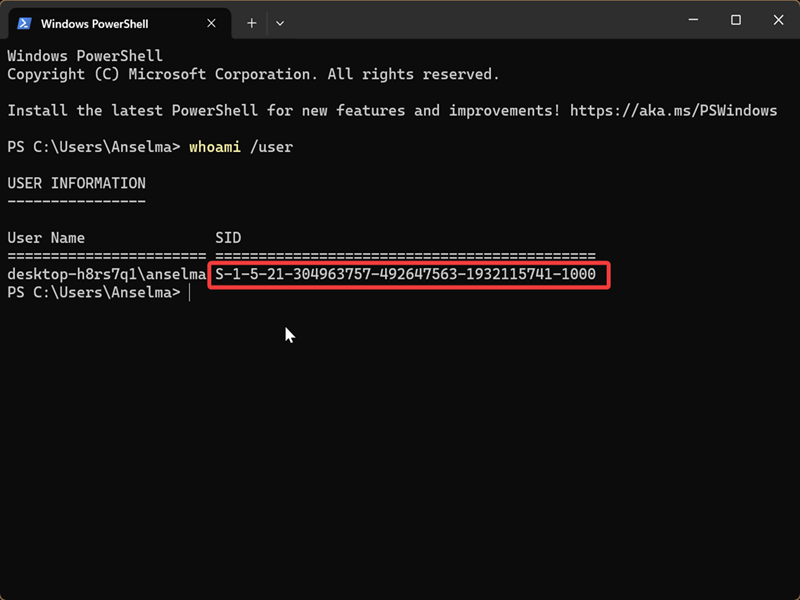
You should see your user name and SID in the terminal window. Keep it open for now, since you'll need it in just a bit.
Now, let's move on to the registry:
- Press Win + R, type regedit, and press Enter.
- Go to HKEY_USERS\*SID*\Software\Microsoft\Windows\CurrentVersion\Explorer\Advanced, where you'll replace *SID* with the actual SID from the previous steps.
- While you're in the Advanced key, double-click Start_TrackDocs.
- In the Value field, type 0 to hide recent files or 1 to show them, and click OK. 1 is the default value.

Via Local Group Policy Editor
Finally, here's a more permanent solution if you want to hide recent items. Disabling this policy will overrule the first and second methods. It will grey out the toggle option in the Settings, for example. Still, it's not set in stone; you can easily undo it.
But if you want to be able to switch recent files on and off directly from the Settings, I recommend ignoring this method. Additionally, the Local Group Policy Editor is only available to certain Windows editions: Pro, Education, and Enterprise.
Make sure you've signed in as an administrator, and follow these steps:
- Press Win + R, type gpedit.msc, and press Enter.
- On the left pane, go to Computer Configuration > Administrative Templates > Start Menu and Taskbar.
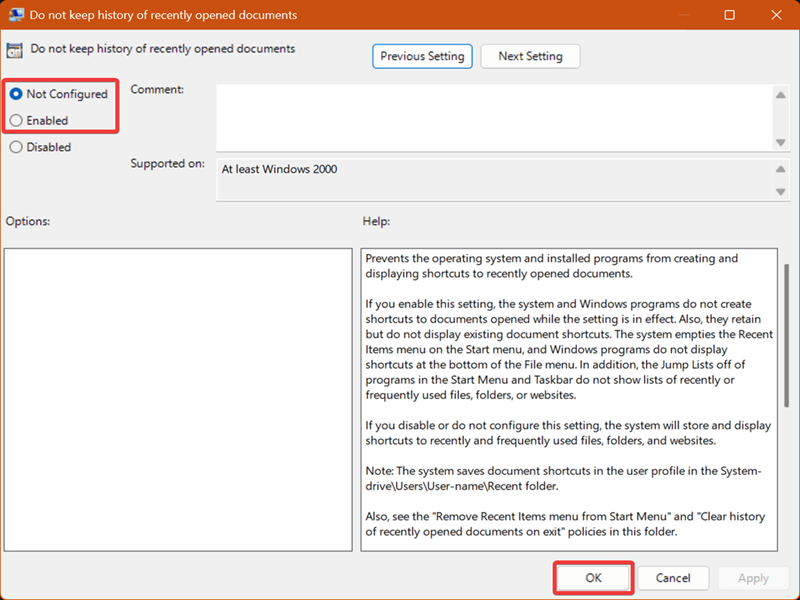
- While you're in the Start Menu and Taskbar folder, double-click Do not keep history of recently opened documents on the right side.
- To disable recent files in jump lists, Start menu, etc., select Enabled and click OK.
- To enable recent files, select Not configured and click OK. This is also the default setting for this policy.
Moreover, you can completely remove the Recommended section and Widgets from the Start menu. I hope these tips make the UI easier on the eyes.

|
selma citakovic
Selma is a gamer, geek and gremlin hunter with a passion for cyber security and smashing Windows bugs before they bite. She’s IBM-certified, loves real freeware, despises bloatware, and powers most of her troubleshooting with an unhealthy amount of coffee. |
comments powered by Disqus
