


Taking Control of Integrated Graphics in Windows 11
By selma čitakovićon 08/13/2026 |
![{$insert['content_title']](/content/file/6323_image3.jpg
)
A lot of PCs come equipped with two GPUs: a dedicated and an integrated one (iGPU). The iGPU is built into the CPU and shares your system memory. It's also a lot weaker than the dedicated graphics card.
Now, you can specify which apps you want to run with each GPU, and in some cases, even configure a hybrid mode so that your computer dynamically switches between the two depending on the load. I use that on my laptop: when I'm browsing and doing other light tasks, the iGPU handles it, but when I'm gaming, my dedicated GPU takes over.
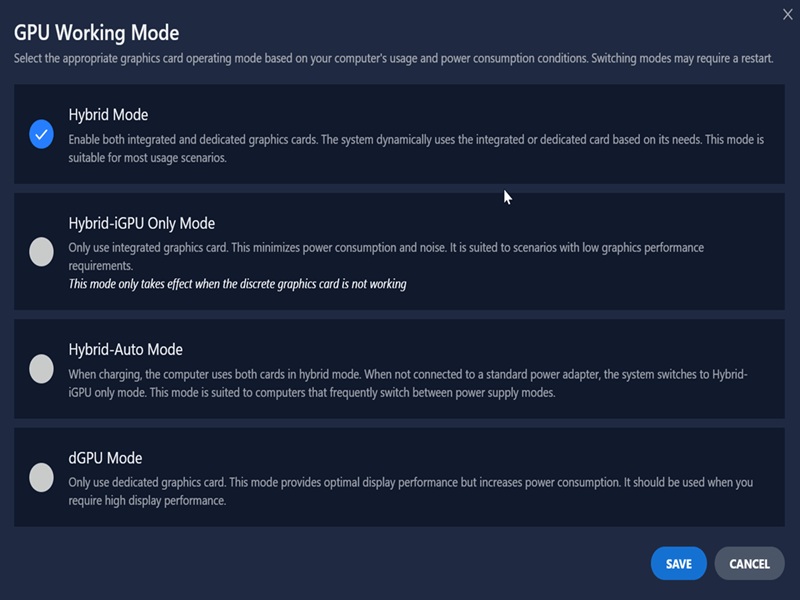
Still, a lot of users prefer to simply disable their iGPU to free up memory, reduce heating, and save power. This is also helpful if you're experiencing driver conflicts or Windows keeps using your iGPU for the wrong tasks (it happens!). But if you have a laptop and you often use it unplugged, you should know that your battery life will suffer if you only rely on a dedicated graphics card.
Anyway, here's how to disable or enable your integrated graphics!
Via Device Manager
Make sure you've signed in as an administrator and do the following:
- Press Win + X and select Device Manager.
- On the list, find Display adapters and click the arrow next to it to expand this section.
- Right-click your iGPU (AMD or Intel), and select Disable device or Enable device.
- Click Yes to confirm your decision.
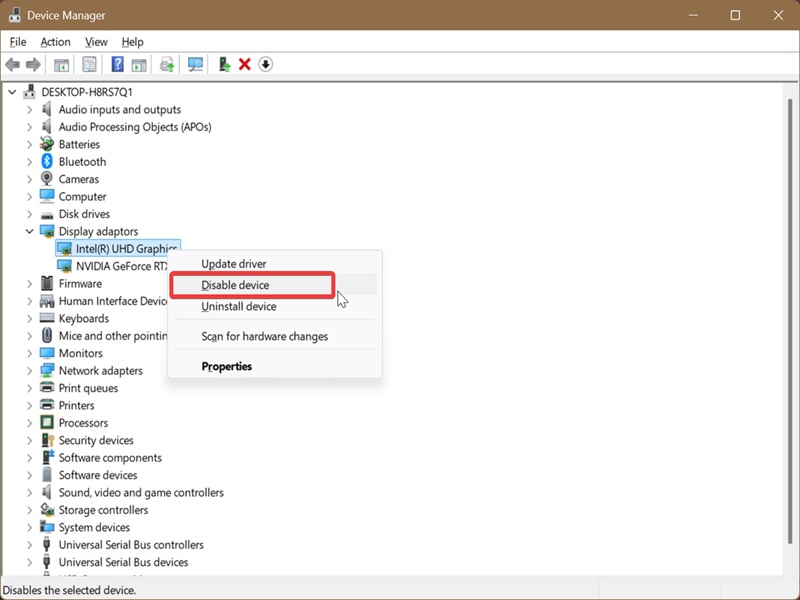
Think of this option as a "soft" disable at the software level. If you want to fully disable your iGPU, follow the next step.
Via BIOS/UEFI
These steps will differ depending on your motherboard manufacturer. You can Google and look for a BIOS manual, or you can boot into BIOS/UEFI and look for the settings yourself. It should be pretty easy; I found mine immediately.
So, here's a general guide:
- Restart and continually press the designated key to enter BIOS. Usually, it's either F1, F2, F10, or Delete. You can check which one it is for your computer.
- Go through the Settings and look for the ones related to your iGPU. For example, I had to go to More Settings > Configuration > Graphics Device.
- Enable or disable integrated graphics. Depending on your settings, it may be phrased differently. In my case, I could choose between Dynamic Graphics (both GPUs) or Discrete Graphics (which disables the iGPU).
- Save the changes and exit.
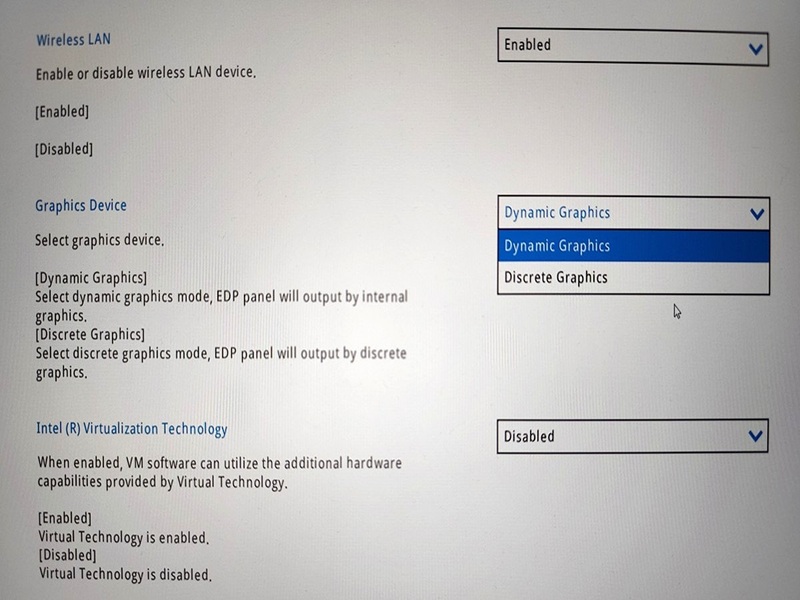
When you log back in, your iGPU will be completely deactivated. If you ever want to re-enable it via Device Manager, you'll have to do so first in the BIOS/UEFI menu.

|
selma citakovic
Selma is a gamer, geek and gremlin hunter with a passion for cyber security and smashing Windows bugs before they bite. She’s IBM-certified, loves real freeware, despises bloatware, and powers most of her troubleshooting with an unhealthy amount of coffee. |
comments powered by Disqus
