


How to Make Your Computer Run Like New in 4 Easy Steps
By Timothy Tibbettson 06/16/2023 |
Over time, most computers can become sluggish for numerous reasons. Computer shops could charge you for hours of labor to do a mediocre job, or you can do it yourself at home by following our four easy steps.
Please follow the tutorial step-by-step.
Video tutorial:
1: Remove Unused Apps
The first thing we want to do is clean out any apps you don't use or need. We always use an uninstaller. Two of the best are IOBit Uninstaller and HiBit Uninstaller. The Windows uninstaller is terrible, leaving behind junk files, folders, and registry entries.
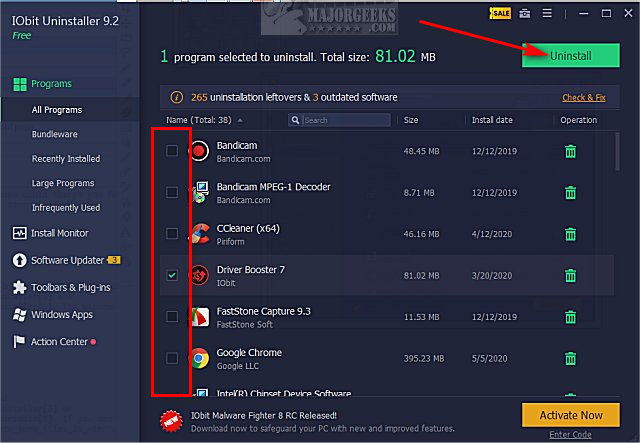
We want to look at two sections; All Programs and Windows Apps.
Click on any app you want to uninstall in both All Programs and Windows Apps, and click on Uninstall. If you have many apps to remove, we recommend you only remove five at a time. We've seen these programs freeze up when removing numerous large apps.
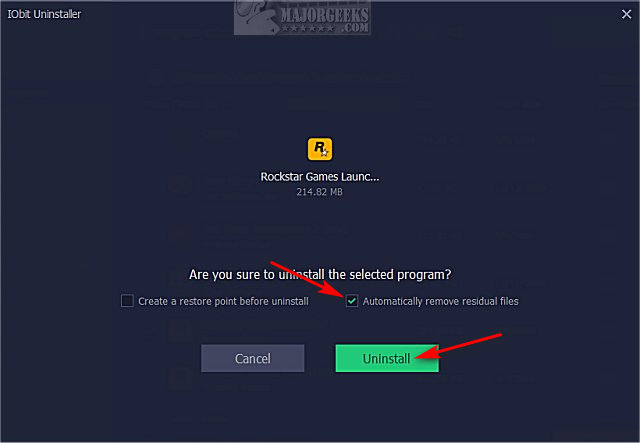
Make sure Automatically remove residual files is checked and click Uninstall.
Need more help using IObit Uninstaller? Here's a video tutorial.
2: Delete Junk Files
Fewer files mean faster search and app startup times.
CCleaner is a safe drive cleaner that can quickly clean out junk files and remove startup apps (next step). Download CCleaner installer or CCleaner portable.
If you want a deep clean, we recommend Privazer.
If you don't want to download an app, see How to Use Storage Sense to Delete Junk Files in Windows 10 Automatically.
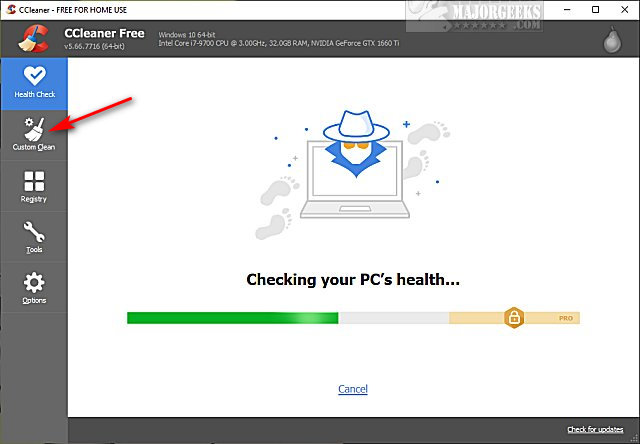
Open CCleaner.
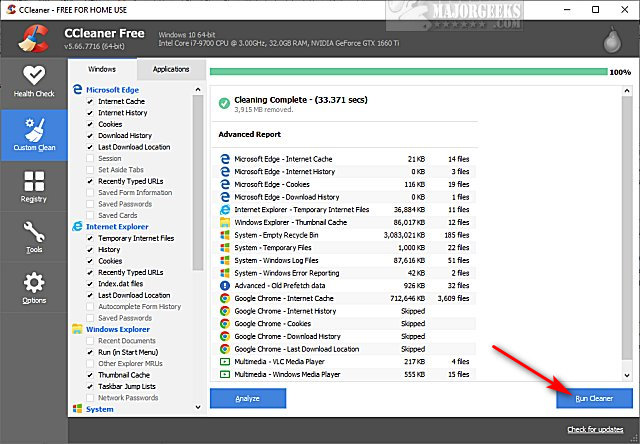
Click on Custom Clean
Optional: The Custom Clean section has two categories; Windows and Applications. You can browse both to see if there's anything you want or don't want to clean. You can click on Analyze to see the results before cleaning.
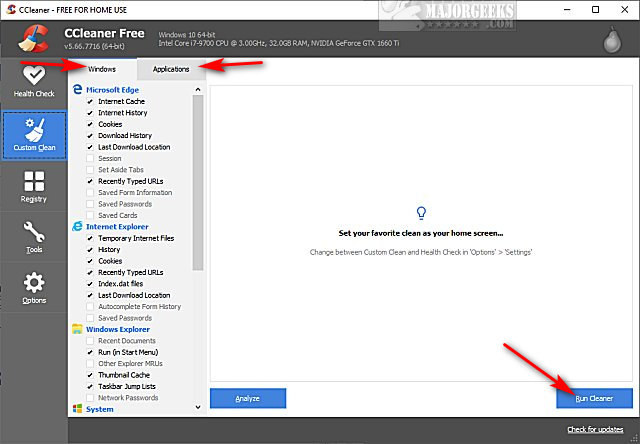
CCleaner is a conservative drive cleaner, so if you're unsure, go ahead and click on Run Cleaner. Cleanup can take 30 seconds to 30 minutes, depending on the amount of junk.
Keep CCleaner open for Step 3.
3: Disable Startup Apps
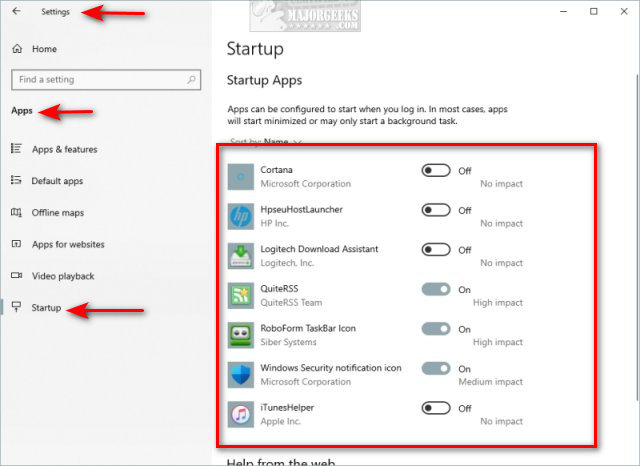
If you didn't download CCleaner, then go to Start > Settings > Apps > Startup. Turn off any apps you don't need running at Startup.
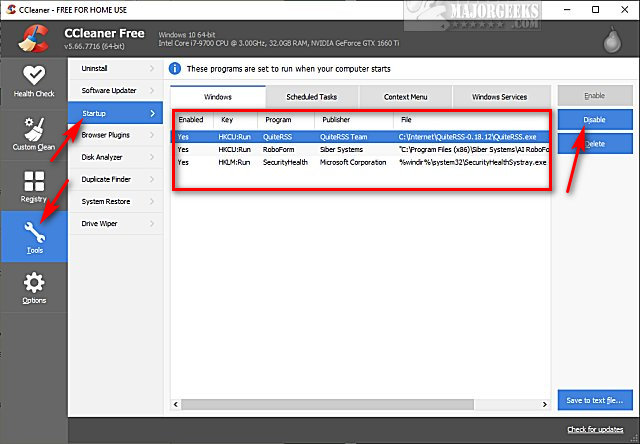
In CCleaner, click on Tools > Startup.
There are four tabs here; Windows, Scheduled Tasks, Context Menu, and Windows Services.
In the Windows tab, you can see all applications that run on Startup.
Click on any item you don't need to run on Startup and click on Disable.
You can always come back and delete an item, but first, disable any startup apps to make sure you're happy with the results.
If you don't recognize any application, Google the application name. Be sure not to disable any security software, including your antivirus.
Reboot to see the results and make sure you didn't disable anything you needed.
4: Defragment Your Hard Drive
Now that we've removed many apps and deleted tons of useless files and folders, we need to rearrange files on your drive by defragmenting.
If you have Windows 10, defrag is automatic, so you're all set.
If you have an SSD hard drive, you don't need to defragment, but you might want to learn about SSD Trim.
Smart Defrag can handle defragmentation and SSD trim.
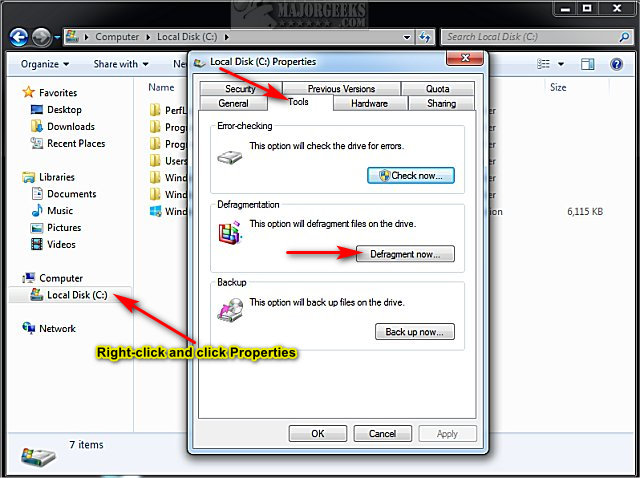
Windows 7 and 8 users can open File Explorer and right-click on your C drive and click Properties. Click on the Tools tab and click on Defragment now...
SSD hard drives are fast and maintenance-free. If your computer isn't any faster, we recommend everybody uses an SSD hard drive. You'll be amazed at the speed differences from the first boot.
We use Western Digital SSD drives because they have excellent software to transfer Windows to the new drive from your old drive.
A 1TB hard drive is now as affordable as $100.
Similar:
Best Drive Cleaner? CCleaner VS Wise Disk Cleaner VS PrivaZer
How to Use Storage Sense to Delete Junk Files in Windows 10 Automatically
How-to Manage Startup Apps in Windows 10
comments powered by Disqus
Please follow the tutorial step-by-step.
1: Remove Unused Apps
The first thing we want to do is clean out any apps you don't use or need. We always use an uninstaller. Two of the best are IOBit Uninstaller and HiBit Uninstaller. The Windows uninstaller is terrible, leaving behind junk files, folders, and registry entries.
We want to look at two sections; All Programs and Windows Apps.
Click on any app you want to uninstall in both All Programs and Windows Apps, and click on Uninstall. If you have many apps to remove, we recommend you only remove five at a time. We've seen these programs freeze up when removing numerous large apps.
Make sure Automatically remove residual files is checked and click Uninstall.
Need more help using IObit Uninstaller? Here's a video tutorial.
2: Delete Junk Files
Fewer files mean faster search and app startup times.
CCleaner is a safe drive cleaner that can quickly clean out junk files and remove startup apps (next step). Download CCleaner installer or CCleaner portable.
If you want a deep clean, we recommend Privazer.
If you don't want to download an app, see How to Use Storage Sense to Delete Junk Files in Windows 10 Automatically.
Open CCleaner.
Click on Custom Clean
Optional: The Custom Clean section has two categories; Windows and Applications. You can browse both to see if there's anything you want or don't want to clean. You can click on Analyze to see the results before cleaning.
CCleaner is a conservative drive cleaner, so if you're unsure, go ahead and click on Run Cleaner. Cleanup can take 30 seconds to 30 minutes, depending on the amount of junk.
Keep CCleaner open for Step 3.
3: Disable Startup Apps
If you didn't download CCleaner, then go to Start > Settings > Apps > Startup. Turn off any apps you don't need running at Startup.
In CCleaner, click on Tools > Startup.
There are four tabs here; Windows, Scheduled Tasks, Context Menu, and Windows Services.
In the Windows tab, you can see all applications that run on Startup.
Click on any item you don't need to run on Startup and click on Disable.
You can always come back and delete an item, but first, disable any startup apps to make sure you're happy with the results.
If you don't recognize any application, Google the application name. Be sure not to disable any security software, including your antivirus.
Reboot to see the results and make sure you didn't disable anything you needed.
4: Defragment Your Hard Drive
Now that we've removed many apps and deleted tons of useless files and folders, we need to rearrange files on your drive by defragmenting.
If you have Windows 10, defrag is automatic, so you're all set.
If you have an SSD hard drive, you don't need to defragment, but you might want to learn about SSD Trim.
Smart Defrag can handle defragmentation and SSD trim.
Windows 7 and 8 users can open File Explorer and right-click on your C drive and click Properties. Click on the Tools tab and click on Defragment now...
SSD hard drives are fast and maintenance-free. If your computer isn't any faster, we recommend everybody uses an SSD hard drive. You'll be amazed at the speed differences from the first boot.
We use Western Digital SSD drives because they have excellent software to transfer Windows to the new drive from your old drive.
A 1TB hard drive is now as affordable as $100.
* As an Amazon Associate, we earn a commission if you purchase an item using our affiliate links
Similar:
comments powered by Disqus
