


How to Change the Default Mouse Cursor in Windows 11
By Timothy Tibbettson 06/15/2023 |
While most of us are accustomed to using the default mouse cursor in Windows 11, it also offers numerous options from minor to major that can help you see and use your mouse cursor easier than ever.
Click on Start > Settings or press the Windows Key + I.
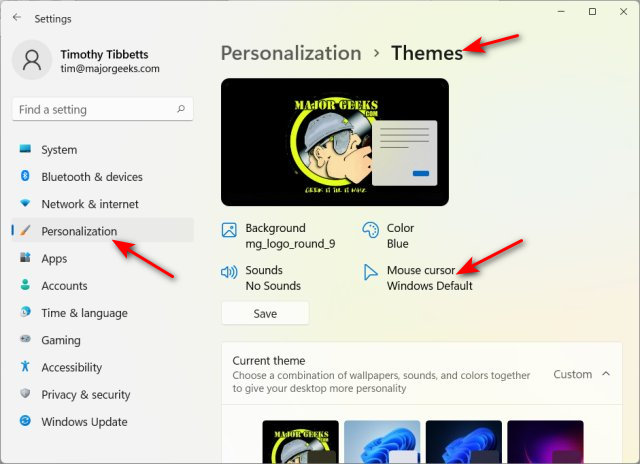
Click on Personalization on the left.
Click on Mouse cursor on the right.
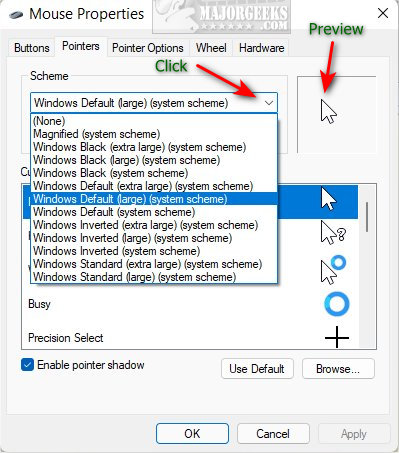
While you can change any mouse cursor individually under Customize, the best thing to try is the dropdown box under Schemes.
You should see 12 custom cursors. Click on one of those, and you will see a preview.
Once you're happy with your selection, click Apply.
Now you can move your mouse around to see if you like it and if not, return and click another scheme.
If you find the default cursor to be too small, try Windows Default (large) (system scheme).
Otherwise, you can find dark cursors, inverted cursors, and many more to try out.
Similar:
How to Enable Mouse Pointer Trails
How to Enable or Disable Snap Pointer To Default Button in Windows
How to Enable or Disable Mouse Acceleration in Windows 10 & 11
How to Troubleshoot a Mouse That's Slow, Lagging or Jumpy
How to Fix Mouse Cursor Jumping or Moving Randomly While Typing
How to Fix Windows Mouse Buttons Reversed
comments powered by Disqus
Click on Start > Settings or press the Windows Key + I.
Click on Personalization on the left.
Click on Mouse cursor on the right.
While you can change any mouse cursor individually under Customize, the best thing to try is the dropdown box under Schemes.
You should see 12 custom cursors. Click on one of those, and you will see a preview.
Once you're happy with your selection, click Apply.
Now you can move your mouse around to see if you like it and if not, return and click another scheme.
If you find the default cursor to be too small, try Windows Default (large) (system scheme).
Otherwise, you can find dark cursors, inverted cursors, and many more to try out.
Similar:
comments powered by Disqus
