


How to Change Automatic Maintenance Settings in Windows 10
By Timothy Tibbettson 06/30/2023 |
Automatic Maintenance runs scheduled maintenance daily when your computer is not in use. These tasks include software and Windows updates, security scans, and system diagnostics. In this tutorial, we can change the scheduled time and decide if Automatic Maintenance can wake your computer.
There is no way currently to disable Automatic Maintenance, and you shouldn't. You can, however, change the scheduled maintenance times and decide if you want to allow your computer to wake up to do so.
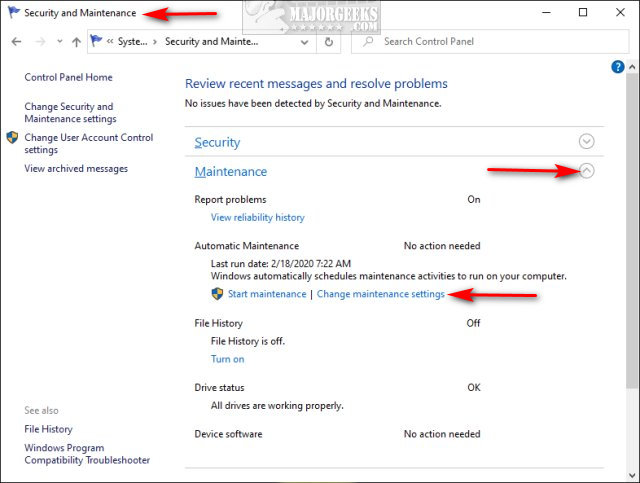
Open the classic Control Panel and click System And Security > Security and Maintenance > Maintenance.
You will see two options:
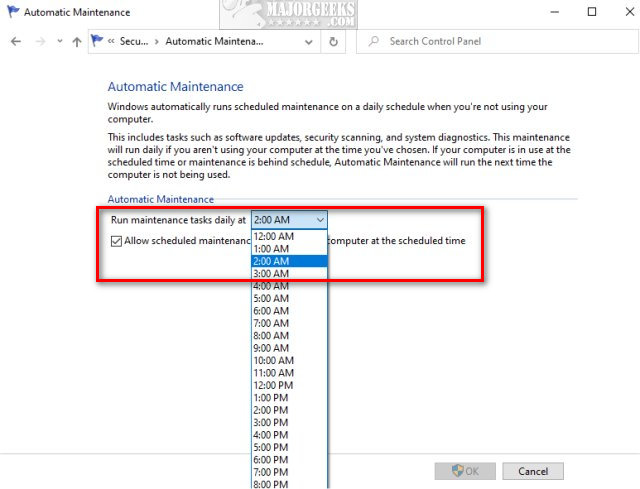
Click the drop-down box next to Run maintenance tasks daily at to change the scheduled time.
Below that, you check or uncheck Allow scheduled maintenance to wake up my computer at the scheduled time.
That's it. Check out the similar links below for some tutorials we hope you find interesting.
Similar:
How to Use Storage Sense to Delete Junk Files in Windows 10 Automatically
Add All Tasks or God Mode to the Control Panel
Create a Shortcut to Any Windows 10 Control Panel Setting
Add the Control Panel to the Context Menu in Windows 10
How to Open the Control Panel Instead of Settings on Windows 10
comments powered by Disqus
There is no way currently to disable Automatic Maintenance, and you shouldn't. You can, however, change the scheduled maintenance times and decide if you want to allow your computer to wake up to do so.
Open the classic Control Panel and click System And Security > Security and Maintenance > Maintenance.
You will see two options:
Click the drop-down box next to Run maintenance tasks daily at to change the scheduled time.
Below that, you check or uncheck Allow scheduled maintenance to wake up my computer at the scheduled time.
That's it. Check out the similar links below for some tutorials we hope you find interesting.
Similar:
comments powered by Disqus
