


Windows Could Not the Start Peer Networking Grouping Service on Local Computer
By Timothy Tibbettson 07/05/2023 |
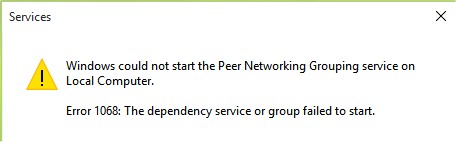
Today, we're looking at an error that reads similar or exactly like "Windows could not start the Peer Networking Grouping service on Local Computer. Error 1068: The dependency service or group failed to start." This error can appear on Windows 7, 8 and 10. Here are some possible solutions.
Creating a Restore Point would be a good idea before proceeding.
1: Check Windows Services
One of the simpler steps is to verify that all required services are running. Press the Windows Key + R and type in Services or the Windows Key + S, type in and click on Services. We want to check four services that should be set to Manual and Running.
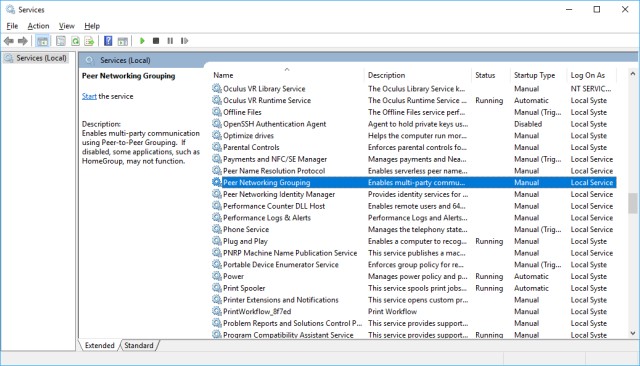
Peer Name Reolution Protocol
Peer Networking Grouping
Peer Netwooking Identity Manager
PNRP Machine Name Enumerator Service
You can right-click and start any of the services that aren't running. Any service that does not have a Startup Type of Manual should be double-clicked and changed to Manual. If Step 1 and Step 2 don't work for you, these services will need to be running for Step 3.
2: Run the Homegroup Troubleshooter
Microsoft removed Homegroup as of Windows 10 v1803, but everyone else can find the Homegroup Troubleshooter in their Control Panel > Updates & Security > Troubleshoot and find Homegroup. Troubleshooters are often quick and easy, so follow the prompts.
3: Rename and Change the Permission of MachineKeys
Open File Explorer and go to C:ProgramDataMicrosoftCryptoRSA and rename the MachineKeys folder. We prefer to name the folder MachineKeys.Old, but you can name the folder anything you like.
Right-click on the RSA folder and create a new MachineKeys folder. Right-click on the new MachineKeys folder and select properties and click on the Security tab. Highlight Everyone and click on Edit.
Under Permissions for Everyone, you want to check the box Allow next to Full Control.
If you don't see this option, please go back to step 1 and make sure all services are running.

4: Check Networking in Group Policy Editor
* Windows 10 Home users won't have Group Policy Editor, but you can by following this guide.
Press the Windows Key + R and type in gpedit.msc to open the Local Group Policy Editor.
Expand the Folder to get to Computer Configuration > Administrative Templates > Network > Microsoft Peer-to-Peer Networking Services.
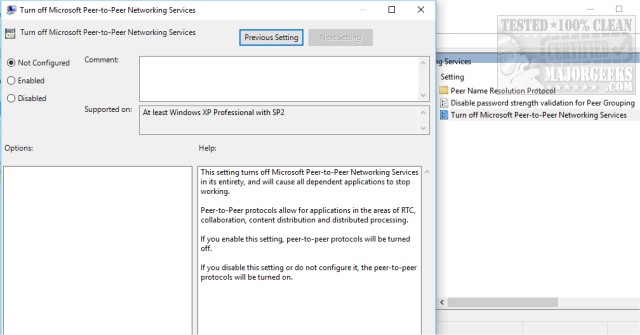
On the right, double-click on Turn off Microsoft Peer-to-Peer Networking Services. The default setting is Not Configured. However, if you've made it this far and nothing else works, try setting this to Disabled.
Similar:
How to Improve Your Wireless Network Performance
Hide or Block Neighbor's Wi-Fi Networks on Windows
Windows Couldn’t Automatically Bind the IP Protocol Stack to the Network Adapter
How to See Your Network Adapter Speed in Windows 10
How to Reset Network Settings in Windows 10
Network Diagnostics Troubleshooter Reports Problem With Wireless Adapter or Access Point
Your Connection Was Interrupted - A Network Change Was Detected - ERR_NETWORK_CHANGED
Windows Can’t Get the Network Settings From the Router
comments powered by Disqus
Creating a Restore Point would be a good idea before proceeding.
1: Check Windows Services
One of the simpler steps is to verify that all required services are running. Press the Windows Key + R and type in Services or the Windows Key + S, type in and click on Services. We want to check four services that should be set to Manual and Running.
Peer Name Reolution Protocol
Peer Networking Grouping
Peer Netwooking Identity Manager
PNRP Machine Name Enumerator Service
You can right-click and start any of the services that aren't running. Any service that does not have a Startup Type of Manual should be double-clicked and changed to Manual. If Step 1 and Step 2 don't work for you, these services will need to be running for Step 3.
2: Run the Homegroup Troubleshooter
Microsoft removed Homegroup as of Windows 10 v1803, but everyone else can find the Homegroup Troubleshooter in their Control Panel > Updates & Security > Troubleshoot and find Homegroup. Troubleshooters are often quick and easy, so follow the prompts.
3: Rename and Change the Permission of MachineKeys
Open File Explorer and go to C:ProgramDataMicrosoftCryptoRSA and rename the MachineKeys folder. We prefer to name the folder MachineKeys.Old, but you can name the folder anything you like.
Right-click on the RSA folder and create a new MachineKeys folder. Right-click on the new MachineKeys folder and select properties and click on the Security tab. Highlight Everyone and click on Edit.
Under Permissions for Everyone, you want to check the box Allow next to Full Control.
If you don't see this option, please go back to step 1 and make sure all services are running.
4: Check Networking in Group Policy Editor
* Windows 10 Home users won't have Group Policy Editor, but you can by following this guide.
Press the Windows Key + R and type in gpedit.msc to open the Local Group Policy Editor.
Expand the Folder to get to Computer Configuration > Administrative Templates > Network > Microsoft Peer-to-Peer Networking Services.
On the right, double-click on Turn off Microsoft Peer-to-Peer Networking Services. The default setting is Not Configured. However, if you've made it this far and nothing else works, try setting this to Disabled.
Similar:
How to Improve Your Wireless Network Performance
Hide or Block Neighbor's Wi-Fi Networks on Windows
Windows Couldn’t Automatically Bind the IP Protocol Stack to the Network Adapter
How to See Your Network Adapter Speed in Windows 10
How to Reset Network Settings in Windows 10
Network Diagnostics Troubleshooter Reports Problem With Wireless Adapter or Access Point
Your Connection Was Interrupted - A Network Change Was Detected - ERR_NETWORK_CHANGED
Windows Can’t Get the Network Settings From the Router
comments powered by Disqus
