


How to Enable or Disable Loudness Equalization in Windows 7-10
By Timothy Tibbettson 06/15/2023 |
Loudness Equalization is a feature in Windows that attempts to keep sounds at the same level. If you're finding that sound on your computer is constantly fluctuating, you might want to make sure Loudness Equalization is on, if available.
Open the Control Panel.
Video tutorial:
Click on Sounds.
If you don't see Sounds, click on Category in the top-right and select small or large icons.
Double-click on the sound device you are using.
Click on the Enhancements tab.
Check the box next to Loudness Equalization to enable or uncheck the box to disable.
Click on OK.
If that didn't work, the freeware Windows Audio Loudness Equalizer (WALE)
Similar:
How to Enable Windows Sonic Surround Sound on Windows 10
How to Fix Sound Problems in Windows
How to Diagnose Sound Delays, Lags and Audio Latency in Windows 10
How to Change Sound Audio Balance in Windows 10
4 Ways to Change the Default Sound Output Device in Windows 10
comments powered by Disqus
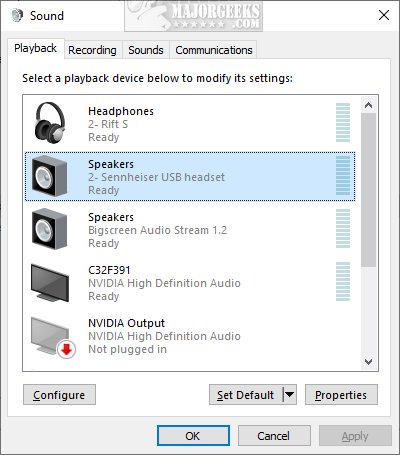
Open the Control Panel.
Click on Sounds.
If you don't see Sounds, click on Category in the top-right and select small or large icons.
Double-click on the sound device you are using.
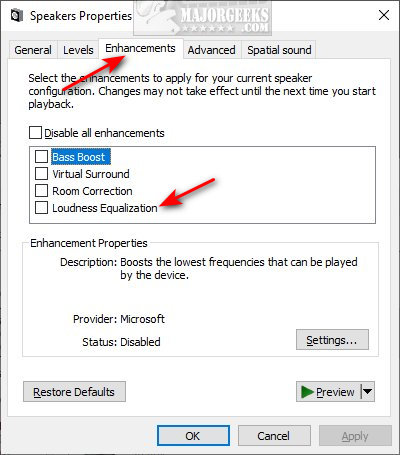
Click on the Enhancements tab.
Check the box next to Loudness Equalization to enable or uncheck the box to disable.
Click on OK.
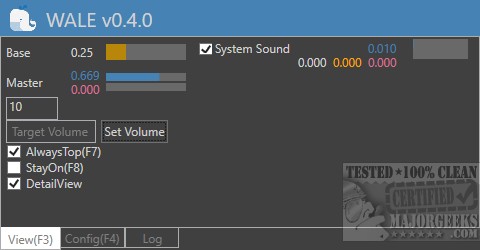
If that didn't work, the freeware Windows Audio Loudness Equalizer (WALE)
Similar:
comments powered by Disqus
