


How to Setup File History in Windows 10 & 11
By Timothy Tibbettson 11/24/2022 |
File History in Windows 10 & 11 allows you to backup your files should they get lost, deleted, or corrupted. If you have a second hard drive, you can choose what files to back up.
You can use any extra drive, including a drive on your network, an attached drive, or any external drive. If you're using an external drive, be sure to plug it in before you start.
The easiest way to access File History is by opening the Control Panel.
Video tutorial:
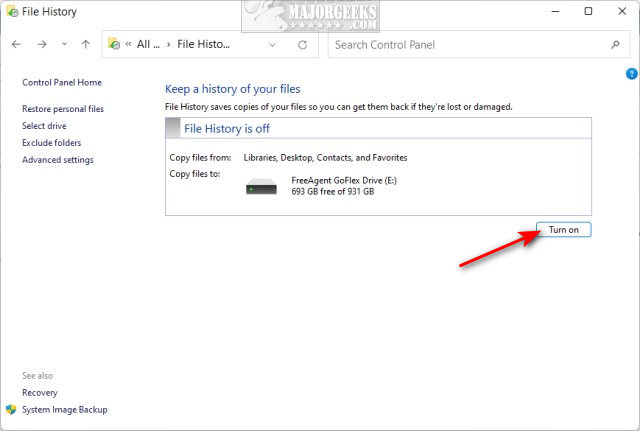
Click on File History.
Click on Turn on if File History is currently off.
If the drive you want to use is not selected, click on Select drive and choose the drive you want to use for backups.
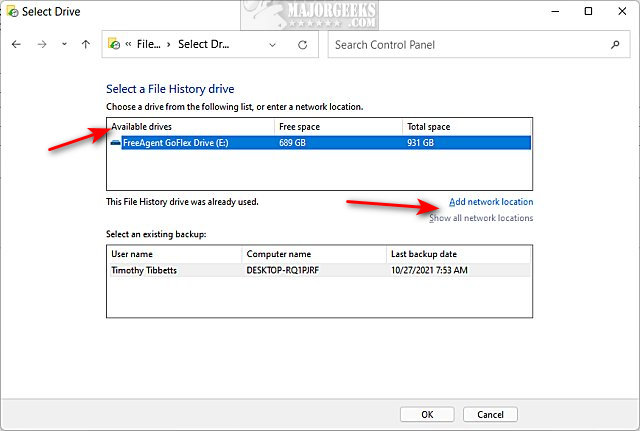
If your drive is on the network, you might need to click on Add a network location or Show all network locations.
File History is now backing up all of the files and folders in your C:\Users\Username folder. That includes Documents, Pictures, Videos, Music, and more.
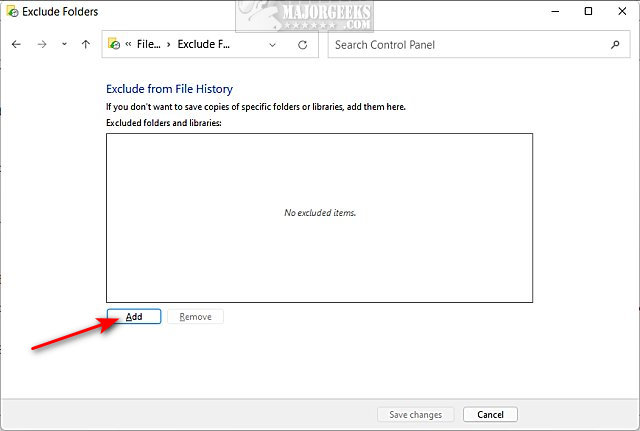
You can exclude individual folders by clicking on Exclude folders.
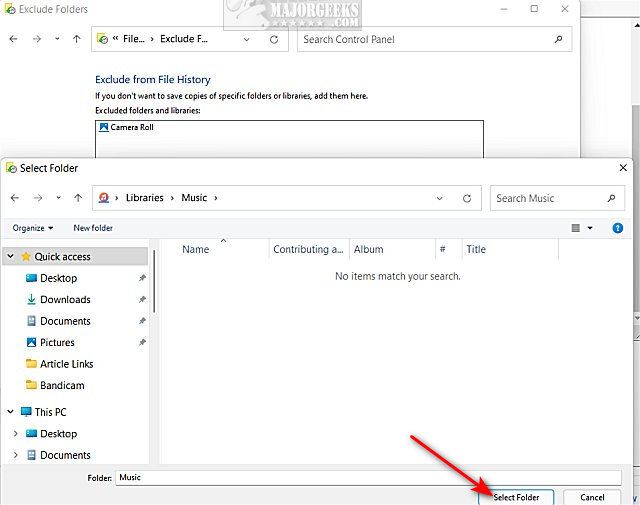
Click on Add to exclude a folder, and select a folder to exclude.
Click on Select folder to add that folder to the excluded list.
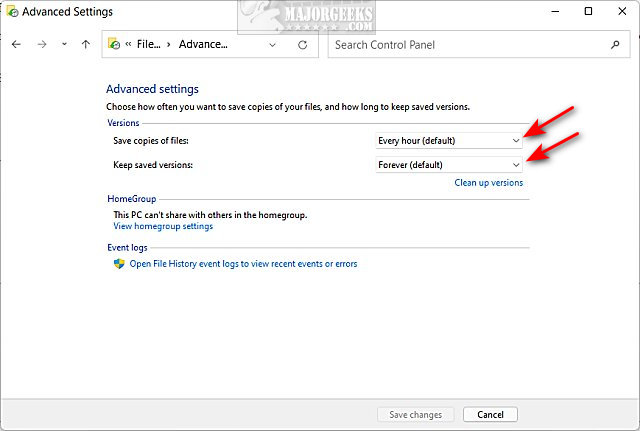
Next, you can decide how often a file is backed and how long it is saved by clicking on Advanced settings.
You can select how often to back up files from 10 minutes to once a day next to Save copies of files.
You can select how long to keep saved files next to Keep saved versions.
Should you need to restore your files, open File History from the Control Panel again, and click on Restore Files.
Similar:
How to Restore Lost or Damaged Files in Windows 11, 10, 8, 7, and Vista
How to Reset or Reinstall Windows 10 Using the Cloud
Enable, Disable, Manage, Delete or Create a System Restore Point
How To Backup and Restore Your Drivers
comments powered by Disqus
You can use any extra drive, including a drive on your network, an attached drive, or any external drive. If you're using an external drive, be sure to plug it in before you start.
The easiest way to access File History is by opening the Control Panel.
Click on File History.
Click on Turn on if File History is currently off.
If the drive you want to use is not selected, click on Select drive and choose the drive you want to use for backups.
If your drive is on the network, you might need to click on Add a network location or Show all network locations.
File History is now backing up all of the files and folders in your C:\Users\Username folder. That includes Documents, Pictures, Videos, Music, and more.
You can exclude individual folders by clicking on Exclude folders.
Click on Add to exclude a folder, and select a folder to exclude.
Click on Select folder to add that folder to the excluded list.
Next, you can decide how often a file is backed and how long it is saved by clicking on Advanced settings.
You can select how often to back up files from 10 minutes to once a day next to Save copies of files.
You can select how long to keep saved files next to Keep saved versions.
Should you need to restore your files, open File History from the Control Panel again, and click on Restore Files.
Similar:
comments powered by Disqus
