


How to Enable or Disable IPv6 in Windows 10 and 11
By Timothy Tibbettson 10/15/2024 |
IPv4 (Internet Protocol version 4) and IPv6 (Internet Protocol version 6) are the two core protocols that identify devices and route traffic across the internet. IPv4, introduced in the early 1980s, relies on 32-bit addresses, allowing for about 4.3 billion unique IP addresses. At the time, this number seemed more than adequate, but with the explosive growth of internet-connected devices—including computers, smartphones, and IoT devices—IPv4 began to run out of available addresses. To solve this issue, IPv6 was developed. It uses 128-bit addresses, offering an almost limitless number of IP addresses, around 340 undecillion (a number with 38 zeros). This ensures that the expanding internet can accommodate billions of devices for the foreseeable future.
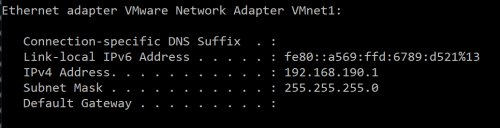
A typical IPv4 address looks like 192.168.1.1, formatted in dotted decimal notation. It consists of four groups of numbers, each ranging from 0 to 255, separated by periods. On the other hand, an IPv6 address, such as 2001:0db8:85a3:0000:0000:8a2e:0370:7334, is much longer and more complex. It consists of eight groups of four hexadecimal digits, separated by colons. For simplicity, IPv6 addresses can often be abbreviated by omitting consecutive zeros, like this: 2001:db8:85a3::8a2e:370:7334. While IPv6 may seem more complex, it is essential for supporting the future of the internet, as IPv4 addresses have become too scarce to meet the current demand. We could go a lot deeper here - but if you want to learn more, check out Wikipedias IPV6 Article
Despite the fact that IPv6 was designed to replace IPv4, not all networks fully support it. However, its adoption is steadily increasing as more devices come online.
While IPv6 is on by default some users might prefer disabling it to avoid potential compatibility or privacy issues.
Why You Might Want to Disable IPv6
Although IPv6 has several benefits, such as offering more IP addresses and improved security, some users may want to disable it due to the following reasons:
- VPN Compatibility: Some VPNs don’t fully support IPv6, which could lead to DNS leaks.
- Network Issues: Certain older networks or devices may still rely on IPv4, and IPv6 could cause connection issues.
- Privacy Concerns:IPv6 can be a privacy issue primarily because of its unique address structure and the way it interacts with certain systems. Unlike IPv4, where devices behind a router often share a single public IP address due to Network Address Translation (NAT), IPv6 gives each device a unique, globally routable IP address. This means that each device has a distinct IP, which could potentially be used to track users across the internet over a long period of time.
How to Enable or Disable IPv6
Windows offers a few ways to enable or disable IPv6, but Windows 10, 8, and 7 users can make the changes in Network Adapter Properties.
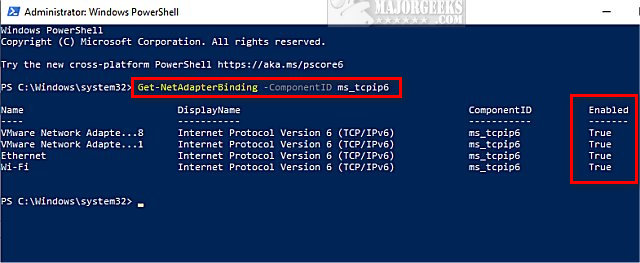
To quickly see if IPv6 is enabled, open PowerShell or the Command Prompt and type in Get-NetAdapterBinding -ComponentID ms_tcpip6.
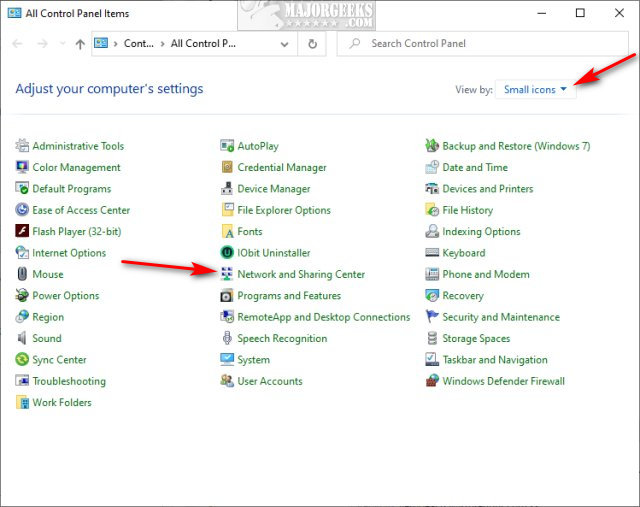
Open the Control Panel Panel with small or large icons.
Click on Network and Sharing Center.
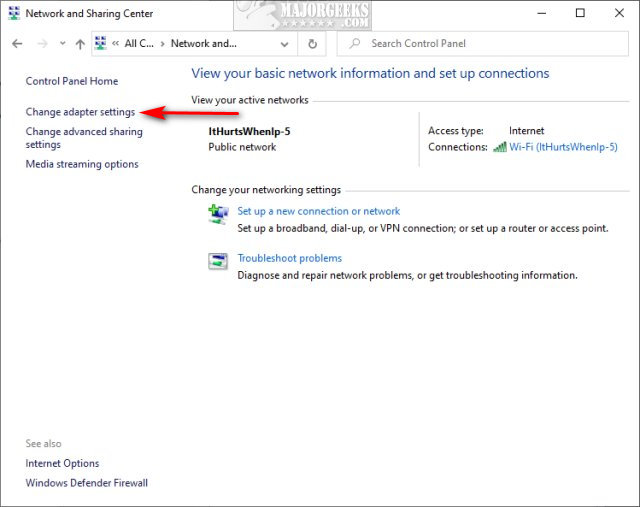
Click on Change adapter settings.
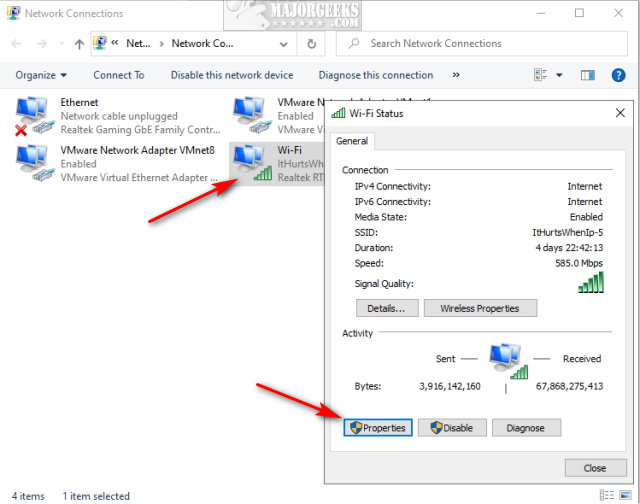
Double-click, or right-click and select Properties from the network adapter you want to modify.
Click on Properties again.
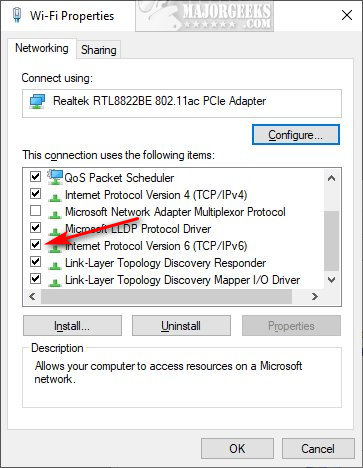
Check or uncheck the box next to Internet Protocol Version 6 (TCP/IPv6).
We discussed how to see if IPv6 is enabled using PowerShell, but you can also enable or disable IPv6 using PowerShell.
Open PowerShell or the Command Prompt.
Type in Get-NetAdapterBinding -ComponentID ms_tcpip6 and make note of the Name of the adapter you want to modify.
1: Enable IPv6 in PowerShell or Command Prompt
Type in Enable-NetAdapterBinding -Name "AdapterName" -ComponentID ms_tcpip6 replacing "AdpaterName with the name of the adapter you want to enable IPv6.
To enable all adapters, type in Enable-NetAdapterBinding -Name "*" -ComponentID ms_tcpip6.
2: Disable / Enable IPv6 in PowerShell or Command Prompt
Type in Disable-NetAdapterBinding -Name "Adapter Name" -ComponentID ms_tcpip6 replacing "AdpaterName with the name of the adapter you want to disable IPv6.
To disable all adapters, type in Disable-NetAdapterBinding -Name "*" -ComponentID ms_tcpip6.
Similar:
How to Change Preferred Band (2.4 GHz or 5 GHz) for Wireless Network Adapters
How to Hide Nearby Wi-Fi Connections From Your List of Networks
How to Improve Your Wireless Network Performance
How to Fix Slow Internet on Windows 10
What is Windows Auto-Tuning?
comments powered by Disqus
A typical IPv4 address looks like 192.168.1.1, formatted in dotted decimal notation. It consists of four groups of numbers, each ranging from 0 to 255, separated by periods. On the other hand, an IPv6 address, such as 2001:0db8:85a3:0000:0000:8a2e:0370:7334, is much longer and more complex. It consists of eight groups of four hexadecimal digits, separated by colons. For simplicity, IPv6 addresses can often be abbreviated by omitting consecutive zeros, like this: 2001:db8:85a3::8a2e:370:7334. While IPv6 may seem more complex, it is essential for supporting the future of the internet, as IPv4 addresses have become too scarce to meet the current demand. We could go a lot deeper here - but if you want to learn more, check out Wikipedias IPV6 Article
Despite the fact that IPv6 was designed to replace IPv4, not all networks fully support it. However, its adoption is steadily increasing as more devices come online.
While IPv6 is on by default some users might prefer disabling it to avoid potential compatibility or privacy issues.
Why You Might Want to Disable IPv6
Although IPv6 has several benefits, such as offering more IP addresses and improved security, some users may want to disable it due to the following reasons:
- VPN Compatibility: Some VPNs don’t fully support IPv6, which could lead to DNS leaks.
- Network Issues: Certain older networks or devices may still rely on IPv4, and IPv6 could cause connection issues.
- Privacy Concerns:IPv6 can be a privacy issue primarily because of its unique address structure and the way it interacts with certain systems. Unlike IPv4, where devices behind a router often share a single public IP address due to Network Address Translation (NAT), IPv6 gives each device a unique, globally routable IP address. This means that each device has a distinct IP, which could potentially be used to track users across the internet over a long period of time.
How to Enable or Disable IPv6
Windows offers a few ways to enable or disable IPv6, but Windows 10, 8, and 7 users can make the changes in Network Adapter Properties.
To quickly see if IPv6 is enabled, open PowerShell or the Command Prompt and type in Get-NetAdapterBinding -ComponentID ms_tcpip6.
Open the Control Panel Panel with small or large icons.
Click on Network and Sharing Center.
Click on Change adapter settings.
Double-click, or right-click and select Properties from the network adapter you want to modify.
Click on Properties again.
Check or uncheck the box next to Internet Protocol Version 6 (TCP/IPv6).
We discussed how to see if IPv6 is enabled using PowerShell, but you can also enable or disable IPv6 using PowerShell.
Open PowerShell or the Command Prompt.
Type in Get-NetAdapterBinding -ComponentID ms_tcpip6 and make note of the Name of the adapter you want to modify.
1: Enable IPv6 in PowerShell or Command Prompt
Type in Enable-NetAdapterBinding -Name "AdapterName" -ComponentID ms_tcpip6 replacing "AdpaterName with the name of the adapter you want to enable IPv6.
To enable all adapters, type in Enable-NetAdapterBinding -Name "*" -ComponentID ms_tcpip6.
2: Disable / Enable IPv6 in PowerShell or Command Prompt
Type in Disable-NetAdapterBinding -Name "Adapter Name" -ComponentID ms_tcpip6 replacing "AdpaterName with the name of the adapter you want to disable IPv6.
To disable all adapters, type in Disable-NetAdapterBinding -Name "*" -ComponentID ms_tcpip6.
Similar:
How to Change Preferred Band (2.4 GHz or 5 GHz) for Wireless Network Adapters
How to Hide Nearby Wi-Fi Connections From Your List of Networks
How to Improve Your Wireless Network Performance
How to Fix Slow Internet on Windows 10
What is Windows Auto-Tuning?
comments powered by Disqus
